Author: YEGAK

  • 가죽가방 제작의 전체 과정: 디자인부터 패턴, 조립과 마감까지

    The Complete Leather Bag-Making Process: From Design and Pattern Making to Assembly and Finishing

    Leather bag making does not begin when the leather is cut and stitched. The process begins much earlier—by defining the bag’s purpose, designing the required shape and dimensions, and selecting leather and reinforcement materials suited to its structure.

    Even bags that look similar on the outside can differ greatly in structural stability, usability, durability, and finishing quality, depending on the order in which the maker made each design decision.

    To make a leather bag properly, it is more important to understand the entire workflow—from design to final inspection—than to learn each technique in isolation. To understand this premise, it is helpful to also examine Why Leathercraft Should Be Learned Through Principles, Not Just Techniques.

    Leather bag making is not simply a process of performing multiple techniques in sequence. It is a continuous design process in which every decision establishes the conditions for the next stage.

    1. Defining the Bag’s Purpose and Conditions of Use

    The first thing to determine is not the bag’s appearance, but its intended purpose.

    Even two tote bags require different structures if one is intended for lightweight personal belongings and the other for carrying a laptop or documents. The size and weight of the contents, carrying method, frequency of use, and opening and closing system must be defined before the appropriate dimensions and structure can be designed.

    Before beginning construction, the following questions should be considered.

    • What items will the bag carry?
    • Will it be carried by hand or worn over the shoulder?
    • Should the bag maintain its shape when placed upright?
    • Does the opening need to close completely?
    • How many compartments should the interior contain?
    • Where will stress be concentrated during use?

    Without clear answers to these questions, it may be possible to create an attractive design, but difficult to make a bag that performs well in actual use.

    2. Designing the Silhouette and Basic Dimensions
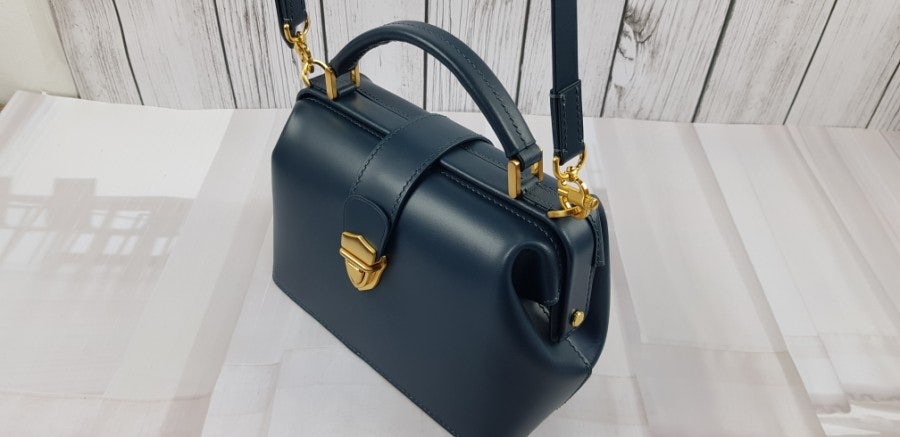
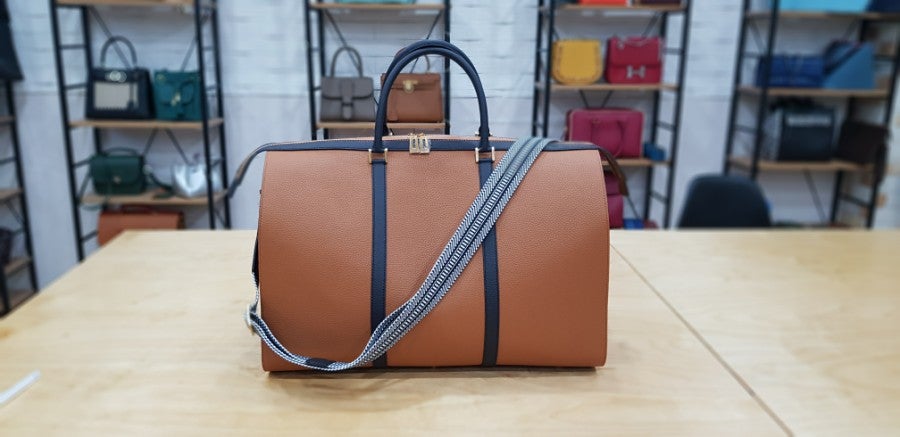
    가로 세로 폭의 비율과 전체 실루엣을 확인할 수 있는 가죽가방

    Once the purpose has been established, the bag’s overall silhouette and dimensions can be designed.

    Width, height, and depth are more than simple measurements. Their proportions affect not only the bag’s visual impression, but also its capacity, center of gravity, and the opening range of its top.

    If the bag is excessively wide, its center may sag. If it is tall but too narrow in depth, it may tip over easily. Conversely, excessive depth increases capacity but can make the bag appear bulky and allow the contents to shift to one side.

    At this stage, the side profile and bottom shape should be examined together with the front view.

    Basic Elements to Check

    • The width-to-height ratio of the front
    • The side depth and expansion angle
    • The side depth and expansion angle
    • The length and position of the handles
    • The length and opening range of the top
    • The length and opening range of the top

    A good silhouette is not defined by attractive lines alone. The bag must maintain visual and structural balance both when empty and when filled.

    3. Selecting Leather and Hardware

    Leather should not be selected by color and grain alone. Its thickness, flexibility, stretch, surface strength, and recovery must all be evaluated in relation to the bag’s structure and size.

    Soft leather creates natural folds and movement, but may lose its shape when used without sufficient support in a large bag. Firm leather maintains structure well, but may behave too rigidly at folds and openings.

    For this reason, the following properties should be examined when selecting leather.

    • The leather’s thickness and density
    • The folds and wrinkles that appear when it is bent
    • The direction in which it stretches when pulled
    • Its resistance to friction and scratching
    • How it changes when adhesive and reinforcement are applied
    • The expected total weight of the finished bag

    Metal components such as zippers, closures, handle fittings, and bag feet are both design elements and structural parts that transfer load. If their size, weight, or attachment method is unsuitable for the leather thickness, the surrounding leather may stretch or deform.

    4. Determining the Internal Structure and Reinforcement Areas
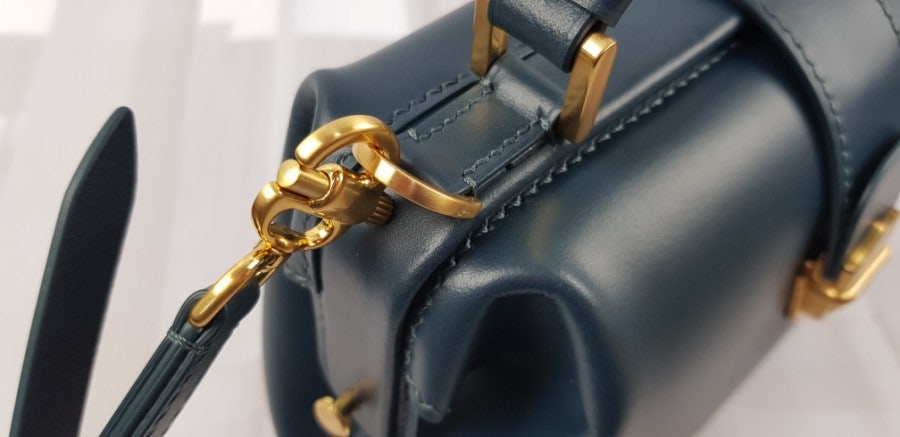
    가죽가방의 하중을 견디도록 보강한 손잡이와 본체 연결 부분

    Once the exterior form has been established, it is necessary to examine how forces travel through the bag’s internal structure.

    When the bag is carried, the weight of its contents does not remain at the bottom. Force travels from the bottom to the side panels, and from the sides to the opening and handle attachments. In a shoulder bag, repeated pulling also occurs at the strap attachment points.

    Making every part rigid is not proper reinforcement. Areas that must retain their shape require suitable stiffness, while parts that open, close, or fold need enough flexibility to move naturally.

    Key Areas to Review for Reinforcement

    • The bag bottom
    • The large surfaces of the front and back panels
    • The opening and areas around the zipper
    • The handle bases and hardware attachment areas
    • The shoulder strap attachment points
    • The corners and side-panel joints
    • The openings of interior pockets

    The purpose of reinforcement is not to make the entire bag rigid. It is to preserve the shape where support is needed while retaining flexibility in the areas that must move.

    5. Creating the Pattern and Establishing Assembly References

    A pattern is not simply a flat drawing of the finished bag’s exterior. It is a construction reference that includes stitching lines, bonding surfaces, fold positions, leather thickness, and assembly allowances.

    If a pattern is based only on the visible finished dimensions, errors may appear during assembly. Where multiple layers overlap, lengths and curves change according to the combined thickness. In turned or folded constructions, the inner and outer surfaces of the leather also travel different distances.

    At a minimum, the following information should be marked on the pattern.

    • The finished line and cutting line
    • The stitching line and starting point
    • The centerline and assembly reference points
    • The fold lines
    • The locations and areas to be skived
    • The size and placement of reinforcement materials
    • The attachment positions of hardware and handles
    • Identification of left and right, or front and back
    • The required seam and assembly allowances

    Clear references on the pattern make it possible to check the same positions consistently during cutting and assembly.

    6. Cutting and Preparing the Components

    Once the pattern is complete, the leather is cut after examining its grain, direction of stretch, and surface condition.

    Even within the same hide, density and flexibility vary by area. Relatively stable sections should be used for large front and back panels, while areas with suitable flexibility are better for smaller components that must fold or wrap around other parts.

    After cutting, the necessary preparation work is completed before assembly.

    • Adjusting the leather thickness
    • Attaching reinforcement materials and lining
    • Skiving the areas that will be folded
    • Marking hardware holes and stitching holes
    • Finishing the edges that must be completed before assembly
    • Constructing interior pockets and zipper components
    • Comparing the sizes and positions of left and right components

    Small errors made at this stage become more noticeable after assembly. In particular, handles and hardware arranged symmetrically should be checked again for matching left and right positions before they are attached to the body.

    7. Assembling the Bag in the Correct Construction Sequence

    A leather bag is not made by simply joining finished components together. It is necessary to distinguish between parts that must be attached first and areas that will no longer be accessible after the body is assembled.

    Components that require access from inside the body—such as interior pockets, zippers, reinforcement patches behind hardware, and handle attachments—must be completed before the bag is closed. In contrast, edges and hardware that should be finished after checking the final form may be damaged during assembly if completed too early.

    Understanding how these stages connect makes it clear that the leather bag construction sequenceis not merely a list of tasks, but a design framework that preserves the bag’s structure.

    A general assembly sequence is as follows.

    1. Constructing interior pockets and zipper components
    2. Reinforce the handle and hardware attachment areas.
    3. Partially assemble the front and back panels.
    4. Combine the lining and internal structure.
    5. Connect the side panels and bottom.
    6. Assemble the bag opening and zipper.
    7. Attach the handles and strap.
    8. Complete the exterior edges and final finishing.

    However, the same sequence cannot be applied to every bag. The order must change according to the bag’s structure, lining method, zipper position, and assembly technique.

    8. Checking the Consistency of Stitching and Edge Finishing
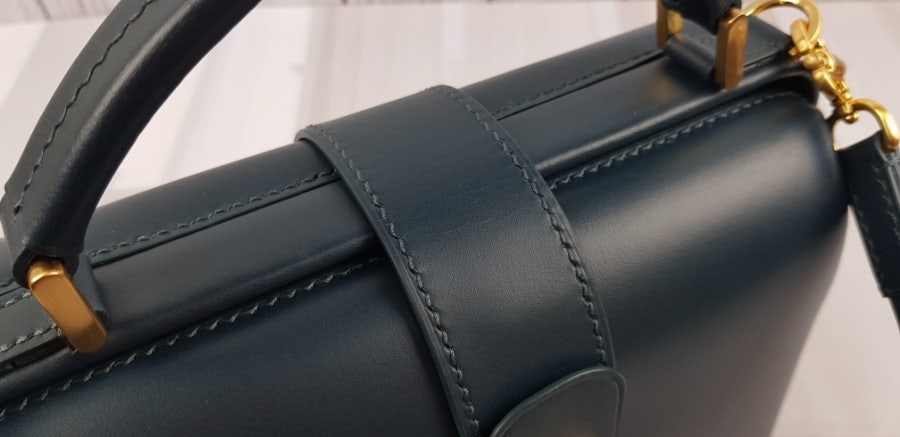
    일정한 바느질 간격과 단면 마감을 보여주는 가죽가방 세부 모습

    Stitching and edge finishing are not merely decorative final steps. They are structural finishing processes that secure bonded components, protect the cut layers of leather, and refine the overall lines of the bag.

    Stitch length should suit the thickness of the leather and the size of the component. Stitches that are too long can make a small component look coarse, while excessively short stitches on a thick joint may weaken the leather by placing the stitching holes too close together.

    Rather than making only one edge perfectly smooth, it is more important to maintain consistent thickness, color, gloss, and curvature throughout the entire bag.

    The following points should be checked.

    • Are the stitching lines parallel to their reference lines?
    • Does the stitch spacing remain consistent around corners?
    • Is the thread thickness proportionate to the leather thickness?
    • Are the edge thickness and color consistent?
    • Are the left and right sides of the handles and strap finished consistently?
    • Do the curved and straight sections connect naturally?

    9. Inspecting the Finished Form and Function

    Construction is not complete simply because the bag has reached its finished form. Its shape and function must be inspected under conditions that reflect actual use.

    The bag should not be evaluated only while empty. Place the expected weight inside and observe how the handles and bottom respond. Zippers and closures should be operated repeatedly, rather than only once, to check for catching, resistance, or twisting.

    Final Inspection Checklist

    • Are the front and side views symmetrical?
    • Does the bottom rest flat?
    • Does the center avoid excessive sagging when the bag is loaded?
    • Do the handles and strap move evenly from their intended positions?
    • Does the zipper move smoothly from beginning to end?
    • Does the zipper move smoothly from beginning to end?
    • Is the leather around the hardware free from excessive pulling or distortion?
    • Have all stitching lines and edges been completely finished?

    Final inspection is not only a process of finding defects. It is also an opportunity to record observations that can improve the pattern and construction sequence of the next project.

    Understanding the Entire Process Changes the Way Patterns Are Designed

    The quality of a leather bag is not determined by one exceptional technique alone.

    Even high-quality leather may lose its shape if the structure is unsuitable. Precise stitching cannot produce a clean interior if the construction sequence is incorrect. Likewise, using excessive reinforcement without understanding where forces are transferred may result in a bag that is unnecessarily heavy and rigid.

    Understanding the entire leather bag-making process does not mean performing every task perfectly from the beginning. It means recognizing how each decision affects the next stage and being able to trace a problem back through earlier stages to identify its cause.

    A high-quality bag is not suddenly created during the final finishing stage. It is achieved only when the intended purpose, dimensions, materials, structure, pattern, and construction sequence all work toward the same objective from beginning to end.
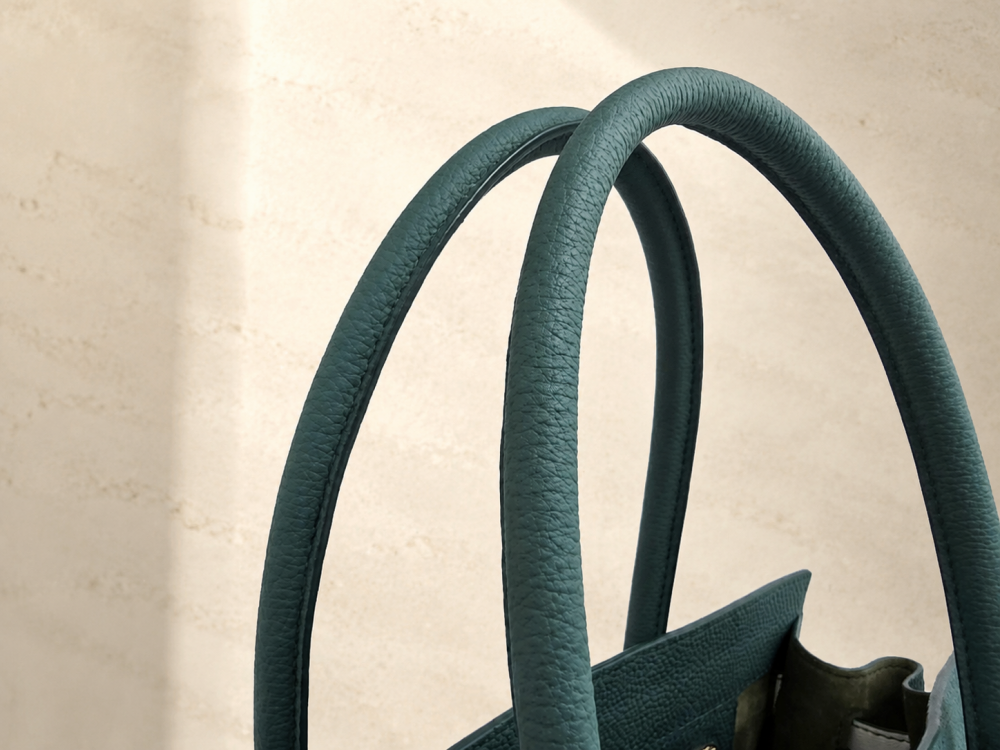
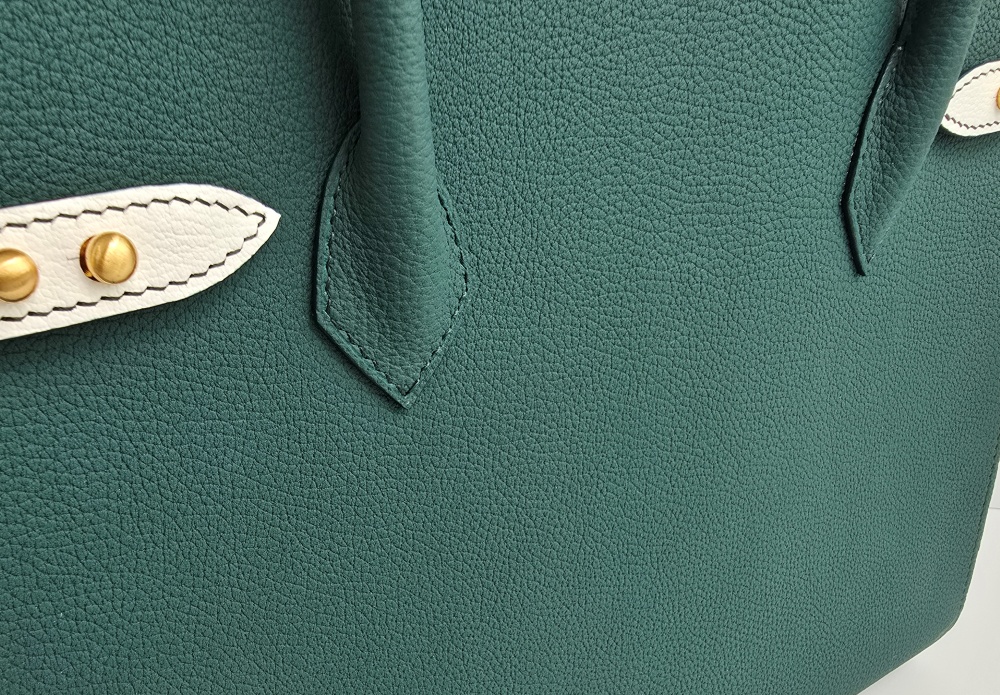
  • Why Leathercraft Should Be Learned Through Principles, Not Just Techniques

    When first learning leathercraft, most people begin with visible techniques such as cutting, bonding, and stitching. However, if you simply follow a sequence of steps without understanding the principles of leathercraft, it becomes difficult to apply the same methods when the material or bag structure changes.

    To create consistently well-made leather goods, you must understand not only how a technique is performed, but also why it is necessary.

    Techniques allow you to repeat a defined process, while principles enable you to make sound decisions when working conditions change.

    Why the Same Method Can Produce Different Results

    In leathercraft, using the same tools and techniques does not always produce the same result. This is because leather type, thickness, fiber density, hide section, reinforcement, adhesive, thread thickness, and product structure can all vary.

    For example, some leathers maintain their shape even after being skived thin, while others may stretch easily under load or become weakened around the stitching line when skived to the same thickness.

    The same principle applies when folding leather. If the same folding allowance is used for both soft and firm leather, the finished edges will differ in thickness and curvature.

    Rather than applying one method unchanged to every leather and product, the working conditions should be adjusted to suit the material and structure being used.

    The Limitations of Learning Techniques Without Understanding Principles

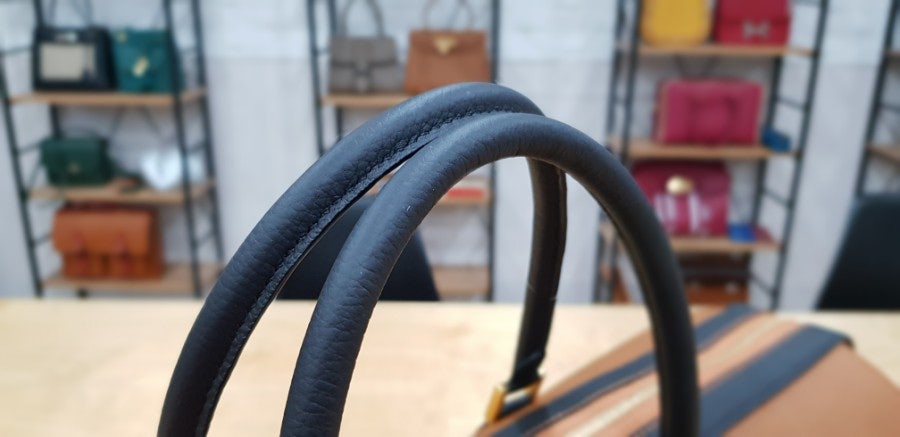
    수제손잡이 둥근형태의  단단함

    Following the exact construction sequence of a finished project can help beginners learn basic procedures. However, this approach makes it difficult to identify the cause when something goes wrong.

    When stitching is uneven, it is easy to blame hand skills alone. When a bag loses its shape, it is also tempting to assume that it needs more reinforcement. In reality, the cause may be uneven leather thickness, an incorrect skiving area, differences in tension between components, the bonding position, or the construction sequence.

    Adding another technique based only on the visible result may temporarily hide the problem, but the same issue is likely to return when making a different product.

    Technique-Based Questions

    • Which tool should be used?
    • To what measurement should the leather be cut?
    • How many stitches are needed?
    • In what order should the components be bonded?

    Principle-Based Questions

    • What kind of force will this component receive?
    • Why does only this area need to be thinned?
    • Does this reinforcement maintain the shape or prevent stretching?
    • How will the area being worked on affect the next construction step?
    • Which area is most likely to deform first after repeated use?

    Both types of questions are necessary. However, principle-based questions are essential when designing a new product independently and correcting structural problems.

    수제 가죽가방 손잡이 연결부와 봉제 마감 상세

    Five Principles to Understand First in Leathercraft

    1. Material Properties

    Even when two leathers have the same thickness, they may differ in firmness, stretch, fiber density, and surface finish. A maker should not judge leather by its name alone, but should evaluate its workability by folding, pulling, and skiving the actual material.

    2. Thickness Distribution

    Not every part of a product needs to have the same thickness. Areas that support the structure, areas that need to fold naturally, and areas where several layers overlap require different thicknesses.

    Thickness is not merely a measurement. It is a design element that determines how the product moves and how its silhouette is formed.

    3. The Path of Force

    When a bag is carried, the load travels from the handles through the body and into the bottom. Repeated tension is also applied to the opening and gussets whenever the zipper is opened and closed.

    Understanding how these forces travel through the bag helps distinguish where reinforcement is needed and where flexibility should remain. Understanding why a bag loses its shapeallows you to design the appropriate stiffness and movement for each area instead of simply adding more reinforcement.

    4. Construction Sequence

    the leather bag construction sequenceis not simply a matter of convenience. The components assembled first determine the working space, reference lines, and bonding surfaces available in the following steps.

    Changing the order of handle reinforcement, zipper attachment, lining assembly, and gusset construction can affect both the difficulty of the work and the quality of the finish, even when the same pattern is used.

    5. Continuity of the Finishing Process

    A refined finish is not suddenly created during the final stage. It is the accumulated result of accurate cutting lines, consistent skiving, aligned bonding surfaces, and precisely positioned stitching holes.

    Applying several layers of edge paint or heavily polishing the surface at the end cannot correct structural errors created during earlier stages.

    Quality is not created by one final finishing step. It is the result of maintaining the original standard throughout the entire construction process.

    가죽가방 바닥부분의 단단한 마감상세

    Understanding Principles Changes the Way You Interpret Failure

    Without an understanding of principles, failure may appear to be nothing more than the result of poor hand skills. When you work with a clear understanding of the underlying principles, however, you can narrow down the cause by examining where and when the problem occurred.

    If an edge is thick and uneven, the problem may not lie in the folding technique alone. The skiving range and overlapping structure must also be examined. If a handle attachment stretches, the way the load is transferred to the body and the extent of the internal reinforcement matter more than the number of stitches.

    If the opening becomes twisted, check the symmetry of the left and right pattern pieces, zipper length, gusset tension, and assembly sequence before forcing the parts into alignment during final construction.

    Analyzing a failure is not simply about finding a mistake. It is a process of revising your construction standards so that the same problem is not repeated in the next project.

    What to Check Before Following a Tutorial

    Studying another maker’s construction method can be useful. Before following it exactly, however, the following conditions should be checked.

    • The type and actual thickness of the leather used
    • The size and intended purpose of the finished product
    • The load carried by the handles and straps
    • The position and purpose of the reinforcement
    • The areas that fold or move repeatedly
    • The order in which the components overlap
    • he differences between your materials and those used in the tutorial

    Once these conditions are understood, a tutorial becomes a reference that can be interpreted for your own work rather than a fixed answer that must be copied exactly.

    Learning the Principles Is Ultimately the Fastest Path

    At first, learning the principles may feel slower than simply following a technique. This is because you must consider the relationships between material properties, structure, thickness, and force.

    As your understanding of these principles grows, you no longer need to search for an entirely new method every time you make a different bag. You can apply established decision-making standards to new materials and structures and adjust only what is necessary.

    Techniques develop proficiency, while principles make adaptation possible. When both are combined, a maker can move beyond simply following a pattern and begin evaluating and refining their own designs.

    Rather than presenting isolated construction tips, Leather Craft WARP will continue building a systematic foundation that helps makers evaluate and design leather goods and bags independently.

  • 가죽가방 입구 설계는 왜 중요한가: 지퍼 길이와 옆판 장력의 관계

    Why Leather Bag Opening Design Matters: Zipper Length and Gusset Tension

    When viewing a finished leather bag from the front, the proportions of the body, the handles, and the color of the leather usually attract attention first. However, once the bag is opened and closed, the opening becomes one of the clearest indicators of its overall quality.

    When the zipper is closed, the opening may fail to form a straight line. The center may sag, the ends may lift, or the leather around the zipper may ripple. Even a bag that initially looks well aligned can gradually develop a widened or uneven opening with use.

    These problems are not caused by the zipper alone. Leather bag opening design is a structural process determined by zipper length, the thickness of the opening leather, reinforcement, gusset tension, handle placement, and the construction sequence.

    A bag opening is not simply a final section completed by attaching a zipper. It is the upper structure where forces from the body panels, gussets, handles, and internal construction come together.

    브라운 가죽 토트백의 전체 형태와 입구 실루엣

    A Bag Opening Must Work Both When Closed and When Open

    When designing a bag opening, it is not enough to make it look straight only when the zipper is closed. When opened, it must provide enough space for the hand to enter naturally and for items to be removed comfortably.

    If the opening is made excessively rigid, it may look neat when closed but fail to open wide enough. If it is too soft, it may be convenient to use but unable to resist the weight of the contents and the pulling force of the handles, causing the top edge to deform.

    The opening must therefore satisfy two conditions at the same time.

    • When the zipper is closed, the height and alignment of both sides must remain stable.
    • When the zipper is opened, the opening must expand smoothly as needed and then return to its original shape.

    A well-designed opening is neither completely rigid nor excessively soft. It maintains a balance between opening movement and shape retention.

    Zipper Length Should Not Be Determined Only by the Visible Opening Length

    It is easy to assume that a 35-centimeter bag opening simply requires a zipper of the same length. However, the opening length shown on the pattern may differ from the actual path the zipper follows after assembly.

    The finished opening length changes when the leather turn-in, gusset seam allowance, zipper-end clearance, and final leather thickness are considered. With a curved opening, the flat pattern measurement may also differ from the actual path followed by the zipper after assembly.

    If the zipper is too short, it may pull both ends inward, causing the top edge to curve or the center to rise. If the zipper is too long, the excess length may create ripples in the zipper tape or bulk at the ends.

    What to Check Before Determining Zipper Length

    • The actual length of the line along which the zipper will sit in the finished bag
    • Whether the zipper ends will be concealed inside the leather or left exposed
    • The clearance between the zipper stops and the handle attachments
    • The amount of length lost when the opening leather is folded
    • Whether the opening is straight or curved
    • The angle at which the gusset meets the opening

    A zipper should not be selected using only a single measurement written on the pattern. Its actual path and movement in the finished bag must be considered first.

    Gusset Tension Pulls the Opening Outward or Inward

    Although zipper and reinforcement problems are often blamed for a spreading opening, the height and attachment length of the gusset also have a major influence.

    If the attachment lengths of the body panel and gusset do not match precisely, one component must be stretched or compressed during assembly. The resulting tension may not be immediately visible, but it can later appear as distortion around the opening as the leather settles with use.

    If the gusset is attached too tightly, it can pull both sides of the opening inward. If excess gusset length remains, the ends of the opening may spread outward or develop wrinkles.

    For a curved gusset, several matching points should be marked to ensure that the body and gusset are distributed in equal proportions. Aligning only the beginning and end while estimating the middle by eye can create uneven tension between the two sides.

    If the two sides of the opening look different, first check whether the body and gusset were joined at matching positions with equal tension before altering the opening line itself.

    가죽가방 입구와 옆판이 연결되는 측면 구조

    Stronger Reinforcement Is Not Always Better

    The opening requires reinforcement because it is repeatedly affected by zipper movement and handle loads. However, adding thick and rigid reinforcement does not necessarily produce a better opening.

    Excessively rigid material may preserve a straight line but create a sharp bend where the opening meets the gusset. The opening may not expand sufficiently, and repeated movement may eventually reveal the edge of the reinforcement through the leather surface.

    Insufficient reinforcement, on the other hand, may allow the top edge to stretch or sag under handle loads and repeated zipper movement.

    Therefore, when planning area-specific reinforcement, the opening should not have the same stiffness throughout.

    • Reinforce long straight sections sufficiently to maintain a stable top edge.
    • Retain flexibility where the opening meets the gusset so that movement is not restricted.
    • Reinforce the load-bearing area around the handle attachments separately rather than stiffening the entire opening.
    • Taper the reinforcement near the zipper ends to prevent a sudden increase in thickness.

    Good reinforcement does not force the leather into a fixed position. It allows the leather to move only where movement is needed.

    Uneven Skiving Can Distort the Zipper Line

    Where the opening leather is folded and joined to the zipper, multiple layers of leather, reinforcement, zipper tape, and lining overlap. Although the opening appears to be a single line, its internal thickness can vary from one section to another.

    If only the zipper ends or gusset connections become suddenly thicker, it becomes difficult to maintain a consistent stitching line and edge height. Forcing layers of different thicknesses together can also cause the opening leather to curl or pull the zipper tape after the adhesive dries.

    Skiving does not mean making the entire opening uniformly thin. It means calculating the number of overlapping layers and creating a smooth transition where the finished thickness changes.

    Thicknesses to Check Before Assembling the Opening

    • The final thickness of the folded leather
    • The difference between reinforced and unreinforced sections
    • The areas where the zipper tape and lining are added
    • The section where the gusset seam allowance overlaps
    • The extent to which handle reinforcement continues into the opening

    If skiving is based only on the thickness of a single outer leather layer, the assembled section may become thicker than expected. The completed layered structure must always be used as the reference.

    Handle Placement Also Affects Opening Deformation

    When the bag is lifted, the handles transfer its entire weight to the area around the opening. If the handle attachments are too close to the top edge or the reinforced area is too narrow, the opening may be pulled upward, causing the center to sag or the ends to spread.

    If the handles are positioned too close together, the load becomes concentrated near the center. If they are too far apart, they may pull the sides of the opening outward. Handle placement must therefore consider not only visual proportion but also how the opening receives and distributes the load.

    To evaluate the stability of the opening, do not inspect only an empty bag. Place a realistic load inside and lift it by the handles. Observe how the top edge is pulled and whether the zipper continues to open and close smoothly.

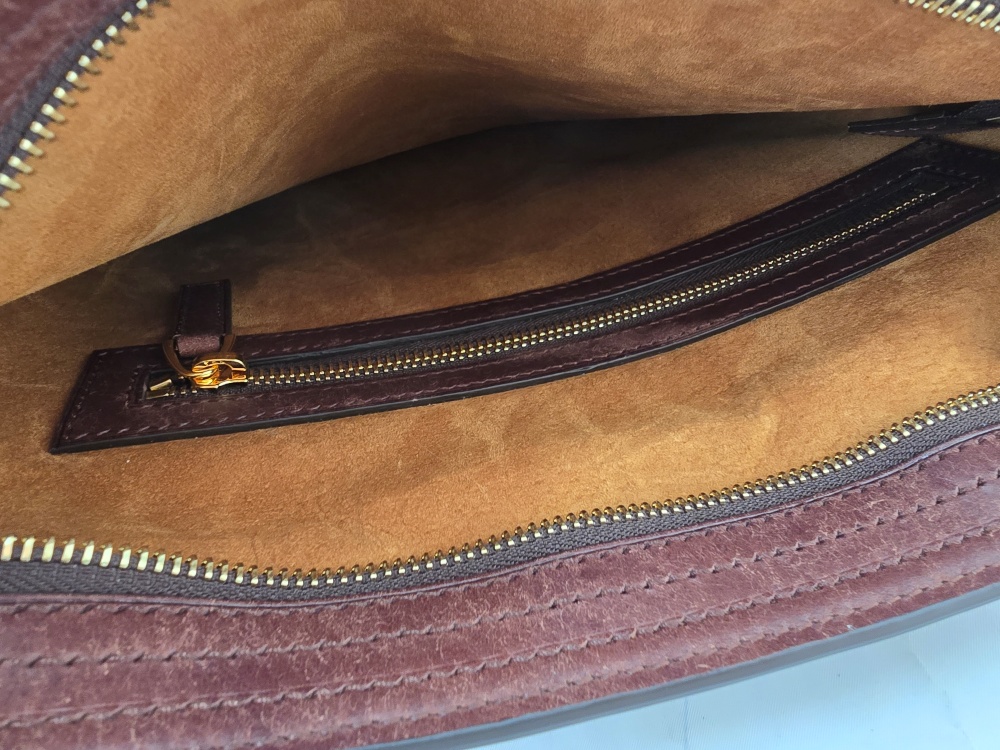
    브라운 가죽가방 내부의 지퍼 포켓과 안감 구조

    Changing the Construction Sequence Can Alter the Opening Alignment

    the leather bag construction sequence, the opening and zipper cannot be worked on independently of the other components. The available working space and alignment references change depending on whether handle reinforcement, zipper attachment, lining assembly, or gusset construction is completed first.

    If the zipper is positioned only after the body and gusset have been fully assembled, there may not be enough room for needles or tools. If the zipper is fixed too early, small length differences created while attaching the gusset may become difficult to correct.

    Before final stitching, check the following points while the components are temporarily bonded or basted.

    • Is the top edge symmetrical when the zipper is closed?
    • Does the opening expand naturally when the zipper is opened?
    • Does either end of the gusset pull the opening to one side?
    • Does the center of the opening sag when the bag is lifted by the handles?
    • Does the zipper slider catch on any thick section?
    • Does the lining interfere with zipper movement after it is installed?

    Any problems found at this stage should be corrected before final stitching and edge finishing.

    A Well-Designed Bag Opening Works Without Drawing Attention

    A well-designed bag opening may not appear visually dramatic. The zipper moves smoothly without excessive force, the opening expands as much as needed, and the top edge returns to its original position when closed.

    Because the opening does not interfere with the bag’s shape and connects the handles, body panels, and gussets naturally, the user rarely notices the structure itself.

    When the opening spreads, the zipper line ripples, or one side tilts, the entire bag can appear less refined than it actually is. Even high-quality leather and hardware cannot compensate for an unstable opening line.

    Leather bag opening design is not simply the step of attaching a zipper. It is a process that determines both usability and structural quality. A stable opening that retains its shape over time can be achieved only when zipper length, gusset tension, skiving thickness, reinforcement coverage, and handle placement are considered as one integrated structure.

  • 가죽가방 손잡이는 왜 먼저 망가지는가: 손잡이 간격과 하중 분산의 설계 원리

    The handle is the part of a leather bag that is touched most frequently, while also carrying the full weight of everything inside. Even when the bag body remains intact, stretched handles or weakened attachment points can significantly reduce both usability and overall appearance.

    Handle durability cannot be improved simply by using thicker leather. The spacing and placement of the handles, the shape of the internal core, the attachment area, and the reinforcement method must all work together to distribute the load effectively.

    Key Principle

    A handle is not merely an accessory attached to the top of a bag. It is a structural component that transfers the weight inside the bag to its body.

    가죽가방 전체 형태와 손잡이의 하중 방향

    Why Stress Concentrates Around the Handles

    When a loaded bag is lifted, the contents pull downward while the handles pull upward. The load is not distributed evenly across the entire handle. Instead, it concentrates around the two points where the handles connect to the bag body.

    The wider and heavier the bag, the more complex the forces acting on these attachment points become. In addition to direct tension, the handles pull the leather outward and create bending stress around the connections.

    This is why stretching, wrinkling, opened seams, and leather deformation usually appear around the attachment points before they appear in the center of the handles.

    Problems Caused by Handles That Are Too Close Together

    When the handles are positioned too close together, the load becomes concentrated near the center of the bag. The outer sections receive insufficient support, causing the sides to sag or the opening to fold inward.

    On a wide tote bag, handles that are placed too close together may look balanced while the bag is resting. However, its silhouette can change dramatically as soon as it is lifted.

    Handle spacing should not be determined by appearance alone. It must remain within a range that allows the bag to be lifted securely around its center of gravity.

    Problems Caused by Handles That Are Too Far Apart

    When the handles are positioned too close to the outer edges, they pull the opening and side panels outward. If the upper section lacks sufficient reinforcement, the opening may spread and wrinkles may form around the corners.

    If an attachment point is located too close to a side seam, the stress from the handle and the stress from the body seam become concentrated in the same area. Repeated use may then stretch the leather or enlarge the stitch holes.

    Therefore, when planning the spacing between the handles and the overall proportions of the bagmust be evaluated not only as design elements, but also as structural considerations.

    가방 입구 폭에 맞춰 배치된 손잡이 간격

    The Direction of Load Distribution Matters More Than the Size of the Attachment

    A larger leather attachment does not automatically make a handle stronger. The force received at the attachment point must spread naturally across a wider area of the bag body.

    When the attachment ends too abruptly or has a sharply defined edge, stress can concentrate along that boundary. A properly shaped and extended attachment allows the force to spread into the body and the internal reinforcement.

    Rather than relying only on visible exterior attachments, the design should carry the load path into the inside of the bag body. At this point, reinforcement at the handle attachment pointshelps prevent the leather from stretching while also maintaining the shape of the attachment area.

    What to Check at the Handle Attachments

    • Does the end of the handle connect to a sufficiently wide area of the bag body?
    • Are the stitch line and hardware holes positioned too close together?
    • Does the reinforcement continue into the inside of the attachment area?
    • Does the reinforcement end with an abrupt and overly rigid edge?
    • Are the positions and heights of the two handles exactly aligned?
    가죽가방 손잡이 연결부의 봉제선과 금속 부속

    A Handle Core Does More Than Create Thickness

    Round or padded handles contain a core that helps maintain their shape. In addition to determining thickness, the core reduces flattening and bending when the bag carries weight.

    If the core is too rigid, the handle may feel uncomfortable and fail to bend naturally near the attachment points. If it is too soft, the handle may flatten and lose its shape with repeated use.

    The thickness and resilience of the core should be selected in relation to the thickness of the covering leather, the width of the handle, the size of the bag, and its expected carrying weight.

    If the edges feel excessively hard or the seam presses directly against the palm, the handle may become uncomfortable during extended use. The tactile quality of the handle should therefore be evaluated alongside its structural durability.

    심재를 넣어 둥글게 제작한 가죽가방 손잡이

    Stitching Can Sometimes Weaken the Leather

    It is easy to assume that denser stitching will always make the handle attachment stronger. However, oversized holes or excessively narrow stitch spacing can create a structure similar to a continuous perforation line.

    If there is insufficient leather between the stitch line and the edge of the attachment, the leather may tear along the stitch holes when placed under load.

    The stitching around a handle attachment should therefore be evaluated not only for visual consistency, but also in relation to leather thickness, fiber condition, hole size, and the margin between the stitch line and the edge.

    When metal hardware is used, make sure that the hardware holes and stitch line do not overlap within the same narrow area. Too many holes concentrated in one location can weaken the leather.

    Hidden Internal Reinforcement Determines Longevity

    Even when the exterior attachment leather is thick, the leather of the bag body may stretch if the inside lacks proper reinforcement.

    Internal reinforcement should extend slightly beyond the visible attachment area so that the load can spread into the surrounding structure. However, if the reinforcement ends with an abrupt and rigid edge, the leather may bend along that boundary or reveal an unwanted step.

    Rather than making the entire area uniformly thick and rigid, the center should provide sufficient support while the outer edges transition gradually into the surrounding leather.

    A Prototype Must Be Tested Under Real Carrying Conditions

    Handle placement cannot be fully evaluated from a flat pattern alone. Once the prototype is complete, it should be filled with the expected everyday load and physically lifted.

    이때 다음 사항을 확인합니다.

    • Does the bag tilt to one side?
    • Do the opening and side panels fold inward excessively?
    • Do wrinkles concentrate around the handle attachments?
    • Do the handles rotate or twist inside the hand?
    • Are both handles identical in height and angle?
    • Does the overall silhouette remain stable when the bag is loaded?

    A bag that looks beautiful while empty is not enough. The handle design is working properly only when the silhouette remains stable under realistic carrying weight.

    Well-Designed Handles Stabilize the Entire Bag

    Handles may appear to be small components, but they influence the bag’s weight distribution, silhouette, and carrying comfort at the same time.

    The handles can maintain their form over time only when their spacing aligns with the bag’s center of gravity, the load spreads naturally into the body and internal reinforcement, and the core and stitching are properly designed.

    When evaluating a finished bag, do not look only at the shape of its handles. Observe how the attachment points, opening, and side panels respond when the bag is lifted.

    Good handle design is not simply about making the handles stronger. It is about creating a structure that allows the entire bag to carry weight in a stable and balanced way.

  • 가죽가방 완성도를 판단하는 7가지 기준: 실루엣부터 바닥 균형까지

    Seven Standards for Evaluating the Quality of a Leather Bag: From Silhouette to Bottom Balance

    When examining a finished leather bag, many people first notice the leather’s color and surface or eye-catching elements such as the hardware. A maker looks at it differently. Before judging the beauty of individual components, a maker first checks whether the entire bag comes together naturally as a single structure.

    The overall quality of a bag does not improve simply because one area has been made with precision. A stable result emerges only when the body panels, side panels, opening, handles, bottom, stitching, and interior organization all work toward the same structural and functional goal.

    Craftsmanship is not about perfecting each component in isolation. It is the state in which every component works toward the same form and purpose.

    1. The Overall Silhouette Should Read Clearly at a Glance

    When looking at a bag for the first time, examine its overall outline before focusing on decorative details. Check whether the width of the top and bottom, the height of the body, and the size and placement of the handles are in proportion. On a rectilinear bag, the outer lines should flow steadily without unintended twisting or a visual pull to one side.

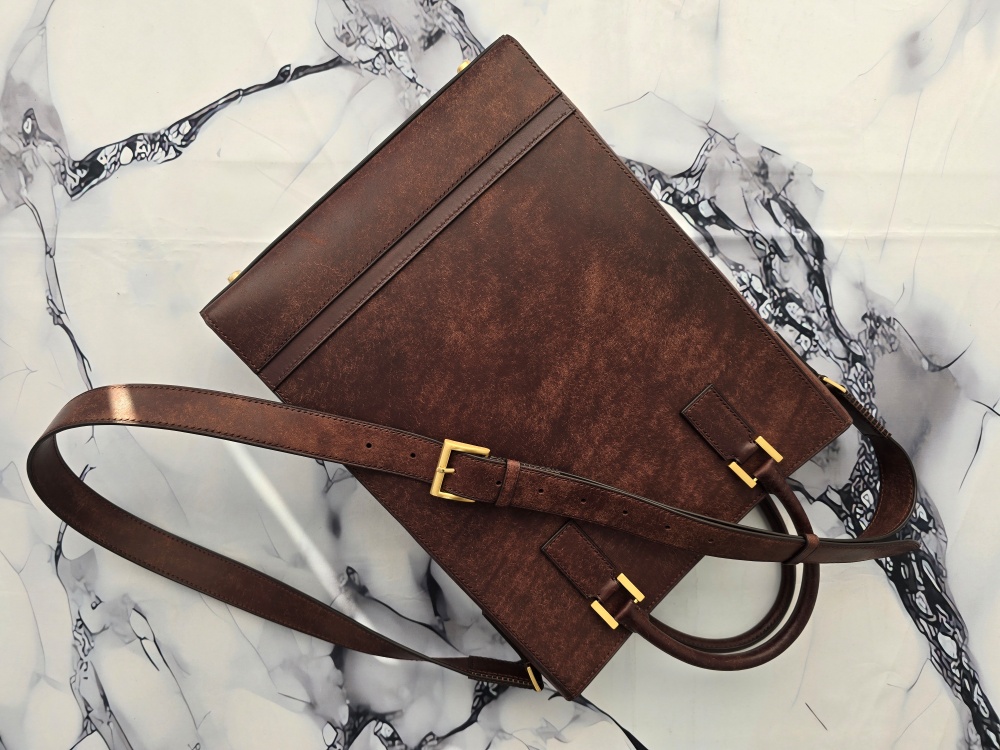
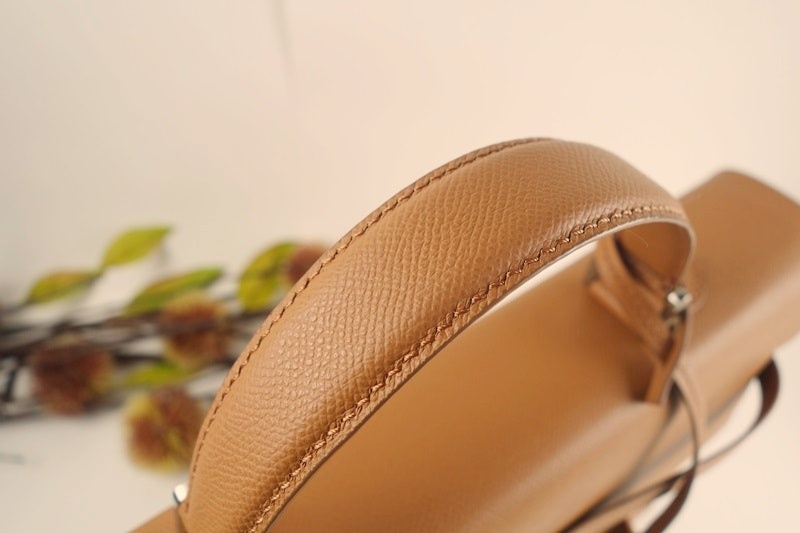
    In the bag shown here, the straight body panels contrast with the rounded handles, while the brown leather contrasts with the gold-toned hardware. What matters is not how decorative each element is, but whether the straight lines and curves are organized within a coherent proportion.

    The reinforcement design that supports the bag’s shapemust be properly planned. Otherwise, the bag may look straight immediately after completion, but its opening and body can deform in different directions with use.

    브라운 가죽가방 몸판과 손잡이 및 스트랩 장식

    2. The Side Profile Reveals the Balance Between Capacity and Form

    The side panel determines the bag’s actual capacity. No matter how beautiful the body panels are, an excessively narrow side panel can cause the opening to spread when the bag is filled. If it is too wide, the bag may lose its shape more easily when empty.

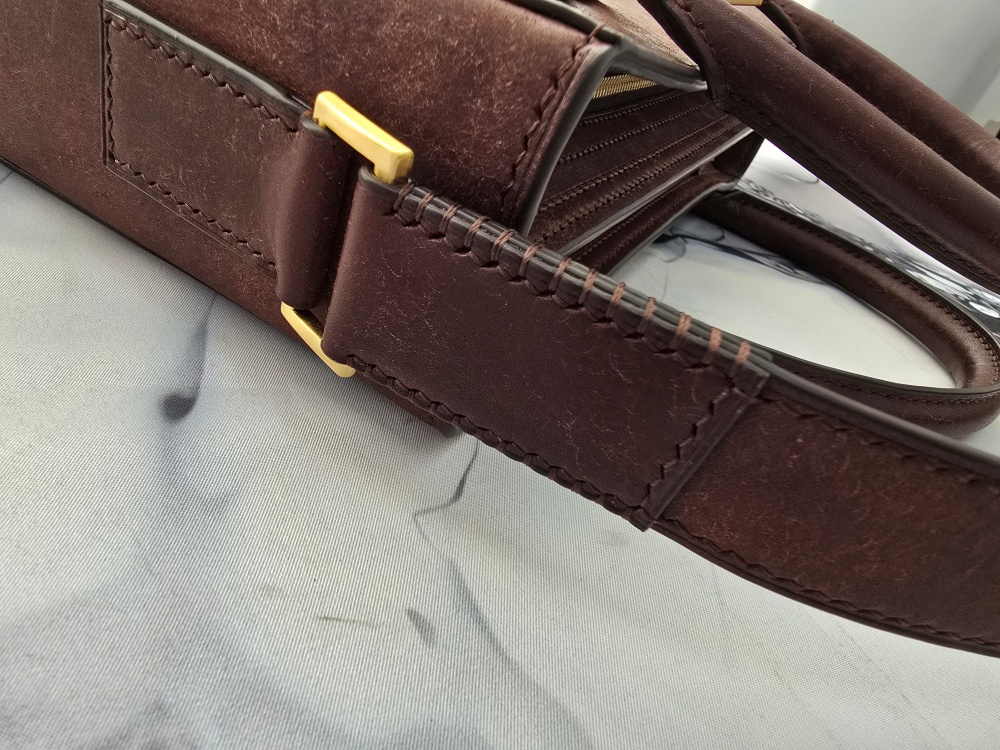
    The line where the gusset meets the body must also be examined. The angle of the side panel, the flow of the joining lines, and the transitions around the corners should feel natural so that the front and side come together as a unified three-dimensional form. The side view in the photograph shows how the layered construction is connected and how leather lacing is used at the joint.

    가죽가방 측면의 여러 층과 가죽끈 결합 구조

    3. The Opening Should Retain Its Structure When Open

    The opening is where appearance and usability directly meet. A straight line when the bag is closed is not enough. When the zipper is opened, the top should not collapse excessively and the interior should remain easy to see.

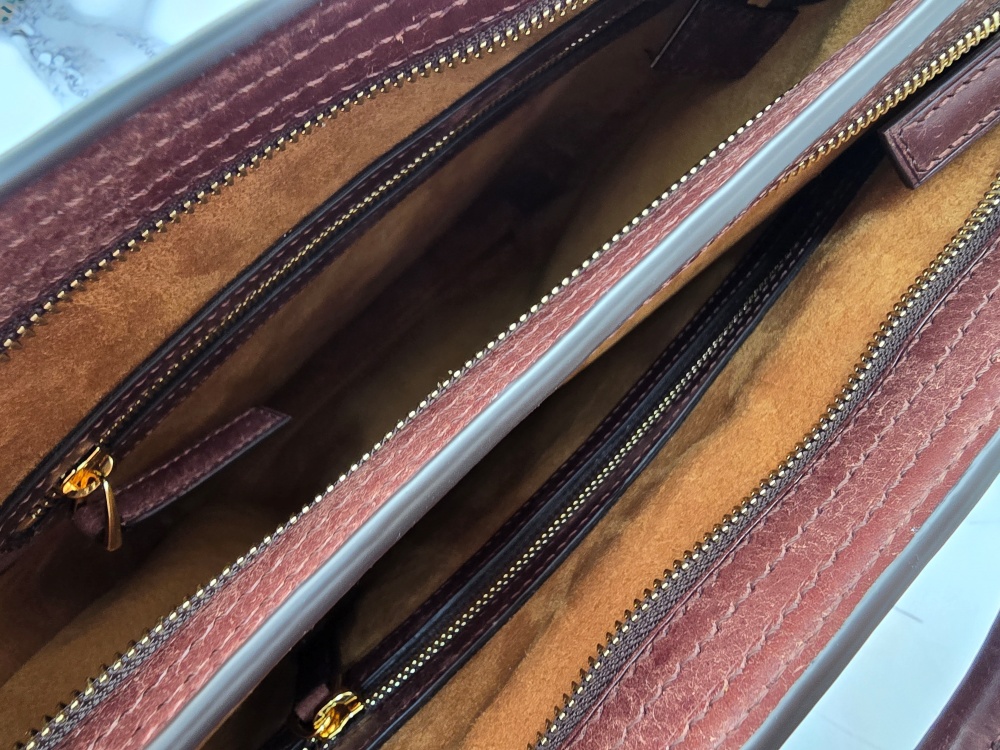
    If the bag has multiple compartments, check whether the zipper lines interfere with one another. A twisted zipper track or an opening pulled toward one side can affect both the feel of opening and closing the bag and the silhouette of its upper section.

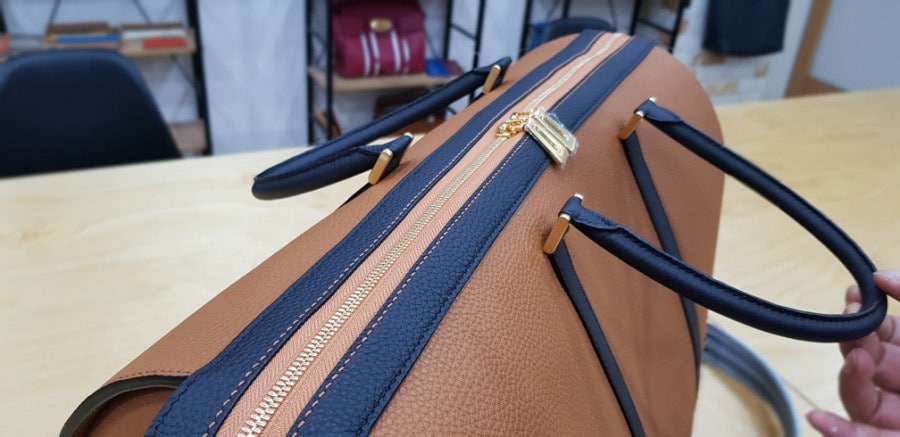
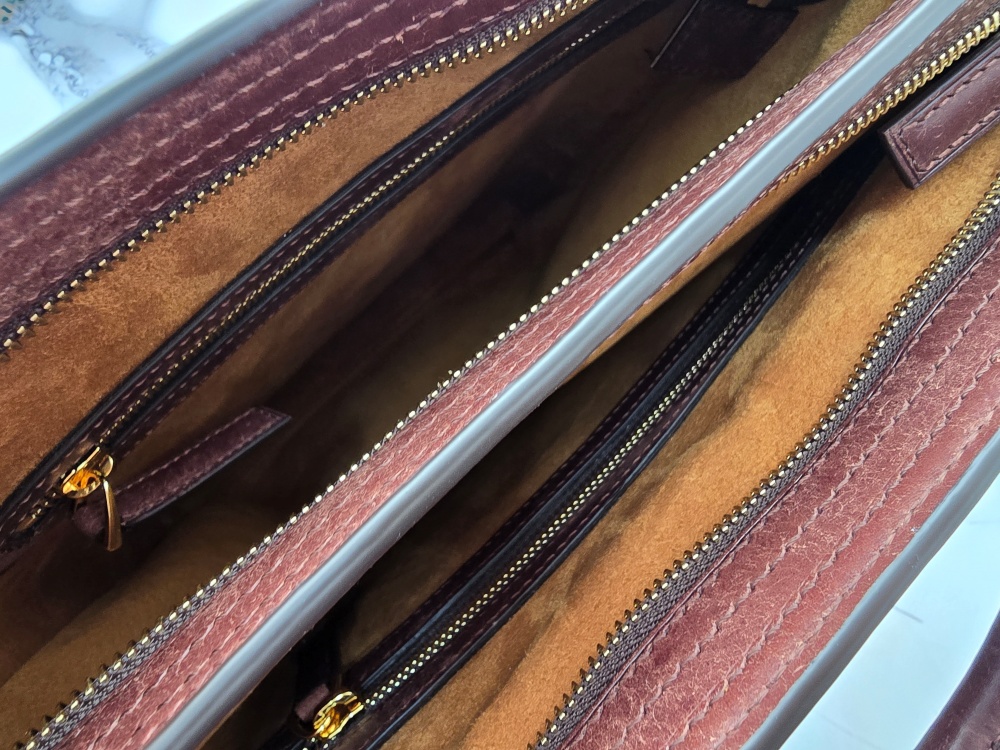
    The bag shown here has several zippered compartments arranged side by side. In this type of construction, the spacing and height of each opening, along with the finishing around the zipper ends, affect the overall quality.

    여러 지퍼 수납부로 구성된 가죽가방 입구

    4. Handle Attachments Are the Starting Point of the Load

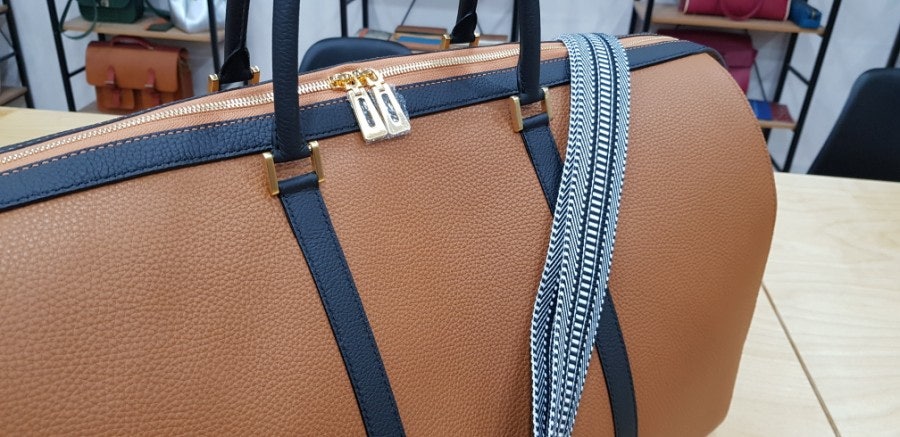
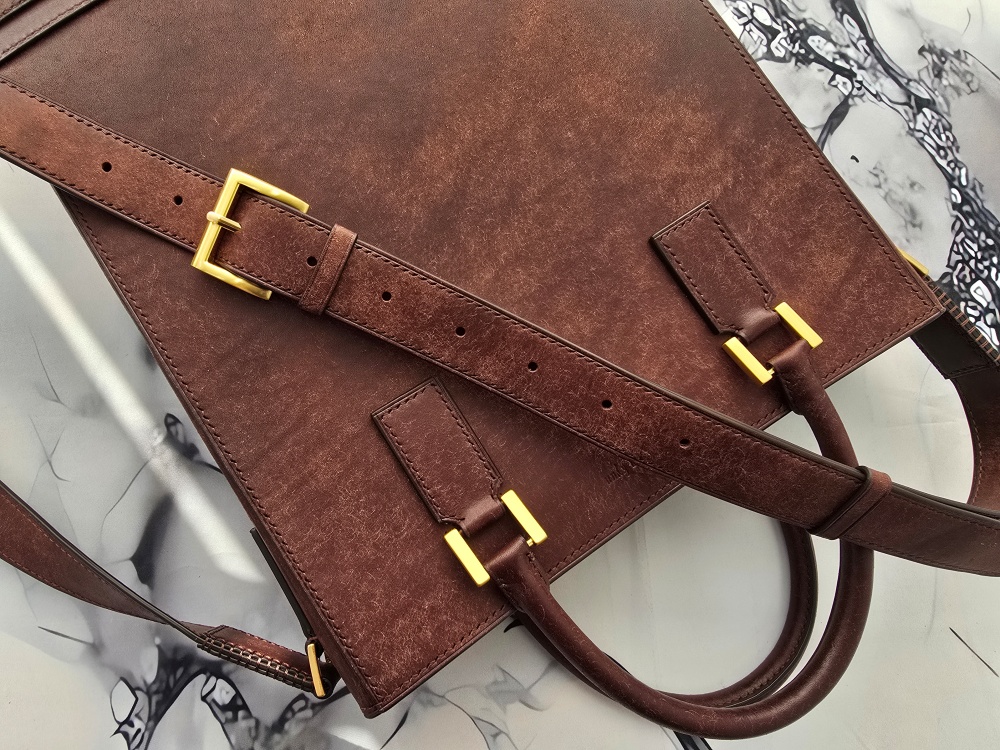
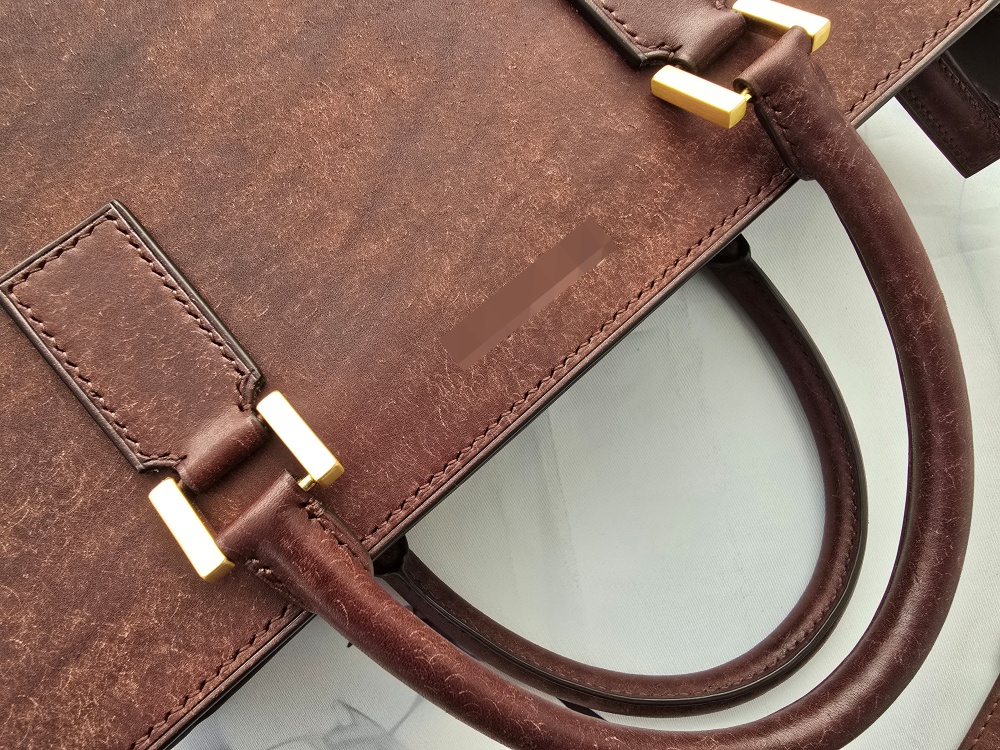
    The handles are among the first parts to receive the bag’s weight. Examine not only the shape of the handles but also their attachment positions, the reinforced areas around them, and the way the metal fittings are joined.

    If the spacing or height of the left and right handles differs, the body may tilt to one side when the bag is carried. Even when the hardware is visually refined, concentrating the load over a small area can eventually stretch the leather or cause the attachment area to lift.

    After completion, do not evaluate only the empty bag. Add the weight of typical contents and check whether the handle attachments distribute the load evenly and remain stable.

    가죽가방 손잡이 연결부와 골드 톤 금속 장식

    5. Stitching and Edge Lines Reveal Each Other’s Irregularities

    Along the outer edge of a bag, the stitching line and edge line run side by side. Because they are so close together, any irregularity in one makes imperfections in the other more noticeable.

    Stitch spacing is not the only factor to inspect. Check whether the stitching remains a consistent distance from the leather’s edge, whether the spacing changes suddenly around corners, and whether the thread compresses the leather too tightly or sits too loosely.

    The edge finish should also follow the outline smoothly, without the coating building up more heavily on one side. The repeated process of sanding and applying edge paintis not merely a way to cover the raw edge. It is part of the process of completing the bag’s outline together with the stitching line.

    브라운 가죽가방 외곽 스티치와 엣지 마감

    6. The Bottom Determines the Bag’s Overall Stance

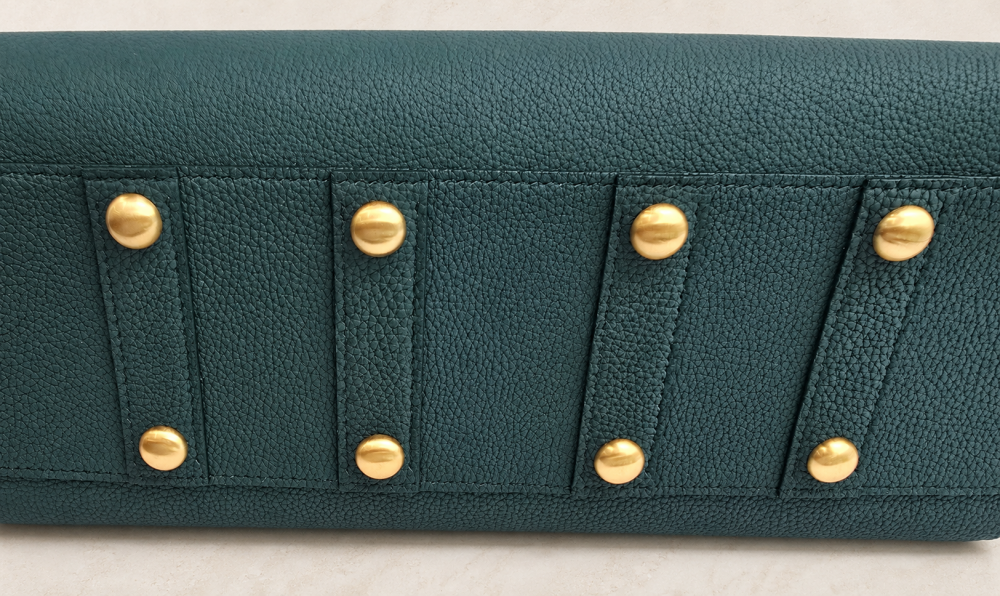
    The bottom directly supports the weight of the bag and its contents. Place the bag on a flat surface and check whether it rocks from side to side, whether all four corners meet the surface at the same height, and whether the bottom panel bends toward one side.

    The placement of bag feet also matters. If they are positioned too far inward from the edges, they may not adequately protect the bottom corners. If they are installed at different heights, the bag may not stand securely.

    The line where the bottom meets the body should also remain straight so the bag appears stable from the front. Although the bottom is not highly visible, it is the foundation that supports the entire silhouette.

    금속 바닥발이 부착된 가죽가방 바닥

    7. Inside the Bag, the Order of Use Matters More Than Appearance

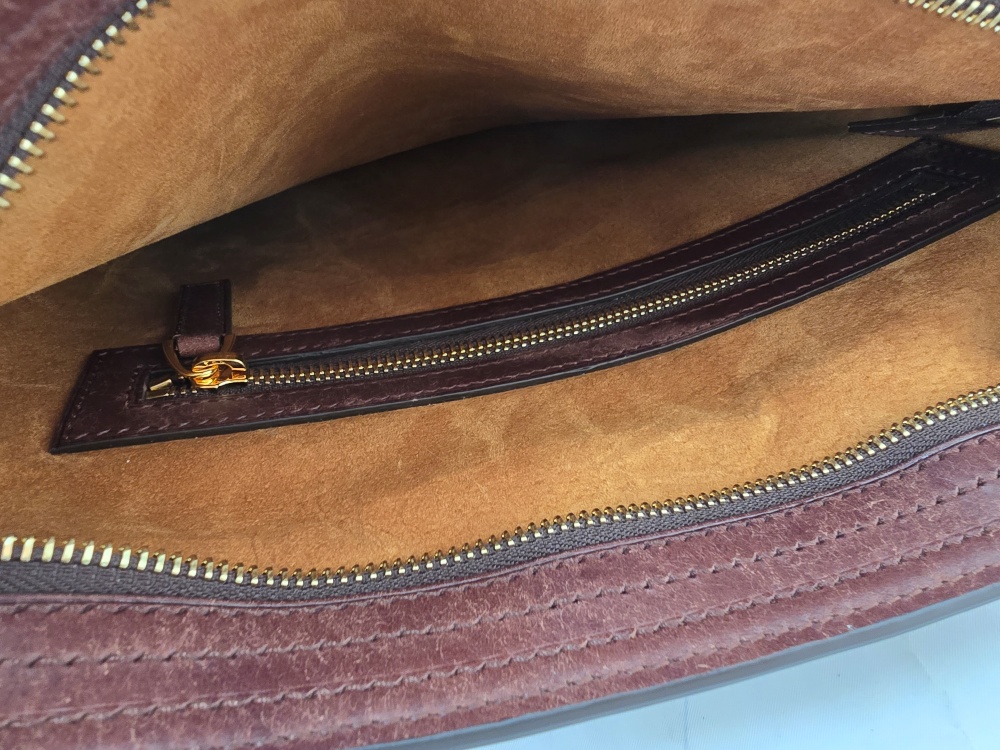
    The interior cannot be judged only by the color or texture of the lining. Check whether frequently used items are easy to see when the bag is opened, whether the height and width of the pockets suit actual belongings, and whether the zippers can be operated with one hand.

    An interior zippered pocket may be used less often if its opening is too narrow or if it is positioned too deep inside the bag. If it is placed too high, the pocket and the main contents may interfere with each other when the bag is opened.

    In a construction where the main compartment and zippered pocket are clearly separated, as shown here, examine not only the pocket placement but also whether the lining bubbles or is pulled under excessive tension.

    브라운 톤 안감과 지퍼 포켓이 있는 가죽가방 내부

    Photographic Inspection Should Be Followed by a Real-Use Test

    Finished-product photographs are useful for documenting overall proportions and surface finishing, but they cannot reveal every aspect of a bag’s quality. Changes under load, the feel of the zippers, and the bag’s balance when filled must be tested through actual use.

    After completion, it is helpful to test the following points in practice

    • Does the empty bag stand securely on a flat surface?
    • Does the opening retain its shape after frequently carried items are placed inside?
    • Do all the zippers move smoothly from beginning to end?
    • Is the load distributed evenly across the handle and strap attachments?
    • Does the bag remain level when carried?
    • Can the interior pocket be accessed naturally with one hand?
    • Do the bottom and corners retain their shape under the weight of the contents?

    A practical inspection sequence is the overall silhouette, side profile, opening, load-bearing points, stitching and edge finish, bottom, and finally the interior. Following this order helps prevent important details from being overlooked.

    In a Well-Made Bag, Every Line and Structure Works in Agreement

    A well-made leather bag is not one in which only a single detail stands out. Its outer contour and handle curves, stitching and edges, opening and interior compartments, bottom and hardware should all work together without conflict toward a unified purpose.

    The more decorative and structural elements a design contains, as in the bag shown here, the more important it becomes to examine not only the quality of each component but also the balance of the whole.

    The true craftsmanship of a leather bag is revealed when the precision of each stitch seen up close and the stability of the overall silhouette seen from a distance are equally convincing.

  • Why Leather Edge Finishing Cannot Be Completed in One Step: The Proper Order of Sanding and Edge Painting

    When a leather item is completed, its overall shape and color are usually the first things we notice. However, when viewed up close, the quality of the craftsmanship is often revealed by the leather edges.

    No matter how fine the leather may be, the finished piece will not look refined if the cut layers are misaligned, the bonded edges are separating, or the edge paint has an uneven surface.

    By contrast, when multiple layers of leather merge into one smooth line and the edge remains consistent in color and thickness, even a small leather item can display a high level of craftsmanship.

    Leather edge finishing is not simply the final application of color. It is a structural finishing process created through a sequence of cutting, bonding, skiving, and sanding.

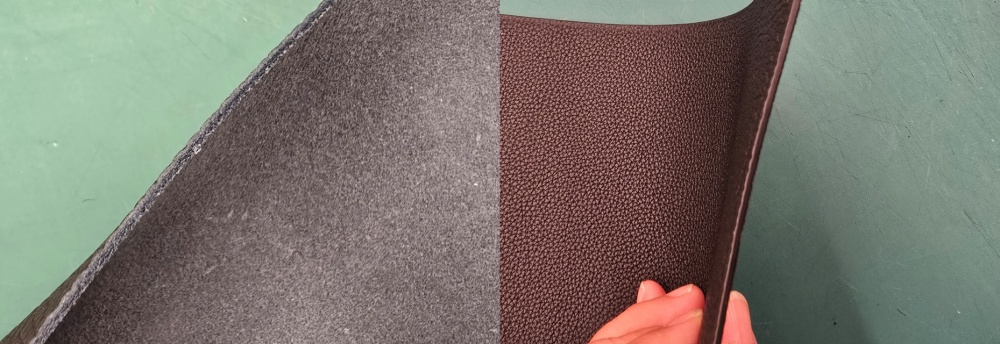
    마감 전 가죽 단면과 엣지코트 작업 후 단면 비교

    Edge Paint Cannot Conceal an Irregular Edge

    Beginners often assume that applying several layers of edge paint will smooth out an uneven edge. However, edge paint alone cannot correct misaligned layers or sections where the bond has begun to separate.

    Applying one heavy coat may initially appear to cover the surface. As it dries, however, the coating may become uneven or crack during use, making the irregularities of the edge even more noticeable.

    Edge paint cannot create the underlying structure of an edge. It is a final finishing material that adds color and a protective layer to an edge that has already been properly prepared.

    The alignment of the leather layers and the condition of the bond must therefore be checked before applying edge paint.

    A Clean Edge Begins with Accurate Cutting and Bonding

    When several pieces of leather are layered together, their cut lines must align precisely. If even one layer protrudes, that area may require excessive sanding, causing the finished outline to differ from the original pattern.

    Adhesive should also be applied evenly up to the edge. If the bond is weak near the edge, the leather layers may separate during sanding, allowing edge paint to seep into the gaps and create an irregular line.

    At folded areas or corners where several layers meet, the final thickness must be calculated in advance. If the relationship between leather thickness and skivingis not considered when the layers are assembled, some sections may become disproportionately thick, making it difficult to create a smooth edge profile.

    What to Check Before Finishing the Edge

    • Are the cut lines of the layered leather precisely aligned?
    • Is the bond secure all the way to the edge?
    • Does the thickness remain consistent across the skived areas?
    • Do the curves and corners match the original pattern?
    • Is the edge free of adhesive residue and loose leather fibers?

    Any problems discovered at this stage should be corrected before edge paint is applied.

    The Purpose of Sanding Is Not to Remove as Much Material as Possible

    Sanding brings multiple layers of leather into a single, even surface and creates a stable foundation for the edge paint.

    The key is not to sand quickly with excessive force, but to maintain consistent pressure and direction. Concentrating on one area can distort a straight edge or create uneven widths.

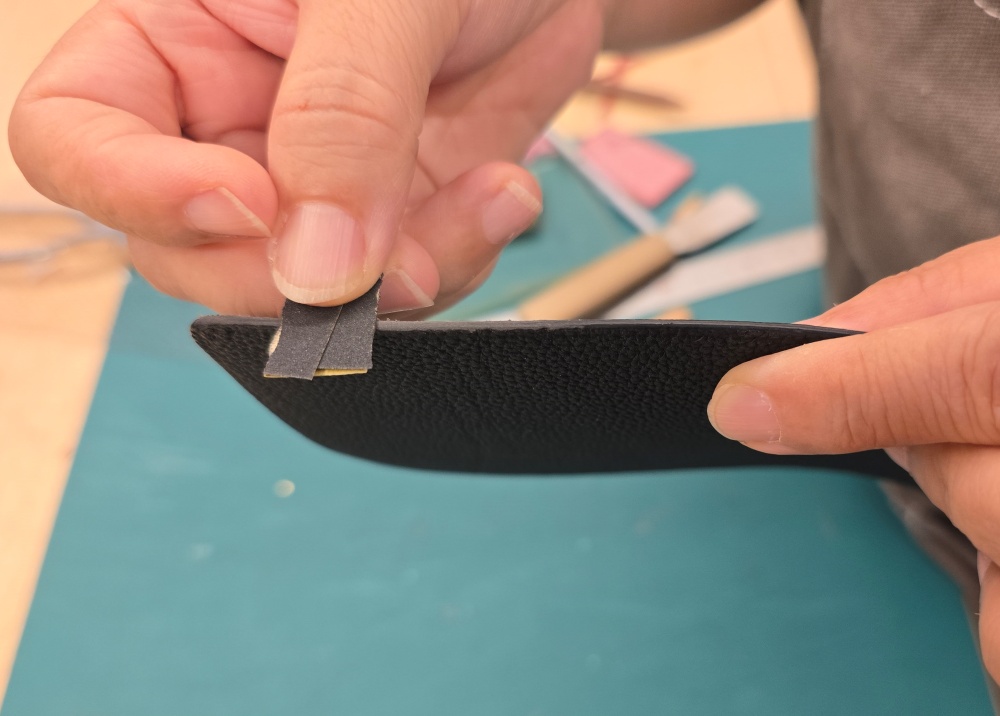
    A relatively coarse abrasive can first be used to level major differences in height, followed by finer abrasives to refine the surface. The exact sanding sequence may vary depending on the type of leather, the condition of the edge, and the finishing product being used.

    Sanding is not simply a way to remove rough marks. It is the process of joining the leather layers into one surface while preserving the designed outline.

    Excessive sanding can round the corners more than intended or reduce the dimensions of the component. On handles and straps that must remain symmetrical, both edges should be compared frequently throughout the process.

    사포를 이용해 가죽 단면을 단계적으로 다듬는 과정

    Apply Edge Paint in Thin Layers and Allow It to Dry Fully

    A heavy coat of edge paint may seem like a way to reduce the number of applications. However, a thick layer can dry at different rates on the surface and underneath, and the paint can easily pool around curves and corners.

    The first coat is not intended to create a perfect gloss. Its main purpose is to reveal small irregularities and provide a foundation for the next sanding stage.

    After the coating has dried completely, the surface should be lightly refined. Thin applications and full drying should then be repeated as needed. Because recommended drying times and application methods vary by product, the manufacturer’s instructions should also be followed.

    What to Check After the First Coat

    • Does the edge paint cover the entire edge without gaps?
    • Has the coating pooled around corners or curves?
    • Have any gaps between the leather layers reappeared?
    • Are there any obvious marks left by the applicator?

    What to Check During the Second and Later Coats

    • Has the previous coat dried completely?
    • Are the surface level and color consistent?
    • Have the straight lines and curves retained their intended shape?
    • Has the coating become thicker than necessary?

    The number of coats alone does not determine the quality of the finish. Each layer should be applied only as needed after inspecting the condition of the edge.

    Slow Down When Working Around Curves and Corners

    It is relatively easy to apply edge paint at a consistent speed along a straight edge. On convex curves, concave curves, and sharply changing corners, however, the amount of paint can easily become uneven.

    Around curves, work more slowly to prevent the applicator from slipping off the edge and staining the leather surface. Avoid loading the tool with too much paint at once.

    Pausing at a corner can cause the edge paint to pool. When changing direction, maintain a continuous movement while keeping the amount of paint consistent.

    On edges that move repeatedly, such as handles and folded sections, the flexibility of the finished coating is just as important as its appearance. An excessively thick coating is more likely to become damaged through repeated bending and friction.

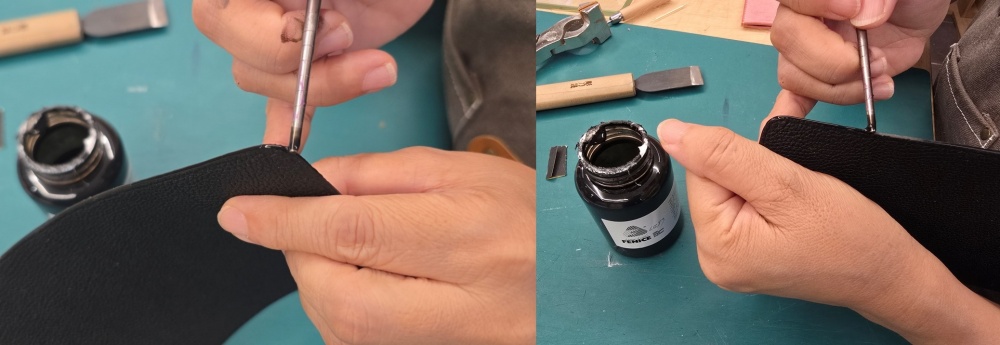
    직선과 곡선 가죽 단면에 엣지코트를 바르는 모습

    The Edge Line and Stitching Line Are Seen Together

    Along the outline of a bag, the edge line and stitching line run beside one another. If either line becomes uneven, irregularities in the other line also become more noticeable.

    If one side of the edge is sanded too heavily, the distance between the edge and the stitching will appear inconsistent. Conversely, if the stitch spacing and thread thickness are too visually dominant for the thickness of the edge, the edge line may appear comparatively weak.

    Therefore, when planning the relationship between thread thickness and stitch spacing, you should also consider the finished edge thickness and the edge line.

    • Avoid excessively thick thread on thin, delicate edges.
    • Balance the visual weight of the edge and stitching on thicker bag components.
    • Maintain a consistent distance between the stitching holes and the edge.
    • Check that the stitching line and edge line remain naturally parallel around curves.

    A well-finished edge and well-executed stitching are not completed independently. They share the same outline and work together to establish the proportions of the piece.

    Edge Color Is Part of the Design

    Using an edge paint color similar to the leather creates a calm and refined appearance. A strongly contrasting color, on the other hand, makes the edge itself a prominent design element.

    Contrasting colors attract attention, but they also reveal small irregularities and application marks more easily. The stronger the color contrast, the more precise the cutting and sanding must be.

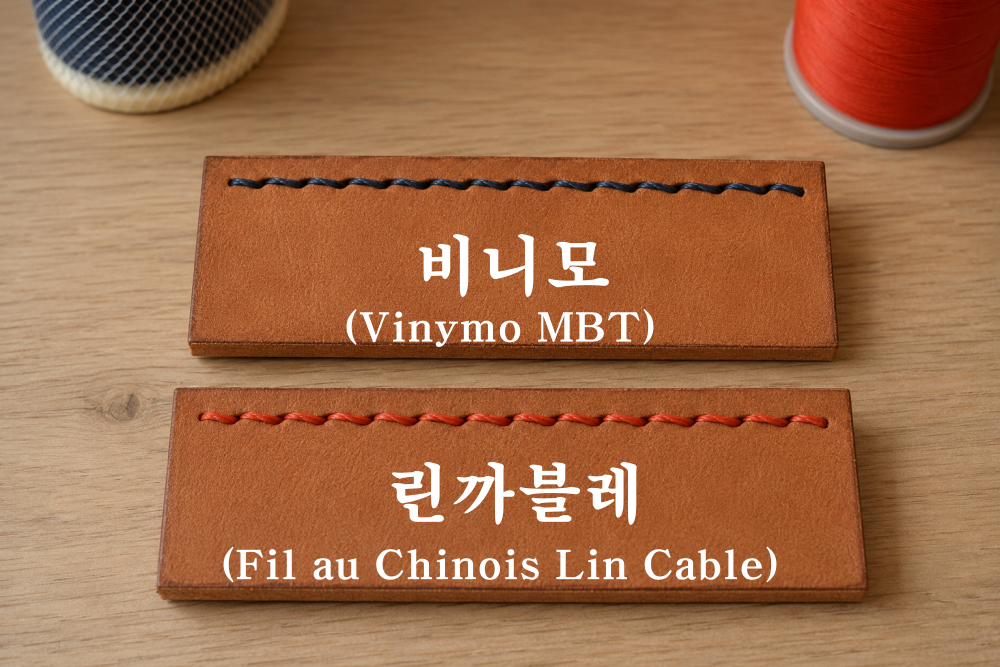
    The colors of the thread and edge paint should also be considered together. The criteria for choosing Vinymo MBTinclude not only thread thickness and stitching stability, but also the harmony between the leather and edge colors.

    Edge color should not be chosen to conceal mistakes. It is a design element that works with the leather, thread, and metal hardware to shape the character of the finished piece.

    Perform the Final Inspection Under Angled Light

    A finished edge should not be inspected only from the front. Angled light makes subtle waves and application marks visible that may otherwise remain hidden.

    Gently run a fingertip along the edge to check for sudden changes in height. The coating must be fully dry before touching it, as handling it too soon can leave marks on the surface.

    Final Inspection Checklist

    • Does the straight edge remain even without bending or wavering?
    • Are the curves symmetrical on both sides?
    • Are the edge color and thickness consistent?
    • Is the leather surface free of edge paint stains?
    • Are the folded areas free of cracking or lifting?
    • Is the distance between the edge line and stitching line consistent?
    측면 조명으로 완성된 가죽 단면을 검사하는 모습

    Edge Finishing Is the Result of the Entire Making Process

    A refined edge is not created simply by applying multiple coats of edge paint. Precise cutting, consistent skiving, secure bonding, and careful sanding that preserves the intended shape must come first.

    Only after thin applications and complete drying are repeated will multiple layers of leather begin to appear as one continuous edge.

    The quality of an edge finish is not determined by the final stroke of paint. It is the visible result of how accurately every preceding stage of construction has been completed.

    From a small card holder to a large bag, the edges reveal the maker’s judgment and working process without disguise. The habit of inspecting each stage without rushing produces leather goods that remain refined even after years of use.

  • 가죽공예 실 굵기와 목타 간격의 관계: 스티치 비례가 완성도를 결정한다

    [The Relationship Between Thread Thickness and Pricking-Iron Spacing: How Stitch Proportion Affects Quality]

    In leathercraft, thread is not simply a material for connecting pieces of leather. The thickness of the thread and the spacing of the stitches change the impression and balance of the bag, determining how refined the finished piece looks.

    Even with the same leather and the same pattern, the stitches can look delicate, overly heavy, or sparse depending on which thread and chisel you choose.

    To create good stitches, you shouldn't just choose the thread thickness; you must judge the chisel spacing, leather thickness, and the size of the piece as a single proportion.

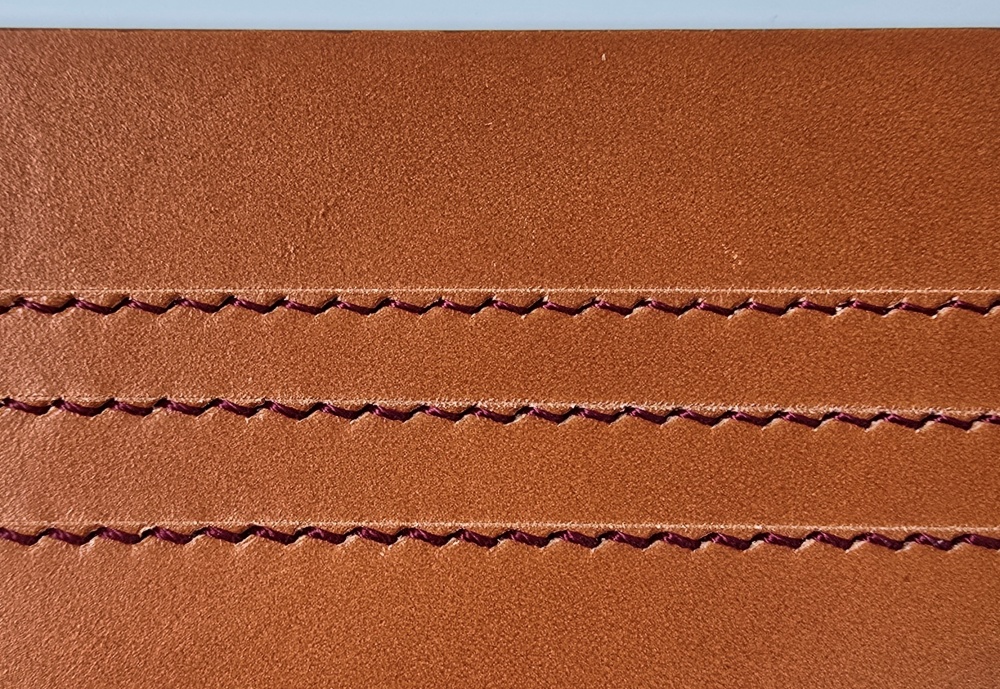
    같은 목타 간격에서 실 굵기를 달리한 가죽 스티치 비교

    Thread Thickness Cannot Be Chosen in Isolation

    Using a thick thread makes the stitches look distinct and gives them a strong presence. However, if only the thread becomes thicker while the chisel spacing remains narrow, the stitches may push against each other, looking cramped, or the area around the holes may be unnecessarily emphasized.

    Conversely, a thin thread creates a delicate and calm impression, but if the chisel spacing is too wide, the stitch line may appear disconnected or give an impression of lacking strength compared to the size of the piece.

    Thread is not necessarily more luxurious just because it's thicker, nor more precise just because it's thinner. The most appropriate thread is the one that naturally suits the size of the piece, the thickness of the leather, and the stitch spacing.

    When choosing a thread, you should first look at the proportion the thread will occupy at the edge of the leather after stitching, rather than the thickness of the thread itself.

    Chisel Spacing Creates the Rhythm of the Stitches

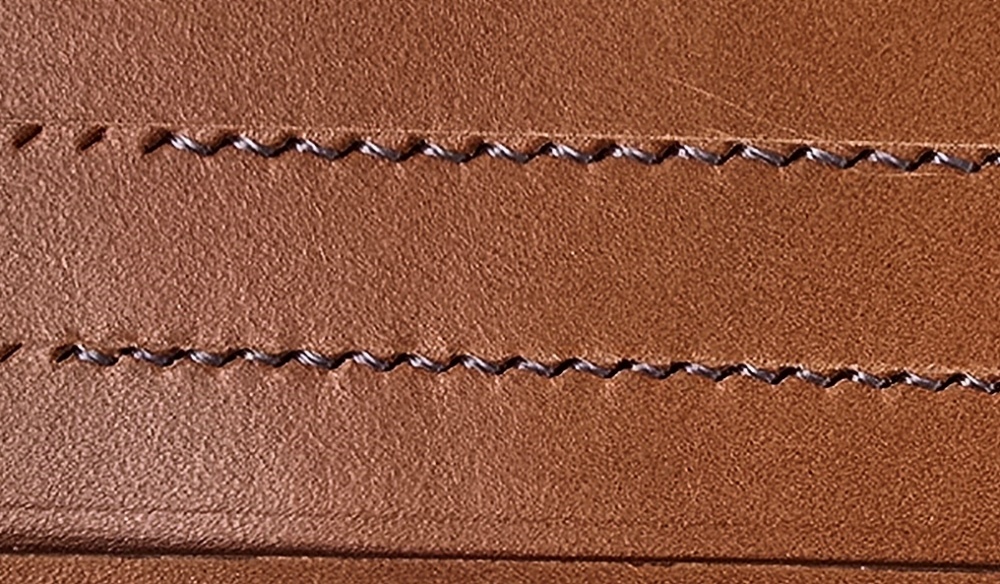
    Chisel spacing determines the speed and rhythm at which the stitches are repeated. If the spacing is narrow, the stitches become dense, creating a delicate impression. If the spacing is wide, each stitch becomes clearly visible, creating a more relaxed and powerful atmosphere.

    Characteristics of Narrow Chisel Spacing

    • It suits small items like small wallets or cardholders well.
    • It is great for creating a refined impression when using thin leather and relatively thin thread.
    • Using it with thick thread can make the stitches overly dense.

    Characteristics of Wide Chisel Spacing

    • It suits large and structural parts like bags or handles well.
    • When combined with a moderately thick thread, it can highlight the presence of the stitches.
    • Using a thread that is too thin can make the spaces between the stitches look empty.
    같은 실을 사용하고 목타 간격을 달리한 가죽 스티치 비교

    Even if the indicated spacing of the chisel is the same, the actual impression of the stitches can vary depending on the shape of the blade, the size of the hole, and the angle at which the chisel is struck. Therefore, rather than choosing a chisel based solely on numbers, it is safer to confirm it through an actual test stitch.

    How to Understand Vinymo MBT Numbers and Thread Thickness

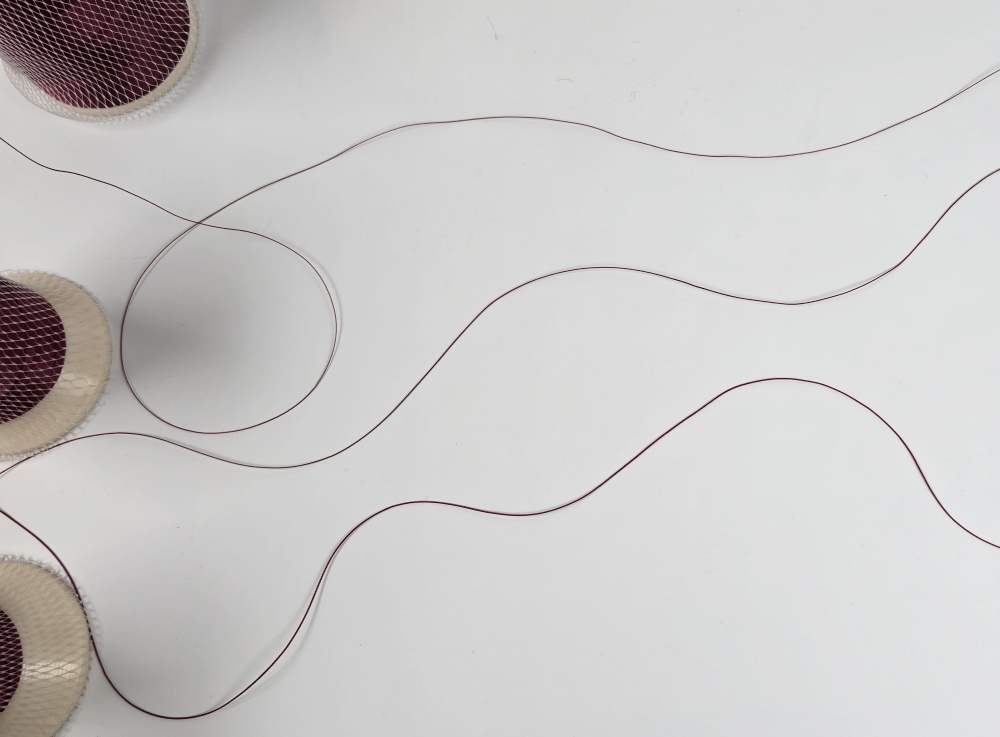
    Vinymo MBT is a thread I frequently use when making actual bags and accessories. The twist does not unravel easily, and the condition of the thread remains relatively stable during stitching, making it useful for repetitive work.

    For Vinymo MBT, the thread generally becomes thicker as the number gets smaller. For example, #8 is thinner than #5, and #1 is thicker than #5.

    However, you should not determine the thread based on the number alone. Even with the same number, the impression of the finished stitches can vary depending on the thread's color, wax treatment, pulling tension, and the needles and chisels used.

    The reason use Vinymo MBT more oftenis not simply because the thread is strong. It is because it is easy to predict the condition of the thread during work and good for maintaining a consistent balance in the finished stitches.

    굵기가 다른 비니모 MBT 실과 풀어 놓은 실 가닥

    Look at the Final Thickness, Not Just a Single Piece of Leather

    A common mistake when determining thread thickness is to only look at the thickness of a single piece of leather. However, in actual bag making, leather is often folded, reinforcements and linings are added, and multiple layers of leather are stacked.

    Therefore, when choosing a thread, you should judge based on the final thickness of the part to be stitched, not a single piece of cut leather.

    • How many layers of leather are stacked?
    • Are folded parts or reinforcements included?
    • Do the stitches play a role in holding the structure?
    • Are they stitches to be emphasized decoratively?
    • What is the overall size of the finished piece?

    If you choose a thick thread looking only at a single thin piece of leather, the stitches may become overly heavy in the finished stage. Conversely, using a thread that is too thin on thick handles or parts where multiple layers overlap can make the stitches look weak relative to the structure.

    Test Stitching is the Smallest Design Process

    Before striking the chisel directly on the finished product, it is advisable to do a test stitch on a scrap of the same leather. If possible, you should stack the same number of leather pieces as the actual production part and prepare the gluing and edge finishing similarly.

    During the test stitch, check the following items:

    • Is it too tight when the thread passes through the chisel hole?
    • Does the leather surface pucker or do the holes gape when the thread is pulled?
    • Is the angle of the stitches consistent on the front and back?
    • Is the thread thickness too strong or too weak compared to the size of the piece?
    • Does the spacing of the stitches connect naturally even on curved parts?

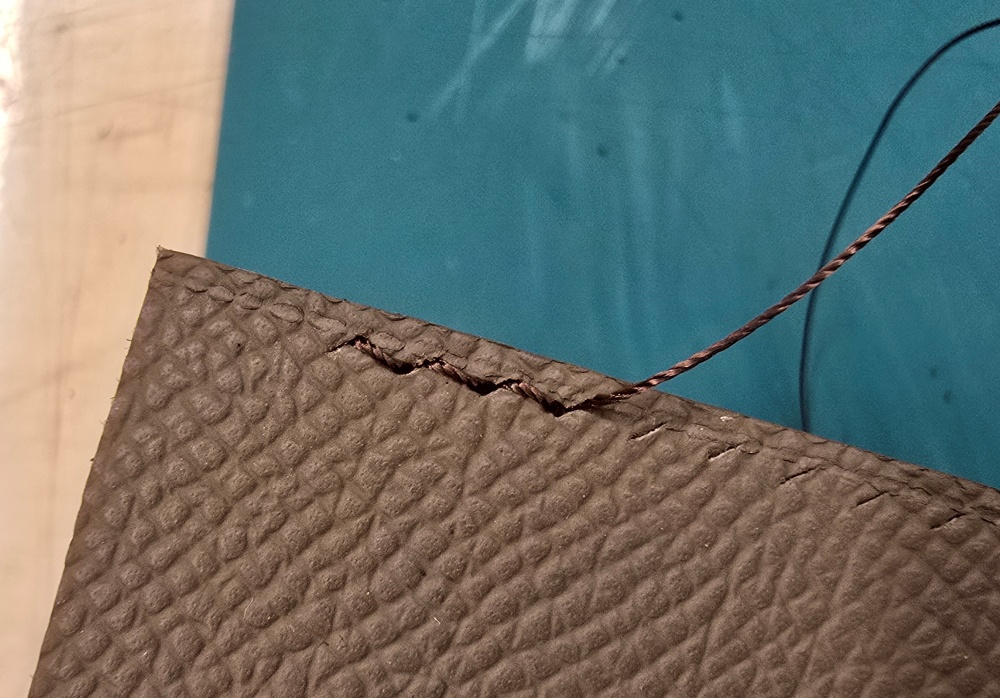
    You should also examine the relationship between the awl hole size and stitch qualityEven if the proportion of the thread and chisel is appropriate, if the holes are too large or inconsistent, the stitch line will not remain neat.

    가죽 자투리에 실 굵기와 목타 간격을 바꾸어 시험 바느질하는 모습

    Test stitching is not a process that wastes materials. It is a design process that discovers potential proportional errors in the finished product at the lowest cost.

    Adjusting the Presence of Stitches According to the Size of the Piece

    In small accessories, a single stitch takes up a large proportion of the overall design. Therefore, using relatively thin thread and narrow spacing is good for creating a delicate and calm impression.

    On the main body of a medium-sized bag, the thread and chisel should not be overly conspicuous while stably tidying up the leather edges. Here, it is important to look at the thickness of the leather and the location of the stitches together to find a medium proportion.

    For handles, strap connections, and outlines that emphasize structure, you can utilize relatively thick thread or wide spacing. However, since using thick thread does not necessarily increase durability, the size of the holes and the stitching tension must also be adjusted.

    Good Stitches Do Not Stand Out Before the Bag

    Refined stitches certainly elevate the perfection of a bag. However, if the stitches are revealed too strongly, the stitch line may be seen before the shape of the bag and the texture of the leather.

    Rather than showing off, good stitches tidy up the edges of the leather, follow the lines of the pattern, and quietly support the structure of the bag.

    Choosing thread thickness and chisel spacing is not a simple material selection, but a process of designing the proportions of the entire bag.

    Rather than memorizing the numbers of threads and chisels like a correct answer, you need the habit of looking at the final thickness of the leather, the size of the piece, and the role the stitches will play together. That small difference in judgment changes the impression of the finished bag and creates stitches that look stable even as time passes.

  • 천연 리넨사보다 비니모 MBT를 더 자주 사용하는 이유

    Why I Use Vinymo MBT More Often Than Natural Linen Thread

    In leathercraft, thread is not simply a material for connecting pieces of leather. The thickness, twist, surface texture, and luster of the thread change the impression of the stitches and greatly influence how well the finished bag maintains its shape over time. Even if you use the same leather and the same pattern, the atmosphere of the piece changes significantly depending on the thread you choose.

    Natural linen thread is a traditional material that has been used in leather handcrafting for a long time. Due to its unique natural texture and warm impression, it is still widely loved in high-end leather goods and manual work. However, when actually crafting bags and accessories, I use Vinymo MBT more often than natural linen thread.

    This does not mean that one thread is absolutely superior. It is simply because the characteristics of Vinymo MBT better align with the production standards I value.

    ■ Natural Linen Thread and Vinymo MBT Serve Different Purposes

    Natural linen thread is made from flax fibers. When waxed, the thread gains proper stiffness and friction, allowing it to sit stably within the leather's stitching holes. Because a subtle fibrous feel remains on the surface, the stitch line is not overly smooth. When this natural irregularity meets vegetable-tanned leather, it creates a depth characteristic of a truly handmade object.

    On the other hand, Vinymo MBT is a bonded polyester thread. The twist does not unravel easily, and the thickness and surface condition of the thread are relatively uniform. Even when making long continuous stitches, it is easy to maintain a consistent impression from beginning to end.

    • Natural Linen Thread: Natural and traditional impression / Fibrous surface texture / Calm and soft luster / Waxing required
    • Vinymo MBT: Neat and modern impression / Smooth and uniform surface / Subtle and clear luster / Stable twist and consistent thickness
    동일한 가죽·동일한 간격으로 바느질한 비교 견본

    ■ The First Reason I Use Vinymo MBT More Often: Consistent Stitches Over Long Lines

    Bags have much longer stitching lines than small leather accessories. Parts of varying thicknesses—such as the main body and side panels, the bottom and reinforcements, and the handles and opening—are connected into a single structure. As the stitch line gets longer, the twist and tension of the thread can change slightly. A difference that might not be visible in a short section becomes noticeable as it follows the long outline of a bag.

    Because Vinymo MBT is quite stable in its thickness and twist, it is great for continuing stitches with a consistent rhythm. It makes it easier to neatly arrange not only the slanted stitches on the front but also the stitch appearance on the back. What I want is not just neat sewing. It is for the stitching lines to connect solidly as part of the structure when viewing the bag as a whole.

    ■ The Second Reason: Easy to Reproduce Results in Repeated Production

    If it is a one-off piece, you can adjust the pulling tension of the thread based on the feel of your hands that day. However, it's a different story if you are making multiple items from the same pattern or communicating work standards clearly to others through pattern documents. When applying the same thread thickness, hole size, stitch spacing, and pulling force again, similar results must be achieved.

    Vinymo MBT is perfectly suited for such repeated production. By using a thread of the same specification, the stitch proportions confirmed in the initial work can be reproduced quite stably in the next project. A good pattern should not rely solely on the maker's coincidental hand skills. Even when someone else applies the same standards, the result should come close to the originally intended shape and balance.

    ■ The Third Reason: Great for Considering the Usage Environment

    A bag is not an exhibit kept in a display case; it is an item carried by hand every day. The handles are constantly in contact with human hands, and the bottom and corners create friction against clothes or surrounding objects. It is also fully exposed to rain, moisture, sunlight, and temperature changes.

    Polyester thread generally absorbs less moisture and maintains its color and physical properties stably. Vinymo MBT is also excellent for stitching bags or wallets used daily. Especially for parts that repeatedly bear weight—such as handle attachments, bag bottoms, and openings—you must consider not only the appearance but also the stability to withstand the test of time.

    비니모 MBT를 사용한 가방의 핸들

    ■ Does Vinymo MBT Also Need Wax?

    The bonding treatment of Vinymo MBT does not mean the same thing as waxing. The bonding treatment keeps the thread twist from unraveling, while wax controls the friction and smoothness during sewing.

    I believe that, depending on the working conditions, Vinymo MBT can also be lightly waxed. When passing through long stitch lines or when the friction on the leather edges is high, a little wax helps. However, applying too much wax can attract dust, leave marks on light-colored leather, or make the stitch surface look dull. It is better to apply it thinly and evenly, just as much as needed.

    ■ Then, When Should Natural Linen Thread Be Used?

    It is not that I don't use natural linen thread at all. In the following types of work, the charm of natural linen thread actually shines much brighter.

    • When emphasizing the process of leather aging and breaking in naturally over time
    • When you want to show the unique texture of hand-stitching as a visual element
    • When a heavy, traditional atmosphere is needed
    • For projects where you want to highlight a human touch rather than perfect uniformity

    The subtle fibrous feel of natural linen thread blends very naturally with the process of the leather's color deepening. The thread itself also changes slightly along with the leather, leaving traces of time on the finished product. Therefore, it is right to first consider what atmosphere and usage conditions you are aiming for before choosing a thread.

    시험 봉제 과정

    ■ The First Thing I Check When Choosing a Thread

    When handling new leather or a new pattern, I do not jump straight into the main work. I cut the exact same leather to be used for the project and do a short test stitch.

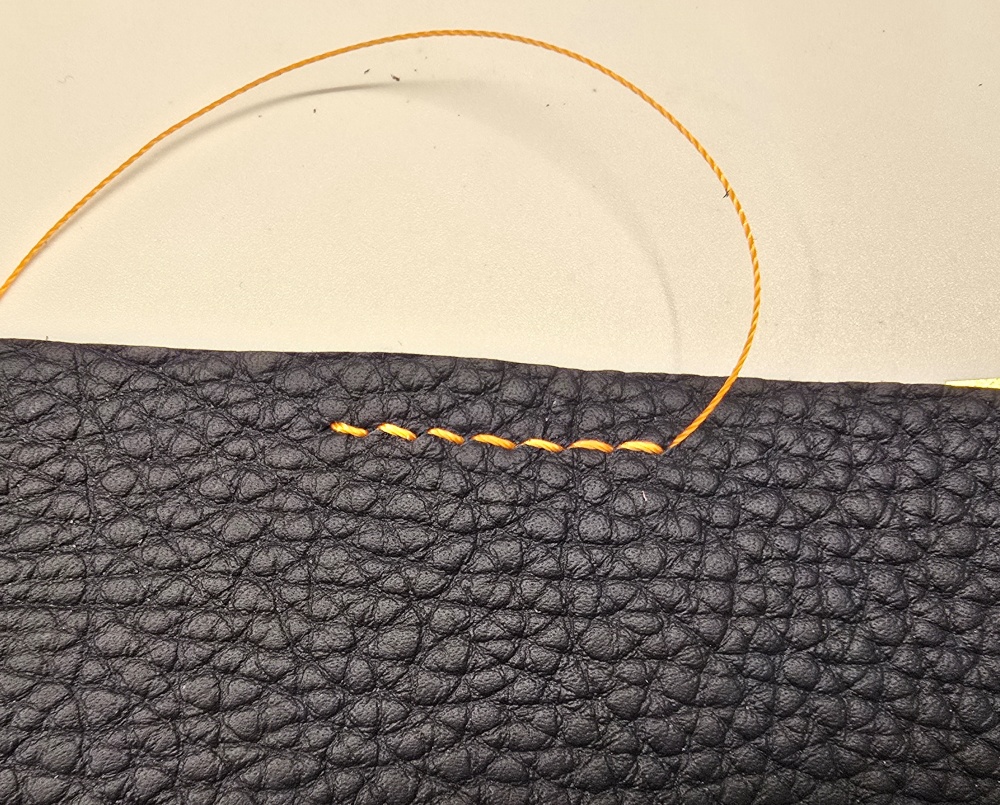
    First, I check whether the thread passes through the stitching hole too loosely or too tightly. Next, I observe if the leather surface dents or the hole tears lengthwise when the thread is pulled. You shouldn't just look at the appearance on the front; you must also carefully check if the thread sits neatly on the back. Finally, I bend the stitched leather multiple times to ensure the thread does not pop out. A test stitch of just ten stitches can prevent numerous problems in advance.

    ■ What is More Important Than Good Thread is the Right Combination

    In leathercraft, people often try to find only the most expensive or the toughest thread. However, a single thread cannot be the answer for every project. Natural linen thread is excellent for expressing the beauty of handcrafting, while Vinymo MBT provides the reliable stability needed for maintaining uniform shapes and everyday use.

    The reason I use Vinymo MBT more often is not that it is unconditionally superior, but because it better suits the framework of the bags I make, my production methods, and the requirement to maintain shape over a long period. Choosing a good thread is not merely about picking a famous brand. It is about finding the perfect match so that the thickness of the leather, the structure of the pattern, the stitch spacing, and the purpose of the item do not conflict with each other.
  • Why the Order of Leather Bag Construction Matters

    Construction Order is Not Just a Sequence of Tasks

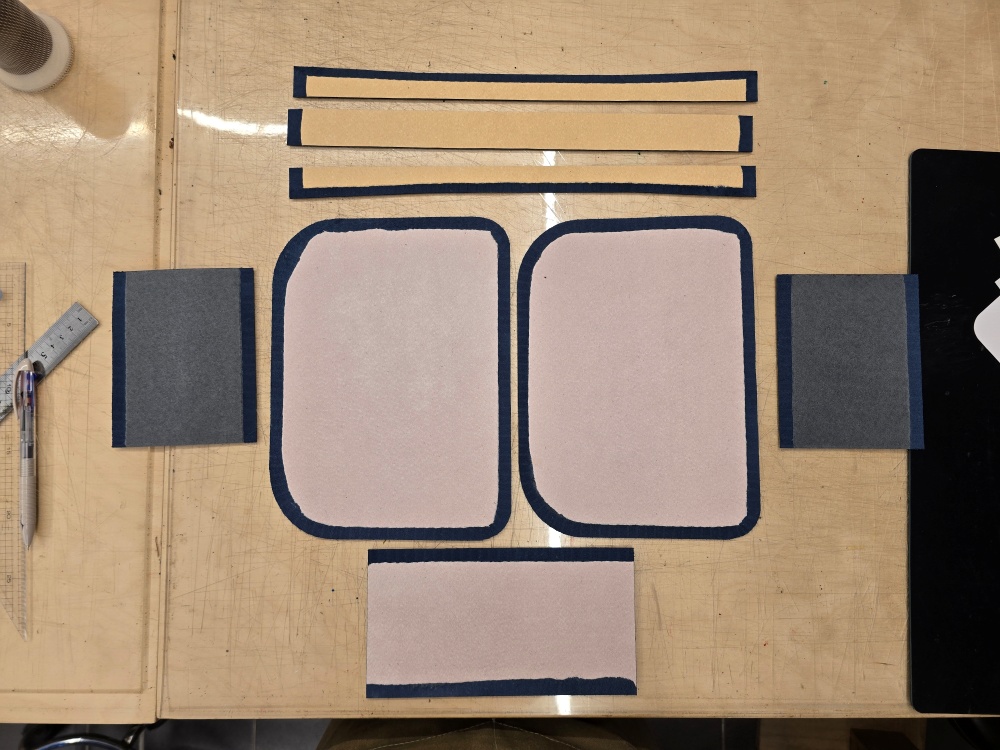
    The process of making a bag in leathercraft is not simply a task of piecing parts together. The construction order is a core blueprint directly linked to the bag's structural stability. You must exactly follow which parts to join first and when to finish the edges to fully maintain the intended three-dimensional shape.

    재단된 가죽 부품 순서대로 놓은 사진

    Problems Caused by Incorrect Construction Order

    If even a single step in the order gets twisted, irreversible problems occur in a chain reaction. If you miss a spot that needs to be glued first, the structure distorts, and if you assemble ignoring the order, there will be no space for the needle to enter, rendering the science of saddle stitchinguseless and resulting in an impossible-to-stitch state. Furthermore, failing to punch holes in advance prevents the proper use of the science of the awl, making a clean finish impossible and ultimately leading to a decline in overall quality.

    접착 과정 사진

    Designing the Construction Order in Advance at the Pattern Stage

    The answer to Why a Good Bag is Already Completed on Paperultimately lies in the 'order'. When building a three-dimensional framework using traditional manual patterns rather than relying on grid paper, a meticulous calculation of the order in which these parts will be joined must already be completed in your mind. Perfect design is an insight that encompasses the entire construction process.
    박음질 과정 사진

    Luxury Brands Also Standardize Their Workflow

    Even in the workshops of luxury brands boasting decades of history, the assembly order is managed most strictly. The secret to maintaining consistent high-end quality regardless of the craftsman's touch is an unwavering construction manual established through numerous trials and errors.

    A Good PDF Pattern Includes the Construction Order

    For this reason, a highly perfected PDF pattern does not end with a simple list of dimensions and lines for cutting leather. It must include an 'Assembly Guide' that clearly indicates the order in which to skive, glue, and assemble. You must be able to fully understand the entire workflow just by looking at the pattern blueprint for it to be a truly good pattern.

    완성 직전 사진

    Conclusion

    A good bag begins not with flashy techniques or hardware, but with the correct order and solid fundamentals. Slowly but solidly, the process of completing it while following the designated sequence is perhaps the true charm of leathercraft.

  • Leather Grain Direction: The Invisible Rule That Determines Bag Strength

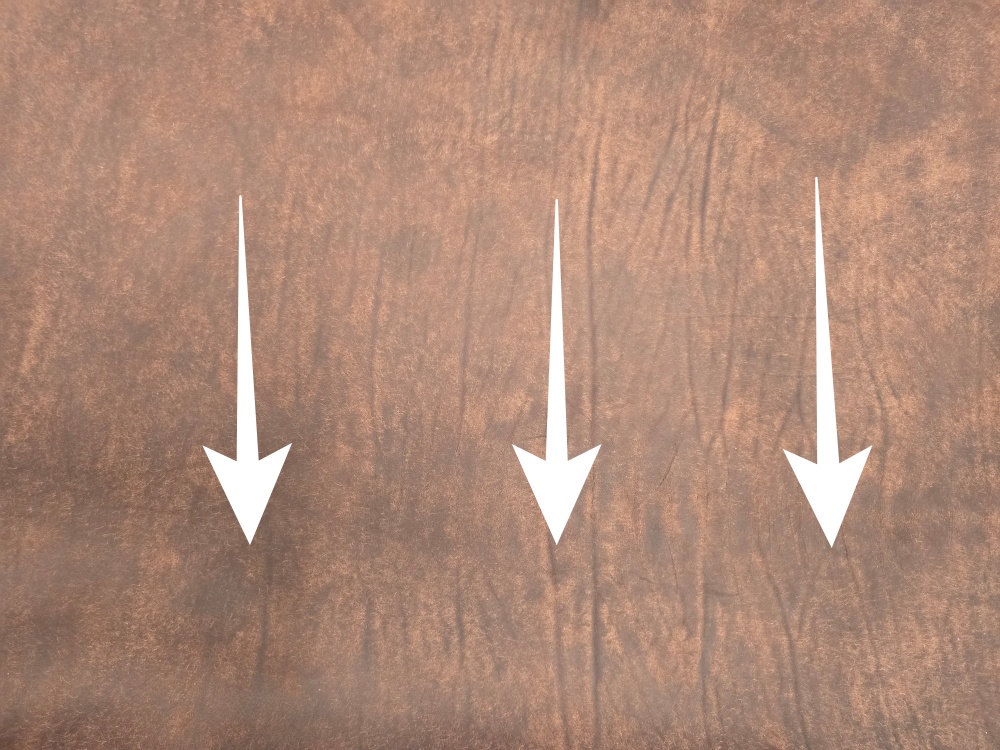
    Many people assume that, unlike fabric, leather can be cut in any direction. However, this is actually not the case. Leather is never a perfectly uniform material, and there is a distinct directionality in the arrangement of its fibers depending on the part of the hide and how the animal's skin grew.

    Reading this subtle flow of fibers, known as the 'grain direction,' is the crucial first step in crafting a sturdy bag.

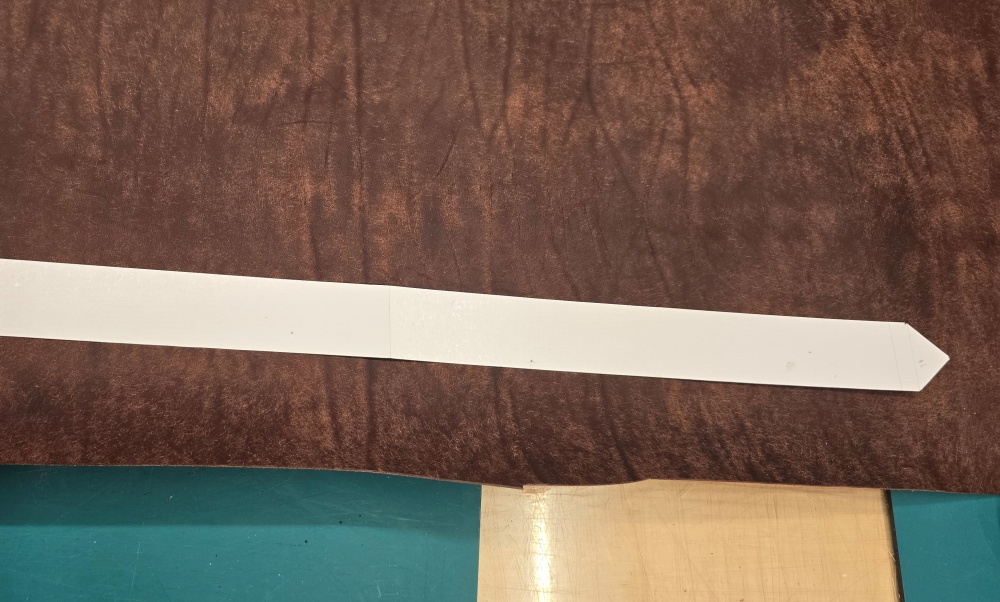
    Depending on the direction it is pulled, leather exhibits completely different levels of tension and stretch. The 'vertical direction' running along the spine has a dense structure, making it the toughest and least prone to stretching. On the other hand, the 'horizontal direction' toward the belly or the diagonal 'bias direction' is relatively flexible and stretches

    If you ignore these characteristics and cut the leather, the bag might look fine at first, but it will inevitably lose its structural shape during use.

    The most intuitive examples are the bag's handles and straps. What happens if you cut a handle, which must constantly bear a heavy load, in a direction where the leather easily stretches? Over time, the leather will stretch out, thin out, and even twist unpleasantly. Parts that need to withstand weight must always be cut along the vertical grain direction, where stretching is minimal, to maintain a solid shape and stability for a long time.

    It’s not just the handles. The bottom, which supports the bag's frame, and the side panels, which need volume, require entirely different physical properties. The bottom, holding the heavy contents, should be cut in the firm grain direction to prevent sagging, while the side panels or pockets, which need flexible curves, should utilize the more stretchable direction. Assigning different grain directions according to the role of each part—this is what we call invisible structural design.

    All these processes must be perfectly determined at the pattern-making stage, long before a knife touches the leather. A piece of graph paper with merely an outline drawn on it is not a complete pattern. Even if you use the finest Italian or French leather, it cannot fully showcase its value if cut while ignoring the grain. A truly calculated blueprint, like precision manual patterns, must include not only the simple shape but also arrows indicating the specific grain direction in which that part should be cut.

    A good bag is not completed simply by using good leather. The true quality of a masterpiece begins with an invisible design—deeply understanding the fiber direction of the leather and finding the correct grain direction that fits the structure before cutting.

    [Read Related Articles]