Category: Crafting Techniques

  • 가죽가방 지퍼 길이를 정하는 방법: 입구 구조·끝단 처리·개폐 범위

    How to Determine Zipper Length for a Leather Bag: Opening Structure, End Finishing, and Usable Opening

    The zipper length for a leather bag cannot be determined by the width of the bag alone. Even for bags of the same size, the appropriate zipper length varies depending on where the zipper is installed, how the opening moves, how the zipper ends are finished, and how wide the bag needs to open during use.

    If the zipper is too short, the bag will not open widely enough, making it difficult to insert and remove items. If it is too long, excess zipper may remain inside the bag, or the zipper may ripple along curved sections and interfere with the smooth movement of the slider.

    Within the complete leather bag-making process—a zipper is not a closure added at the end. It is a structural component whose position, length, end finishing, and assembly sequence with the lining must be determined from the pattern-design stage.
    Overall Zipper Length and Usable Opening Length Are Different

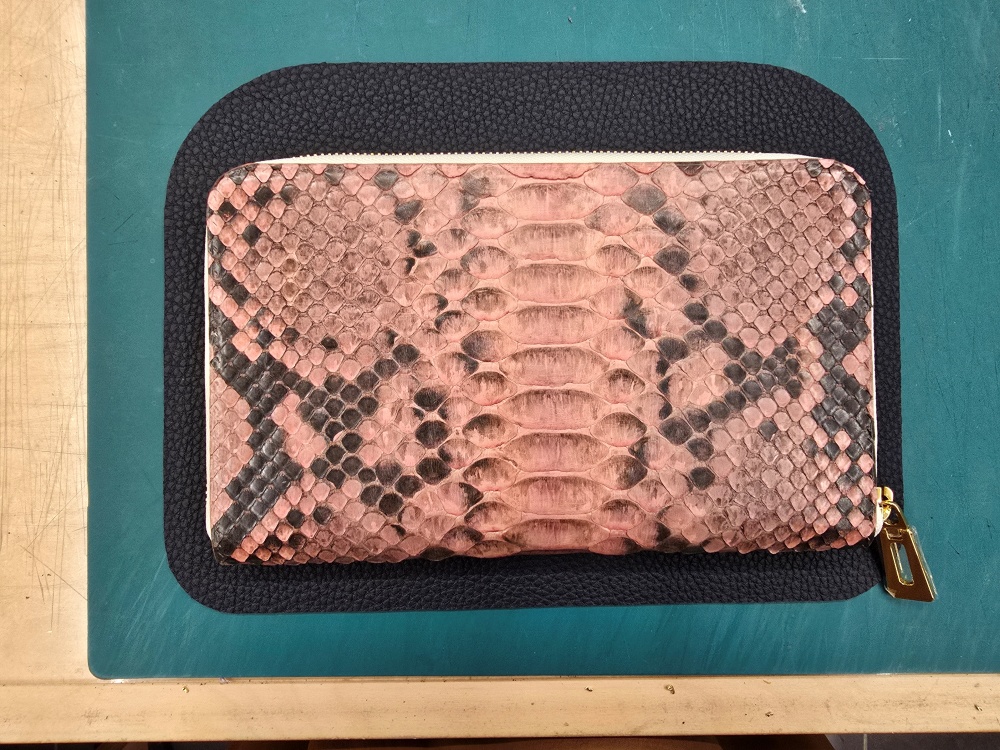
    When determining zipper length, distinguish between the overall length of the zipper tape, the length of the zipper chain, and the usable opening length through which the slider can actually move.

    Even when the zipper tape is longer than the bag opening, the usable opening becomes shorter if both ends are folded or secured to interior components. The positions of the zipper stops, the full travel range of the slider, and the length of the leather pieces covering the zipper ends also affect the actual opening range.

    When ordering or cutting a zipper, do not rely only on its stated length. First determine exactly where the finished zipper should begin and end its opening movement.

    The Finished Opening Width Cannot Simply Be Used as the Zipper Length

    Just as leather bag pattern measurements differ from finished dimensions—zipper length cannot simply be copied from the finished width of the bag opening.

    The required length depends on whether the zipper stops precisely at both ends of the opening or extends beyond one or both ends so that the bag can open more widely. You must also check whether the zipper lies along a straight section of the body panel or continues around the curve of the gusset.

    A bag with a 30 cm opening does not necessarily require a 30 cm zipper. The length of the leather pieces covering the zipper ends, the stitch-line position, seam allowances, the connection with the gusset, and the space occupied by the slider must all be considered.
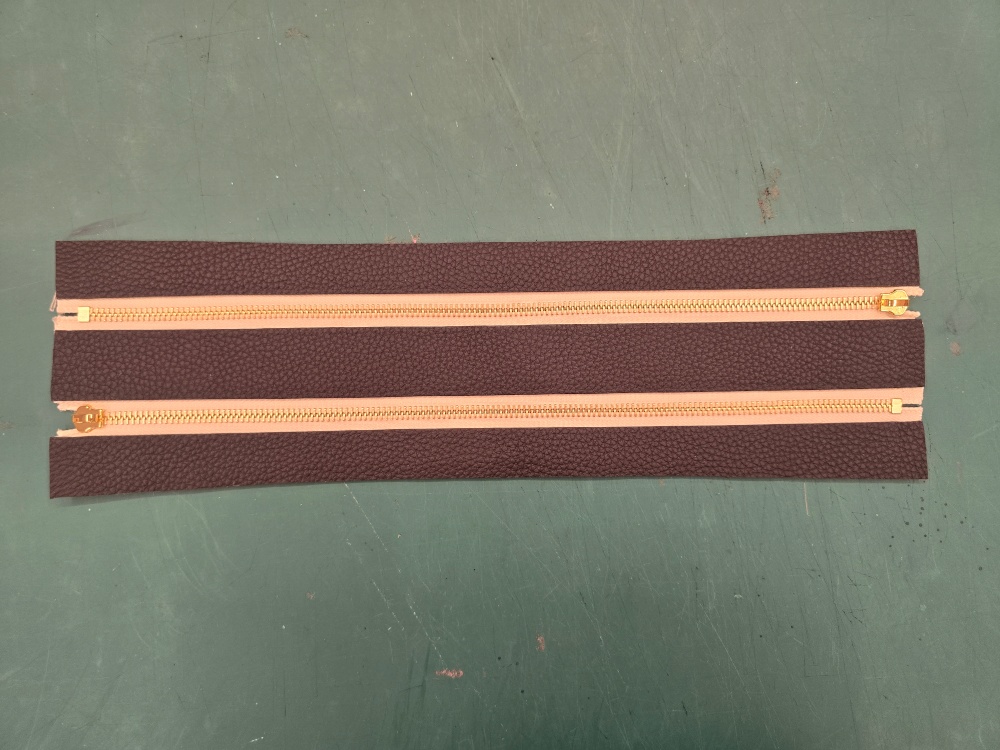
    가죽가방 지퍼의 시작점과 종료점

    Determine the Required Opening Range First

    Before determining the zipper length, consider what items will be placed inside and removed from the bag. Even when the exterior dimensions are sufficient, the interior space cannot be used effectively if the zipper opening is too narrow.

    Check the following first:

    • The size of the largest item that will be placed inside the bag
    • Whether the item will be inserted vertically or at an angle
    • Whether the bag opening needs to be operated with one hand
    • Whether an interior divider or pocket restricts the opening range
    • Whether there is enough space for the hand when the slider is fully open
    • Whether the zipper ends catch on anything inside the bag

    For a bag designed to hold wide items such as a laptop or documents, both the opening width and the extent to which the sides spread apart are important. For a small wallet or interior pocket, check whether there is enough room for the fingers to enter and grip the slider.

    Zipper Starting and Ending Points Determine the Bag’s Usability

    The zipper’s starting and ending points affect both the appearance of the bag and its practical usability.

    If the zipper begins inside the ends of the opening, closed sections remain on both sides and reduce the usable opening range. Extending the zipper toward the gusset allows the bag to open more widely, but the excess zipper ends must be secured when they are not in use.

    The resting position of the slider when the zipper is closed must also be checked. If the slider strikes a handle attachment or metal fitting, operating the zipper becomes inconvenient and repeated friction may damage the leather surface.

    For a bag in which left-to-right symmetry is important, the resting position of the closed slider should be determined during the design stage together with the zipper’s starting and ending points.

    A Zipper Installed Along a Curve Must Do More Than Match the Length

    A zipper installed along a straight line and one installed around a curve operate under different conditions.

    Zipper tape is flexible to a certain extent, but forcing it around a tight curve causes excess tape to gather on the inside while the outside is stretched. If stitched in this condition, wrinkles may form around the zipper or the zipper chain may twist and restrict the slider’s movement.

    Check the following when installing a zipper along a curve:

    • Does the zipper tape lie naturally along the curve?
    • Is the excess tape on the inside free from folds and overlaps?
    • Is the outer section of the tape free from excessive tension?
    • Does the slider pass smoothly through the curved section?
    • Do the left and right curves begin at matching positions?
    • Does the leather opening remain flat instead of rolling inward after stitching?

    Because the curve radius, leather thickness, and flexibility of the zipper tape vary, a single fixed formula cannot determine the correct length in every case. The most accurate method is to make a small test piece using the actual leather and zipper and then check how the zipper operates.
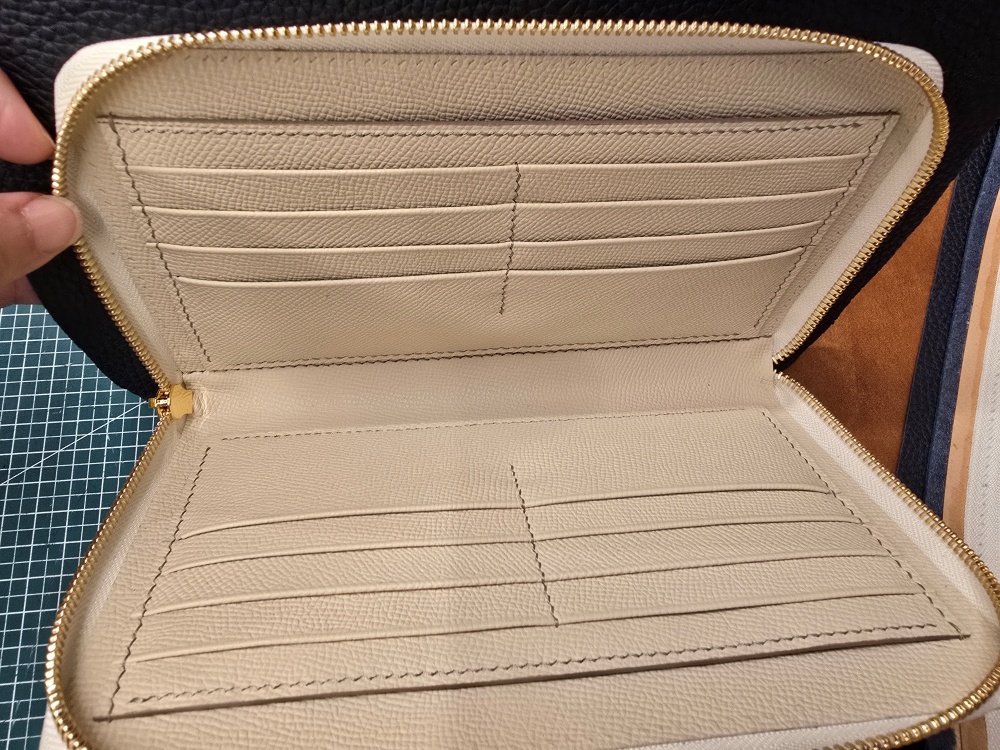
    가죽가방 지퍼를 열었을 때의 개방 범위

    Zipper Ends Must Be Structurally Finished, Not Simply Left Loose

    If the zipper ends are simply pushed inside the bag, they may change direction during use or catch on the lining and stored items. Repeated movement can also cause the tape ends to unravel or allow the slider to come off.

    The ends should be wrapped with leather, secured inside separate zipper-end pieces, or stitched so that they cannot move within the bag structure. Whichever method is used, it must not interfere with the movement of the zipper chain or slider.

    If the leather covering the zipper ends is excessively thick, both ends of the opening may bulge. If it is too thin or short, repeated opening and closing may stretch the stitching holes or cause the end piece to come loose.

    The size of each zipper-end piece should be determined by considering the zipper-tape width, leather thickness, stitch-line position, and surrounding reinforcement together.

    Skiving and Reinforcement Around the Zipper Must Be Calculated Together

    At the zipper installation area, the exterior leather, zipper tape, lining, and reinforcement may overlap in several layers. If this combined thickness is ignored during assembly, the opening may become excessively stiff or the zipper tape may be pushed inward.

    If the leather is skived too thinly, the area around the stitch line becomes weak and the holes may stretch during repeated use. If it is not skived sufficiently, excessive thickness around the zipper may cause the slider to rub against the leather or prevent the opening from folding naturally.

    The reinforcement must support the zipper stitch line without becoming so rigid that it restricts curves and folds. If the reinforcement ends too abruptly, stress may concentrate along its boundary and create a visible line or crease on the leather surface.
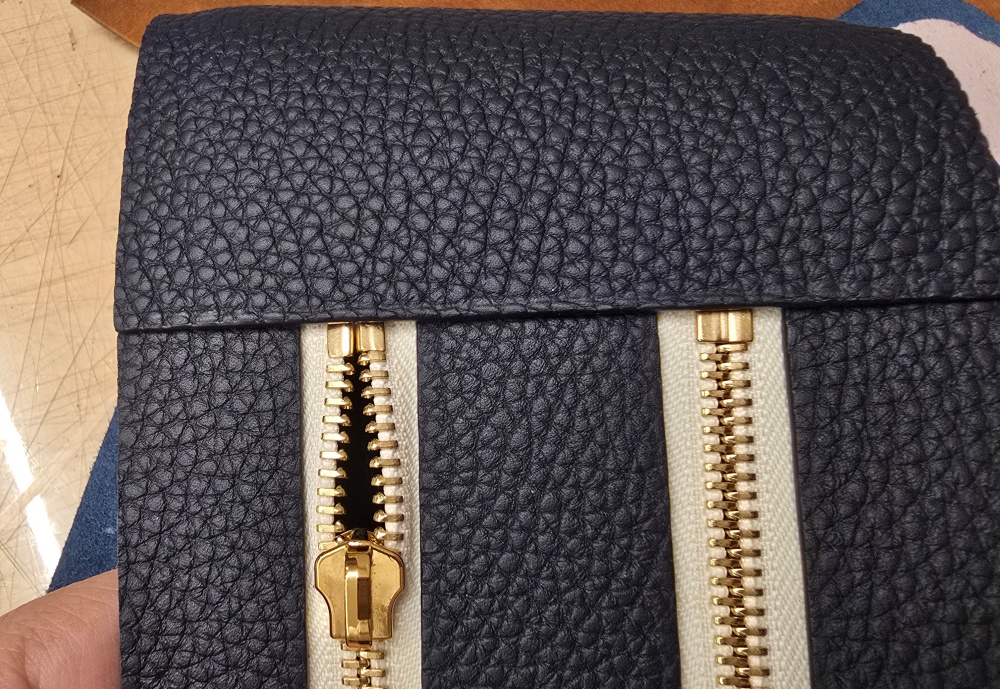
    가죽과 지퍼 테이프의 봉제선 및 끝단 마감

    For an Interior Zipper Pocket, Check the Space Needed for the Hand

    The full zipper-opening length of an interior pocket is not always completely usable. The slider and end pieces occupy space at both ends, while the depth of the pocket bag and the position of its opening also affect hand movement.

    Why leather bag lining design matters—the position and size of a zippered pocket can affect not only the interior storage space but also the exterior form of the bag.

    If the pocket zipper is positioned too high, it may overlap with the main zipper or handle reinforcement near the top of the bag. If it is too low, stored items become difficult to remove and the pocket bag may touch the bottom of the bag.

    When the pocket is intended for specific items such as cards, coins, or a mobile phone, check the size of those items, the direction in which the hand enters, and the actual depth of the pocket bag before deciding the zipper length.

    Control Stitching Tension to Prevent the Zipper from Rippling

    Zipper tape is thinner and more flexible than leather, so it can easily stretch during stitching. Pulling the thread too tightly or stretching the tape in one direction while stitching can cause ripples around the zipper.

    Secure the zipper and leather in stable positions before stitching and maintain a consistent distance from the edge to the stitch line. During stitching, open and close the zipper periodically to confirm that the slider continues to move smoothly.

    If the zipper is tested only after stitching is complete, it may be difficult to identify the section causing the problem. The zipper’s movement should be checked repeatedly during stitching, especially around curves and end sections where several materials overlap.

    Test Zipper Operation Before Closing the Bag

    Do not proceed immediately to the next assembly stage simply because the zipper has been installed. Once the body panel and gusset have been joined and the bag has been closed, access to the inside of the zipper may become difficult.

    Check the following:Check the following:

    • Does the zipper open and close smoothly from beginning to end?
    • Does the slider move without catching on the leather or lining?
    • Are both sides of the opening the same height when the zipper is closed?
    • Is the zipper tape free from twisting or rippling toward one side?
    • Do the zipper-end pieces remain securely in place?
    • Does the open zipper provide the required usable opening?
    • Do the interior divider and pockets remain clear of the slider’s path?
    • Does the stitch line remain stable after repeated opening and closing?

    The zipper should be tested both with the bag empty and with the items it is intended to carry. Check whether the zipper is placed under excessive tension when the weight of the contents pulls the bag opening apart.
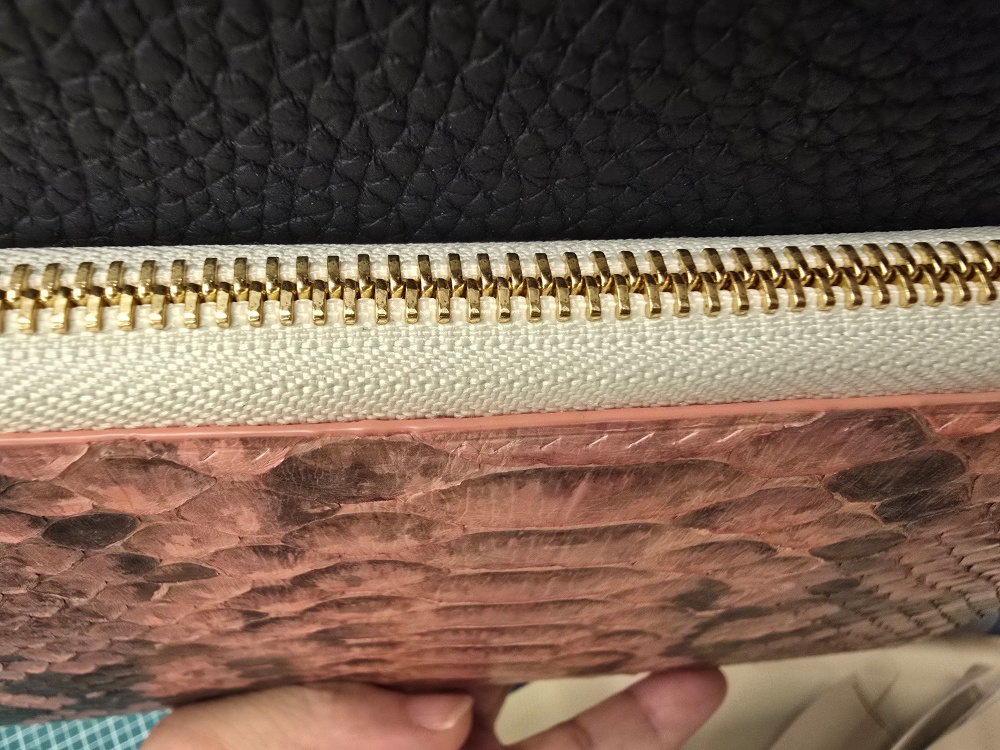
    지퍼를 닫았을때의 상태

    Zipper Length Is the Result of Calculating Both Use and Structure

    The zipper length for a leather bag cannot be determined solely from the finished width of the bag or the number printed on the zipper product. The usable opening range, starting and ending points, curve shape, end finishing, thicknesses of the leather and lining, and assembly sequence must all be calculated together.

    If the zipper is too short, the interior space cannot be used effectively. If it is too long, the end finishing and operational stability may be compromised. The zipper’s function should therefore be defined during the pattern stage and tested using the actual materials.

    Accurate zipper design is not simply about making a bag close properly. It is functional design that allows every action—from opening the bag and placing items inside to closing it again—to flow naturally.
  • 가죽가방 몸판과 옆판을 정확하게 연결하는 방법: 중심점·곡선·봉제 장력

    How to Accurately Join a Leather Bag Body Panel and Gusset: Alignment Points, Curves, and Stitching Tension

    Joining a leather bag body panel and gusset may appear to be a simple matter of attaching two flat components. In practice, however, this is a critical stage that determines the bag’s three-dimensional form. Even when both components have been cut accurately, misaligned reference points, misplaced curves, or inconsistent stitching tension can cause the bag to twist to one side or develop wrinkles around the corners.

    Within the complete leather bag-making process—joining the body panel and gusset marks the point at which a flat pattern becomes a three-dimensional structure. The goal is not to force the two endpoints together. Their lengths and curves must be distributed evenly according to the alignment marks and stitch lines shown on the pattern.

    Compare Stitch-Line Lengths, Not Cutting-Line Lengths

    Before joining the body panel and gusset, comparing only their cutting edges does not provide an accurate indication of how they will fit after assembly.

    On straight components, the difference between the cutting-line length and stitch-line length may be small. On curved components, however, the outer cutting edge and inner stitch line have different lengths. This difference becomes especially important around bottom corners with a tight curve, where even a small change in the stitch-line position can alter the actual joining length.

    The correct approach is therefore to compare the lines along which the stitching will be placed, rather than simply comparing the outer edges of the gusset and body panel.

    Just as leather bag pattern measurements differ from finished dimensions—the answer lies in this same structure. A pattern must account not only for the intended finished size but also for leather thickness, stitch lines, curve radii, and assembly allowance.

    몸판과 옆판이 연결된 상태에서 곡선 부분과 봉제선이 보이는 사진

    Center Points and Alignment Marks Establish the Assembly Reference

    If only the starting and finishing points are matched and the components are joined continuously in one direction, any excess length may collect in a single area. Everything may appear to fit at first, only for the gusset to become too long or too short near the final section.

    To prevent this problem, reference marks should be placed at the following positions:

    • Top and bottom center points of the body panel
    • Center point along the length of the gusset
    • Points where the left and right bottom curves begin
    • Points where a straight line transitions into a curve
    • Left and right reference points used to confirm handle and pocket placement
    • Assembly starting and finishing points specified on the pattern

    First align the center points of the body panel and gusset. Then confirm that the marks at the major curves and corners correspond with one another. The length between each pair of reference points should then be aligned and secured separately so that any minor difference is distributed evenly around the perimeter.

    A center point is not simply a mark indicating the middle. It is a structural reference that prevents the components from shifting to one side during assembly.

    Do Not Glue the Entire Perimeter at Once

    If adhesive is applied around the entire perimeter and the body panel and gusset are attached in a single step, correcting a misaligned section becomes difficult. On curves, one component may adhere first and create a length difference on the opposite side.

    It is more reliable to align the main reference points temporarily and then divide the perimeter into smaller sections. Straight sections and curved sections should be treated separately, with each section properly aligned before moving on to the next.

    Check the following during the gluing process:

    • Is the distance from the edge to the stitch line consistent?
    • Do the center and corner marks meet accurately?
    • Has either piece of leather stretched in one direction?
    • Are there wrinkles or lifted areas along the bonded surface?
    • Is the height of the gusset consistent on both sides?
    • Are areas containing several layers excessively thick?

    Gluing is not merely a temporary step that makes stitching easier. It holds both components in their intended positions while they are being stitched. Adhesive, however, should never be used to conceal a mismatch in length.

    가방 몸판의 곡선을 따라 옆판을 연결한 모습

    Do Not Stretch the Leather to Force the Curves to Match

    When the body panel and gusset do not fit perfectly, it can be tempting to stretch the more flexible component until the endpoints meet. However, stretched leather will continue trying to return to its original state after stitching. This can cause the corner to lift or create wrinkles on one side of the bag.

    Instead of forcibly stretching the leather, distribute the length gradually between the alignment marks. Spreading a minor difference across several sections produces a more natural finished curve than concentrating it in one location.

    Leather cut from the belly area can stretch easily because its fiber structure is relatively loose. Even when the body panel and gusset are cut from the same hide, they may stretch differently depending on their location and grain direction.

    If a component has already stretched, do not gather the excess length into a corner and glue it in place. Recheck the pattern, cutting dimensions, and grain direction before proceeding.

    Corner Thickness Affects the Joining Length

    At the bottom corners of a leather bag, the body panel, gusset, reinforcement, and lining may overlap in several layers. If these areas have not been skived sufficiently, the added bulk inside the curve can push the gusset outward.

    Even when the pattern measurements are accurate, excessive assembly thickness can cause the following problems:

    • The corner curve becomes angular.
    • The stitch line is pushed toward the outer edge.
    • The gusset extends beyond the body panel.
    • The bottom of the bag does not rest flat.
    • The lining or interior divider pulls toward one side.

    The skiving range and final thickness around the corners must therefore be checked before assembly. Skiving is not simply a way to make stitching easier. It controls the amount of space occupied by overlapping materials inside a curve.

    Stitching Holes Must Correspond on Both Components

    When the body panel and gusset are pre-punched separately, the total number of holes and the hole positions at major reference points must correspond. Pay particular attention to the holes at the beginning and end of each curve and at the center points.

    If the two components have different numbers of holes, one side may have unused holes or the stitch spacing may become irregular near the end. Trying to solve the problem by suddenly reducing the spacing or passing through the same hole more than once around a corner will interrupt the flow of the finished stitch line.

    When holes are punched after the components have been glued together, or when an awl is used to pierce both layers, the tool must pass through the leather at a consistent angle. If it tilts, the holes may appear even on the front while the stitch line on the back shifts toward the edge.

    안정적인 타공과 바느질로 연결한 옆판

    Stronger Stitching Tension Does Not Create a Stronger Join

    Pulling the thread excessively tight may initially make the two components feel firmly connected. However, excessive tension can draw the stitch line inward and distort the curve.

    Around corners, the direction of the thread changes continuously. Even when the thread is pulled with the same force used on a straight section, the pressure transferred to the leather may be different. Both threads should be pulled in consistent directions with even tension, while checking that the stitches are not cutting into the leather surface.

    Excessive stitching tension can cause the following problems:

    • The leather becomes indented around the stitch line.
    • The gusset edge develops a wavy appearance.
    • The corner curve rolls inward.
    • The left and right body panels take on different shapes.
    • The stitching holes become stretched or torn.

    Thread connects the two components, but it cannot correct inaccurate measurements or poor alignment. Any part that does not fit properly before stitching should be corrected before the stitching begins.

    Why Interior Components Must Be Completed First

    In a bag with two compartments, an interior divider, or zippered pockets, the internal components should be completed before joining the body panel and gusset around the perimeter.

    Once the body panel and gusset have been stitched together, the space available for hands and tools inside the bag becomes limited. Adding a divider, zippered pocket, or reinforcement at this stage can make accurate stitching difficult and may require the completed exterior seam to be opened again.

    Why the order of leather bag construction matters—each stage determines the space and working conditions available for the next one. Before closing the exterior perimeter, check the interior pockets, dividers, reinforcement behind the handle attachments, and lining.

    In this two-compartment bag, the front zippered wallet, interior storage structure, and handles were completed before the perimeter of the body was joined. This sequence is not merely more convenient. It is a planned construction method that protects both the internal functions and the exterior shape.

    Inspect the Join as a Three-Dimensional Form

    After stitching the body panel and gusset, do not inspect only the seam. Stand the bag upright and examine its complete three-dimensional form.

    Check the following:Check the following:

    • Are the left and right sides the same height when viewed from the front?
    • Has the gusset twisted toward one side?
    • Does the bottom rest flat?
    • Are the curves at the left and right corners symmetrical?
    • Is the center of the bag opening correctly aligned?
    • Are both handles positioned at the same height?
    • Is the interior divider pulling the exterior inward?
    • Are the stitch spacing and tension consistent around the entire perimeter?

    The bag should be examined both empty and with weight inside to simulate actual use. If one body panel sags or the gusset twists when the bag is filled, recheck the handle position, interior divider, and perimeter assembly.

    몸판과 옆판의 둘레 연결이 끝난 가방을 세워 전체 형태를 확인

    Accurate Perimeter Assembly Completes the Bag’s Form

    A leather bag body panel and gusset cannot be joined accurately by matching only their endpoints. The stitch-line lengths, center points, curve positions, corner thicknesses, and stitching tension must work together for the finished bag to maintain a balanced form.

    If the lengths do not match during assembly, do not attempt to solve the problem by stretching the leather or pulling the thread more tightly. Recheck the pattern’s stitch lines, reference points, skiving range, gluing sequence, and hole positions.

    Joining the body panel and gusset is not simply the final step of closing the bag’s outer edge. It is the critical process that confirms whether the flat pattern has been transformed into the intended three-dimensional structure.

  • Why Leather Edge Finishing Cannot Be Completed in One Step: The Proper Order of Sanding and Edge Painting

    When a leather item is completed, its overall shape and color are usually the first things we notice. However, when viewed up close, the quality of the craftsmanship is often revealed by the leather edges.

    No matter how fine the leather may be, the finished piece will not look refined if the cut layers are misaligned, the bonded edges are separating, or the edge paint has an uneven surface.

    By contrast, when multiple layers of leather merge into one smooth line and the edge remains consistent in color and thickness, even a small leather item can display a high level of craftsmanship.

    Leather edge finishing is not simply the final application of color. It is a structural finishing process created through a sequence of cutting, bonding, skiving, and sanding.

    마감 전 가죽 단면과 엣지코트 작업 후 단면 비교

    Edge Paint Cannot Conceal an Irregular Edge

    Beginners often assume that applying several layers of edge paint will smooth out an uneven edge. However, edge paint alone cannot correct misaligned layers or sections where the bond has begun to separate.

    Applying one heavy coat may initially appear to cover the surface. As it dries, however, the coating may become uneven or crack during use, making the irregularities of the edge even more noticeable.

    Edge paint cannot create the underlying structure of an edge. It is a final finishing material that adds color and a protective layer to an edge that has already been properly prepared.

    The alignment of the leather layers and the condition of the bond must therefore be checked before applying edge paint.

    A Clean Edge Begins with Accurate Cutting and Bonding

    When several pieces of leather are layered together, their cut lines must align precisely. If even one layer protrudes, that area may require excessive sanding, causing the finished outline to differ from the original pattern.

    Adhesive should also be applied evenly up to the edge. If the bond is weak near the edge, the leather layers may separate during sanding, allowing edge paint to seep into the gaps and create an irregular line.

    At folded areas or corners where several layers meet, the final thickness must be calculated in advance. If the relationship between leather thickness and skivingis not considered when the layers are assembled, some sections may become disproportionately thick, making it difficult to create a smooth edge profile.

    What to Check Before Finishing the Edge

    • Are the cut lines of the layered leather precisely aligned?
    • Is the bond secure all the way to the edge?
    • Does the thickness remain consistent across the skived areas?
    • Do the curves and corners match the original pattern?
    • Is the edge free of adhesive residue and loose leather fibers?

    Any problems discovered at this stage should be corrected before edge paint is applied.

    The Purpose of Sanding Is Not to Remove as Much Material as Possible

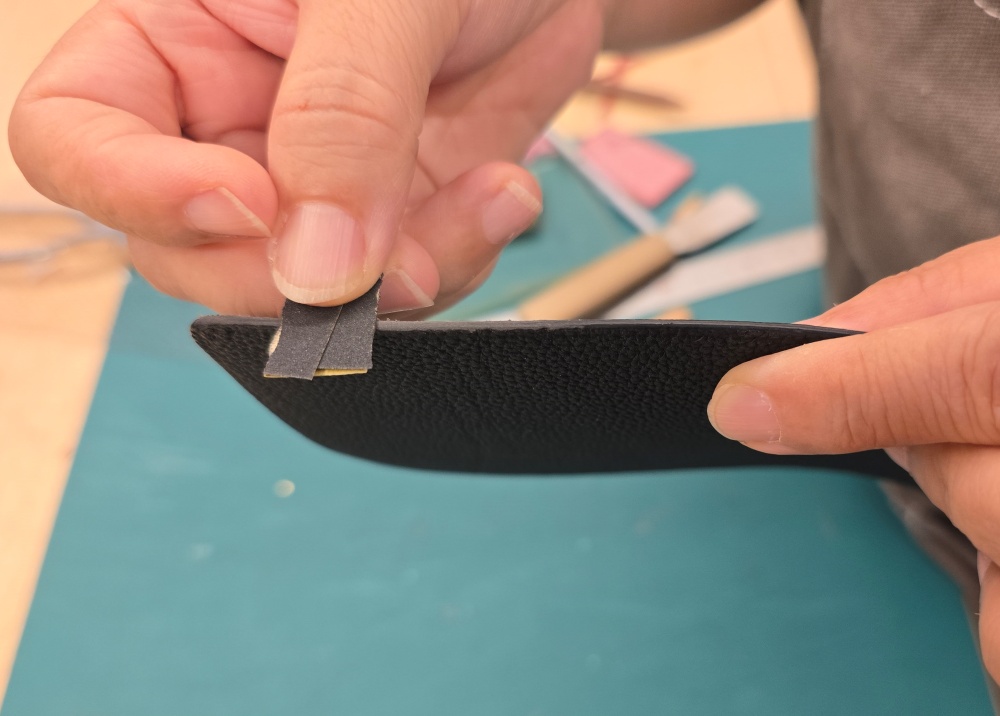
    Sanding brings multiple layers of leather into a single, even surface and creates a stable foundation for the edge paint.

    The key is not to sand quickly with excessive force, but to maintain consistent pressure and direction. Concentrating on one area can distort a straight edge or create uneven widths.

    A relatively coarse abrasive can first be used to level major differences in height, followed by finer abrasives to refine the surface. The exact sanding sequence may vary depending on the type of leather, the condition of the edge, and the finishing product being used.

    Sanding is not simply a way to remove rough marks. It is the process of joining the leather layers into one surface while preserving the designed outline.

    Excessive sanding can round the corners more than intended or reduce the dimensions of the component. On handles and straps that must remain symmetrical, both edges should be compared frequently throughout the process.

    사포를 이용해 가죽 단면을 단계적으로 다듬는 과정

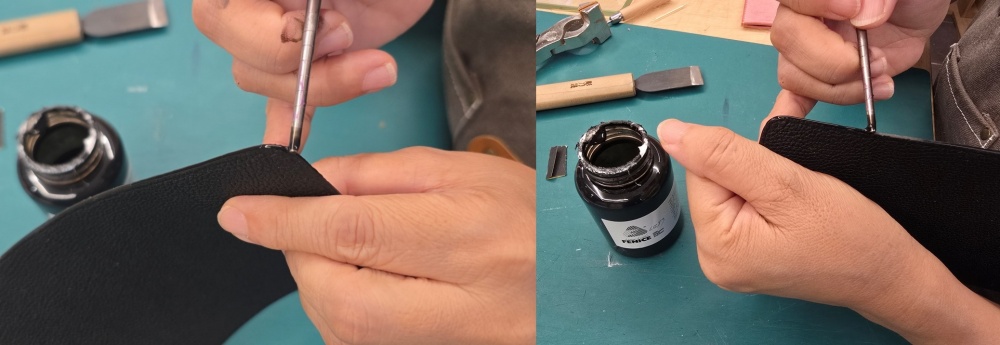
    Apply Edge Paint in Thin Layers and Allow It to Dry Fully

    A heavy coat of edge paint may seem like a way to reduce the number of applications. However, a thick layer can dry at different rates on the surface and underneath, and the paint can easily pool around curves and corners.

    The first coat is not intended to create a perfect gloss. Its main purpose is to reveal small irregularities and provide a foundation for the next sanding stage.

    After the coating has dried completely, the surface should be lightly refined. Thin applications and full drying should then be repeated as needed. Because recommended drying times and application methods vary by product, the manufacturer’s instructions should also be followed.

    What to Check After the First Coat

    • Does the edge paint cover the entire edge without gaps?
    • Has the coating pooled around corners or curves?
    • Have any gaps between the leather layers reappeared?
    • Are there any obvious marks left by the applicator?

    What to Check During the Second and Later Coats

    • Has the previous coat dried completely?
    • Are the surface level and color consistent?
    • Have the straight lines and curves retained their intended shape?
    • Has the coating become thicker than necessary?

    The number of coats alone does not determine the quality of the finish. Each layer should be applied only as needed after inspecting the condition of the edge.

    Slow Down When Working Around Curves and Corners

    It is relatively easy to apply edge paint at a consistent speed along a straight edge. On convex curves, concave curves, and sharply changing corners, however, the amount of paint can easily become uneven.

    Around curves, work more slowly to prevent the applicator from slipping off the edge and staining the leather surface. Avoid loading the tool with too much paint at once.

    Pausing at a corner can cause the edge paint to pool. When changing direction, maintain a continuous movement while keeping the amount of paint consistent.

    On edges that move repeatedly, such as handles and folded sections, the flexibility of the finished coating is just as important as its appearance. An excessively thick coating is more likely to become damaged through repeated bending and friction.

    직선과 곡선 가죽 단면에 엣지코트를 바르는 모습

    The Edge Line and Stitching Line Are Seen Together

    Along the outline of a bag, the edge line and stitching line run beside one another. If either line becomes uneven, irregularities in the other line also become more noticeable.

    If one side of the edge is sanded too heavily, the distance between the edge and the stitching will appear inconsistent. Conversely, if the stitch spacing and thread thickness are too visually dominant for the thickness of the edge, the edge line may appear comparatively weak.

    Therefore, when planning the relationship between thread thickness and stitch spacing, you should also consider the finished edge thickness and the edge line.

    • Avoid excessively thick thread on thin, delicate edges.
    • Balance the visual weight of the edge and stitching on thicker bag components.
    • Maintain a consistent distance between the stitching holes and the edge.
    • Check that the stitching line and edge line remain naturally parallel around curves.

    A well-finished edge and well-executed stitching are not completed independently. They share the same outline and work together to establish the proportions of the piece.

    Edge Color Is Part of the Design

    Using an edge paint color similar to the leather creates a calm and refined appearance. A strongly contrasting color, on the other hand, makes the edge itself a prominent design element.

    Contrasting colors attract attention, but they also reveal small irregularities and application marks more easily. The stronger the color contrast, the more precise the cutting and sanding must be.

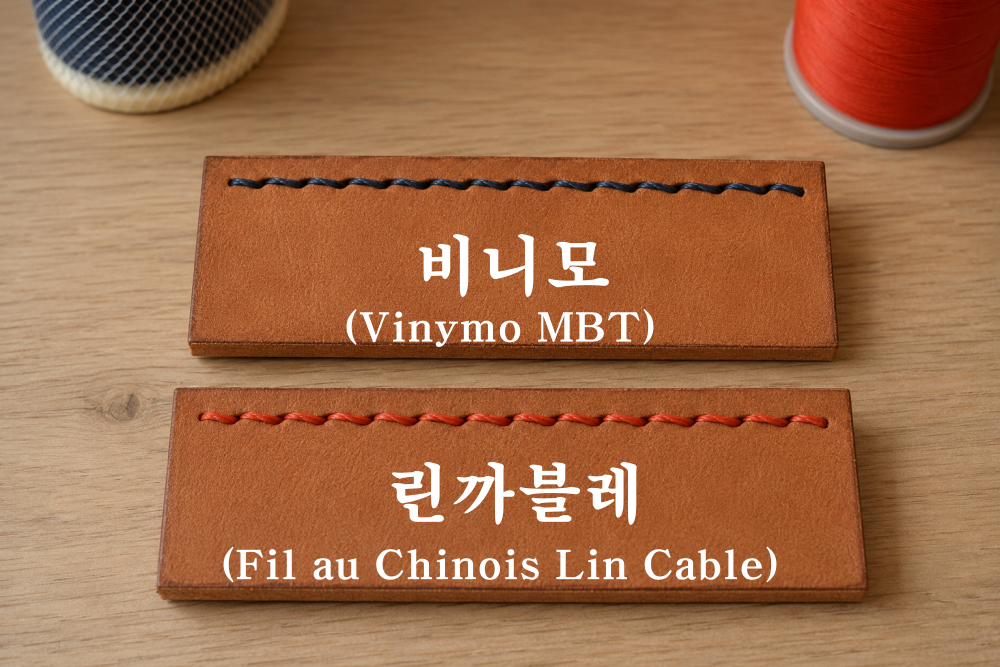
    The colors of the thread and edge paint should also be considered together. The criteria for choosing Vinymo MBTinclude not only thread thickness and stitching stability, but also the harmony between the leather and edge colors.

    Edge color should not be chosen to conceal mistakes. It is a design element that works with the leather, thread, and metal hardware to shape the character of the finished piece.

    Perform the Final Inspection Under Angled Light

    A finished edge should not be inspected only from the front. Angled light makes subtle waves and application marks visible that may otherwise remain hidden.

    Gently run a fingertip along the edge to check for sudden changes in height. The coating must be fully dry before touching it, as handling it too soon can leave marks on the surface.

    Final Inspection Checklist

    • Does the straight edge remain even without bending or wavering?
    • Are the curves symmetrical on both sides?
    • Are the edge color and thickness consistent?
    • Is the leather surface free of edge paint stains?
    • Are the folded areas free of cracking or lifting?
    • Is the distance between the edge line and stitching line consistent?
    측면 조명으로 완성된 가죽 단면을 검사하는 모습

    Edge Finishing Is the Result of the Entire Making Process

    A refined edge is not created simply by applying multiple coats of edge paint. Precise cutting, consistent skiving, secure bonding, and careful sanding that preserves the intended shape must come first.

    Only after thin applications and complete drying are repeated will multiple layers of leather begin to appear as one continuous edge.

    The quality of an edge finish is not determined by the final stroke of paint. It is the visible result of how accurately every preceding stage of construction has been completed.

    From a small card holder to a large bag, the edges reveal the maker’s judgment and working process without disguise. The habit of inspecting each stage without rushing produces leather goods that remain refined even after years of use.

  • 가죽공예 실 굵기와 목타 간격의 관계: 스티치 비례가 완성도를 결정한다

    [The Relationship Between Thread Thickness and Pricking-Iron Spacing: How Stitch Proportion Affects Quality]

    In leathercraft, thread is not simply a material for connecting pieces of leather. The thickness of the thread and the spacing of the stitches change the impression and balance of the bag, determining how refined the finished piece looks.

    Even with the same leather and the same pattern, the stitches can look delicate, overly heavy, or sparse depending on which thread and chisel you choose.

    To create good stitches, you shouldn't just choose the thread thickness; you must judge the chisel spacing, leather thickness, and the size of the piece as a single proportion.

    같은 목타 간격에서 실 굵기를 달리한 가죽 스티치 비교

    Thread Thickness Cannot Be Chosen in Isolation

    Using a thick thread makes the stitches look distinct and gives them a strong presence. However, if only the thread becomes thicker while the chisel spacing remains narrow, the stitches may push against each other, looking cramped, or the area around the holes may be unnecessarily emphasized.

    Conversely, a thin thread creates a delicate and calm impression, but if the chisel spacing is too wide, the stitch line may appear disconnected or give an impression of lacking strength compared to the size of the piece.

    Thread is not necessarily more luxurious just because it's thicker, nor more precise just because it's thinner. The most appropriate thread is the one that naturally suits the size of the piece, the thickness of the leather, and the stitch spacing.

    When choosing a thread, you should first look at the proportion the thread will occupy at the edge of the leather after stitching, rather than the thickness of the thread itself.

    Chisel Spacing Creates the Rhythm of the Stitches

    Chisel spacing determines the speed and rhythm at which the stitches are repeated. If the spacing is narrow, the stitches become dense, creating a delicate impression. If the spacing is wide, each stitch becomes clearly visible, creating a more relaxed and powerful atmosphere.

    Characteristics of Narrow Chisel Spacing

    • It suits small items like small wallets or cardholders well.
    • It is great for creating a refined impression when using thin leather and relatively thin thread.
    • Using it with thick thread can make the stitches overly dense.

    Characteristics of Wide Chisel Spacing

    • It suits large and structural parts like bags or handles well.
    • When combined with a moderately thick thread, it can highlight the presence of the stitches.
    • Using a thread that is too thin can make the spaces between the stitches look empty.
    같은 실을 사용하고 목타 간격을 달리한 가죽 스티치 비교

    Even if the indicated spacing of the chisel is the same, the actual impression of the stitches can vary depending on the shape of the blade, the size of the hole, and the angle at which the chisel is struck. Therefore, rather than choosing a chisel based solely on numbers, it is safer to confirm it through an actual test stitch.

    How to Understand Vinymo MBT Numbers and Thread Thickness

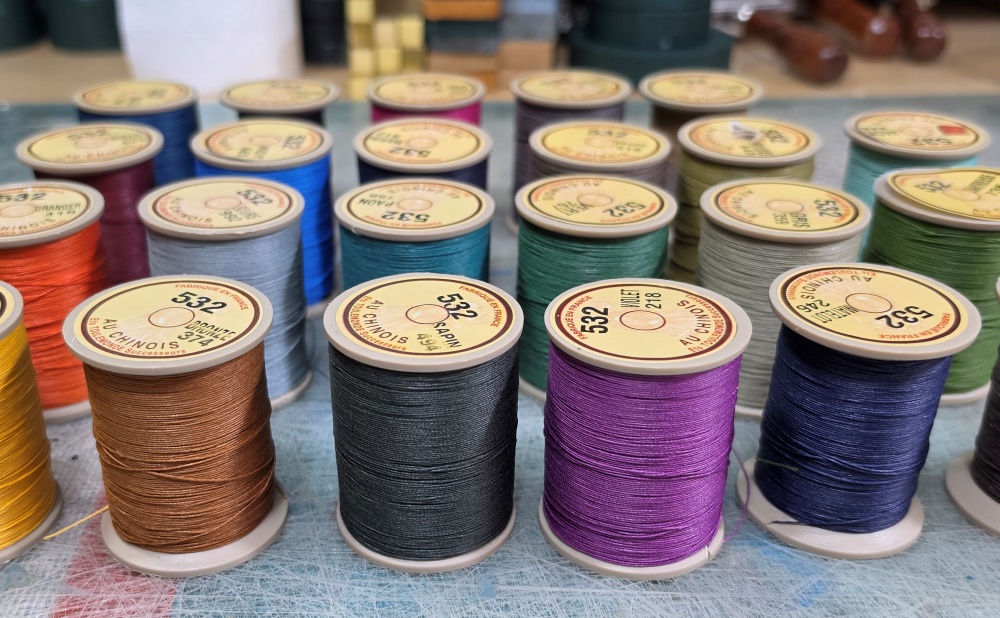
    Vinymo MBT is a thread I frequently use when making actual bags and accessories. The twist does not unravel easily, and the condition of the thread remains relatively stable during stitching, making it useful for repetitive work.

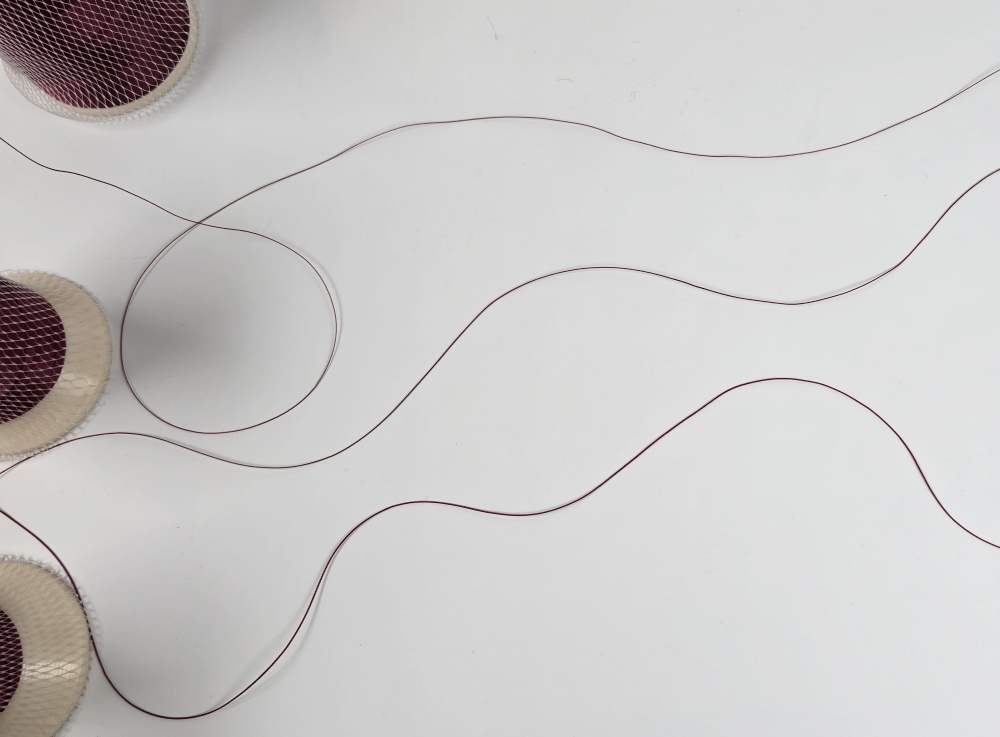
    For Vinymo MBT, the thread generally becomes thicker as the number gets smaller. For example, #8 is thinner than #5, and #1 is thicker than #5.

    However, you should not determine the thread based on the number alone. Even with the same number, the impression of the finished stitches can vary depending on the thread's color, wax treatment, pulling tension, and the needles and chisels used.

    The reason use Vinymo MBT more oftenis not simply because the thread is strong. It is because it is easy to predict the condition of the thread during work and good for maintaining a consistent balance in the finished stitches.

    굵기가 다른 비니모 MBT 실과 풀어 놓은 실 가닥

    Look at the Final Thickness, Not Just a Single Piece of Leather

    A common mistake when determining thread thickness is to only look at the thickness of a single piece of leather. However, in actual bag making, leather is often folded, reinforcements and linings are added, and multiple layers of leather are stacked.

    Therefore, when choosing a thread, you should judge based on the final thickness of the part to be stitched, not a single piece of cut leather.

    • How many layers of leather are stacked?
    • Are folded parts or reinforcements included?
    • Do the stitches play a role in holding the structure?
    • Are they stitches to be emphasized decoratively?
    • What is the overall size of the finished piece?

    If you choose a thick thread looking only at a single thin piece of leather, the stitches may become overly heavy in the finished stage. Conversely, using a thread that is too thin on thick handles or parts where multiple layers overlap can make the stitches look weak relative to the structure.

    Test Stitching is the Smallest Design Process

    Before striking the chisel directly on the finished product, it is advisable to do a test stitch on a scrap of the same leather. If possible, you should stack the same number of leather pieces as the actual production part and prepare the gluing and edge finishing similarly.

    During the test stitch, check the following items:

    • Is it too tight when the thread passes through the chisel hole?
    • Does the leather surface pucker or do the holes gape when the thread is pulled?
    • Is the angle of the stitches consistent on the front and back?
    • Is the thread thickness too strong or too weak compared to the size of the piece?
    • Does the spacing of the stitches connect naturally even on curved parts?

    You should also examine the relationship between the awl hole size and stitch qualityEven if the proportion of the thread and chisel is appropriate, if the holes are too large or inconsistent, the stitch line will not remain neat.

    가죽 자투리에 실 굵기와 목타 간격을 바꾸어 시험 바느질하는 모습

    Test stitching is not a process that wastes materials. It is a design process that discovers potential proportional errors in the finished product at the lowest cost.

    Adjusting the Presence of Stitches According to the Size of the Piece

    In small accessories, a single stitch takes up a large proportion of the overall design. Therefore, using relatively thin thread and narrow spacing is good for creating a delicate and calm impression.

    On the main body of a medium-sized bag, the thread and chisel should not be overly conspicuous while stably tidying up the leather edges. Here, it is important to look at the thickness of the leather and the location of the stitches together to find a medium proportion.

    For handles, strap connections, and outlines that emphasize structure, you can utilize relatively thick thread or wide spacing. However, since using thick thread does not necessarily increase durability, the size of the holes and the stitching tension must also be adjusted.

    Good Stitches Do Not Stand Out Before the Bag

    Refined stitches certainly elevate the perfection of a bag. However, if the stitches are revealed too strongly, the stitch line may be seen before the shape of the bag and the texture of the leather.

    Rather than showing off, good stitches tidy up the edges of the leather, follow the lines of the pattern, and quietly support the structure of the bag.

    Choosing thread thickness and chisel spacing is not a simple material selection, but a process of designing the proportions of the entire bag.

    Rather than memorizing the numbers of threads and chisels like a correct answer, you need the habit of looking at the final thickness of the leather, the size of the piece, and the role the stitches will play together. That small difference in judgment changes the impression of the finished bag and creates stitches that look stable even as time passes.

  • 천연 리넨사보다 비니모 MBT를 더 자주 사용하는 이유

    Why I Use Vinymo MBT More Often Than Natural Linen Thread

    In leathercraft, thread is not simply a material for connecting pieces of leather. The thickness, twist, surface texture, and luster of the thread change the impression of the stitches and greatly influence how well the finished bag maintains its shape over time. Even if you use the same leather and the same pattern, the atmosphere of the piece changes significantly depending on the thread you choose.

    Natural linen thread is a traditional material that has been used in leather handcrafting for a long time. Due to its unique natural texture and warm impression, it is still widely loved in high-end leather goods and manual work. However, when actually crafting bags and accessories, I use Vinymo MBT more often than natural linen thread.

    This does not mean that one thread is absolutely superior. It is simply because the characteristics of Vinymo MBT better align with the production standards I value.

    ■ Natural Linen Thread and Vinymo MBT Serve Different Purposes

    Natural linen thread is made from flax fibers. When waxed, the thread gains proper stiffness and friction, allowing it to sit stably within the leather's stitching holes. Because a subtle fibrous feel remains on the surface, the stitch line is not overly smooth. When this natural irregularity meets vegetable-tanned leather, it creates a depth characteristic of a truly handmade object.

    On the other hand, Vinymo MBT is a bonded polyester thread. The twist does not unravel easily, and the thickness and surface condition of the thread are relatively uniform. Even when making long continuous stitches, it is easy to maintain a consistent impression from beginning to end.

    • Natural Linen Thread: Natural and traditional impression / Fibrous surface texture / Calm and soft luster / Waxing required
    • Vinymo MBT: Neat and modern impression / Smooth and uniform surface / Subtle and clear luster / Stable twist and consistent thickness
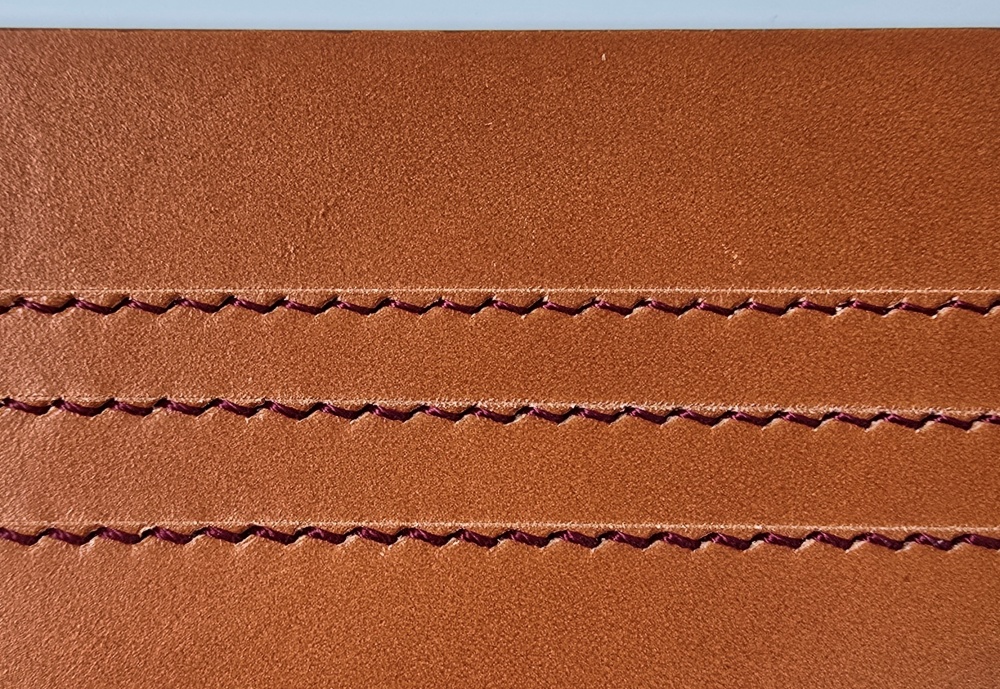
    동일한 가죽·동일한 간격으로 바느질한 비교 견본

    ■ The First Reason I Use Vinymo MBT More Often: Consistent Stitches Over Long Lines

    Bags have much longer stitching lines than small leather accessories. Parts of varying thicknesses—such as the main body and side panels, the bottom and reinforcements, and the handles and opening—are connected into a single structure. As the stitch line gets longer, the twist and tension of the thread can change slightly. A difference that might not be visible in a short section becomes noticeable as it follows the long outline of a bag.

    Because Vinymo MBT is quite stable in its thickness and twist, it is great for continuing stitches with a consistent rhythm. It makes it easier to neatly arrange not only the slanted stitches on the front but also the stitch appearance on the back. What I want is not just neat sewing. It is for the stitching lines to connect solidly as part of the structure when viewing the bag as a whole.

    ■ The Second Reason: Easy to Reproduce Results in Repeated Production

    If it is a one-off piece, you can adjust the pulling tension of the thread based on the feel of your hands that day. However, it's a different story if you are making multiple items from the same pattern or communicating work standards clearly to others through pattern documents. When applying the same thread thickness, hole size, stitch spacing, and pulling force again, similar results must be achieved.

    Vinymo MBT is perfectly suited for such repeated production. By using a thread of the same specification, the stitch proportions confirmed in the initial work can be reproduced quite stably in the next project. A good pattern should not rely solely on the maker's coincidental hand skills. Even when someone else applies the same standards, the result should come close to the originally intended shape and balance.

    ■ The Third Reason: Great for Considering the Usage Environment

    A bag is not an exhibit kept in a display case; it is an item carried by hand every day. The handles are constantly in contact with human hands, and the bottom and corners create friction against clothes or surrounding objects. It is also fully exposed to rain, moisture, sunlight, and temperature changes.

    Polyester thread generally absorbs less moisture and maintains its color and physical properties stably. Vinymo MBT is also excellent for stitching bags or wallets used daily. Especially for parts that repeatedly bear weight—such as handle attachments, bag bottoms, and openings—you must consider not only the appearance but also the stability to withstand the test of time.

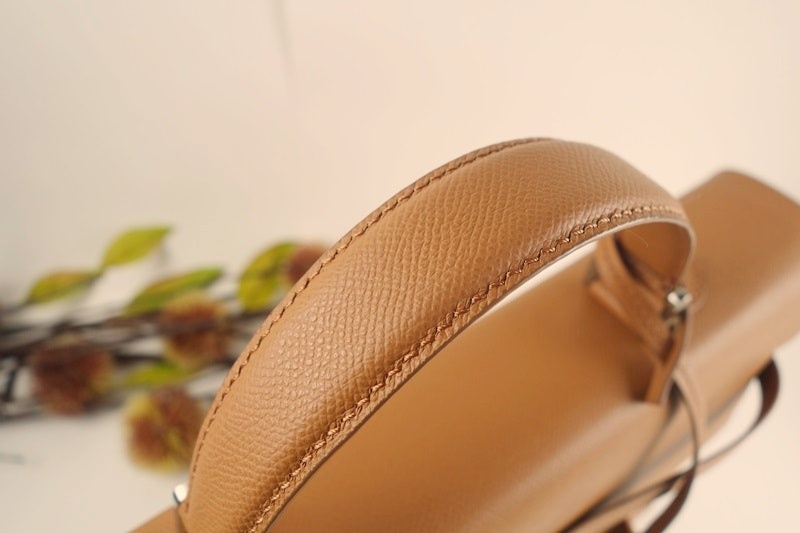
    비니모 MBT를 사용한 가방의 핸들

    ■ Does Vinymo MBT Also Need Wax?

    The bonding treatment of Vinymo MBT does not mean the same thing as waxing. The bonding treatment keeps the thread twist from unraveling, while wax controls the friction and smoothness during sewing.

    I believe that, depending on the working conditions, Vinymo MBT can also be lightly waxed. When passing through long stitch lines or when the friction on the leather edges is high, a little wax helps. However, applying too much wax can attract dust, leave marks on light-colored leather, or make the stitch surface look dull. It is better to apply it thinly and evenly, just as much as needed.

    ■ Then, When Should Natural Linen Thread Be Used?

    It is not that I don't use natural linen thread at all. In the following types of work, the charm of natural linen thread actually shines much brighter.

    • When emphasizing the process of leather aging and breaking in naturally over time
    • When you want to show the unique texture of hand-stitching as a visual element
    • When a heavy, traditional atmosphere is needed
    • For projects where you want to highlight a human touch rather than perfect uniformity

    The subtle fibrous feel of natural linen thread blends very naturally with the process of the leather's color deepening. The thread itself also changes slightly along with the leather, leaving traces of time on the finished product. Therefore, it is right to first consider what atmosphere and usage conditions you are aiming for before choosing a thread.

    시험 봉제 과정

    ■ The First Thing I Check When Choosing a Thread

    When handling new leather or a new pattern, I do not jump straight into the main work. I cut the exact same leather to be used for the project and do a short test stitch.

    First, I check whether the thread passes through the stitching hole too loosely or too tightly. Next, I observe if the leather surface dents or the hole tears lengthwise when the thread is pulled. You shouldn't just look at the appearance on the front; you must also carefully check if the thread sits neatly on the back. Finally, I bend the stitched leather multiple times to ensure the thread does not pop out. A test stitch of just ten stitches can prevent numerous problems in advance.

    ■ What is More Important Than Good Thread is the Right Combination

    In leathercraft, people often try to find only the most expensive or the toughest thread. However, a single thread cannot be the answer for every project. Natural linen thread is excellent for expressing the beauty of handcrafting, while Vinymo MBT provides the reliable stability needed for maintaining uniform shapes and everyday use.

    The reason I use Vinymo MBT more often is not that it is unconditionally superior, but because it better suits the framework of the bags I make, my production methods, and the requirement to maintain shape over a long period. Choosing a good thread is not merely about picking a famous brand. It is about finding the perfect match so that the thickness of the leather, the structure of the pattern, the stitch spacing, and the purpose of the item do not conflict with each other.

  • Why the Order of Leather Bag Construction Matters

    Construction Order is Not Just a Sequence of Tasks

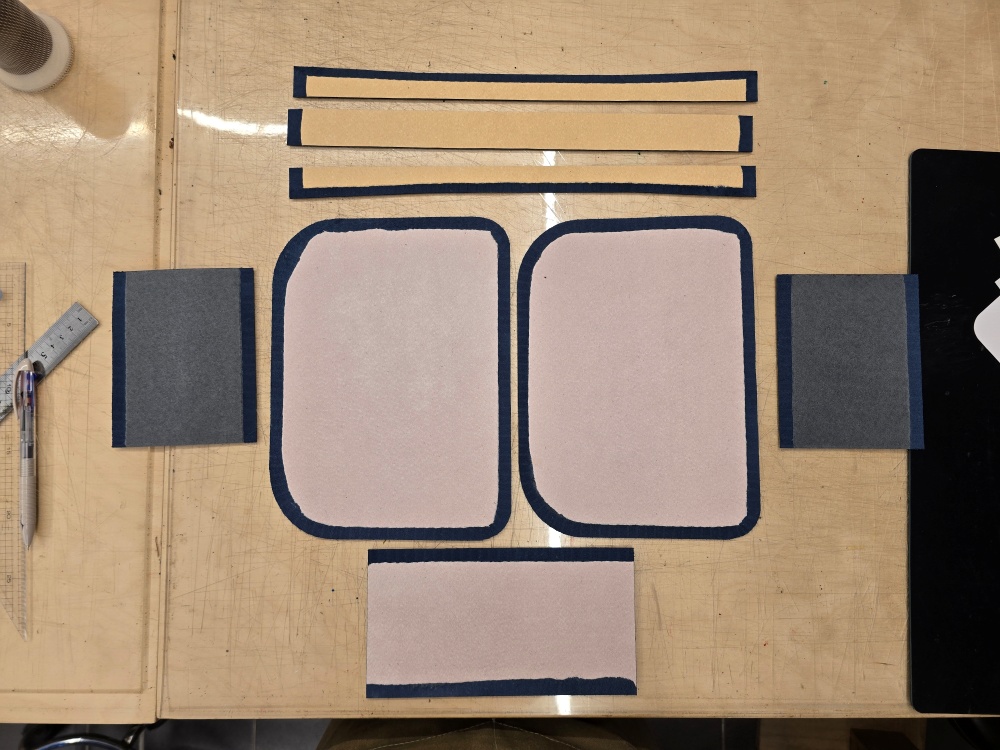
    The process of making a bag in leathercraft is not simply a task of piecing parts together. The construction order is a core blueprint directly linked to the bag's structural stability. You must exactly follow which parts to join first and when to finish the edges to fully maintain the intended three-dimensional shape.

    재단된 가죽 부품 순서대로 놓은 사진

    Problems Caused by Incorrect Construction Order

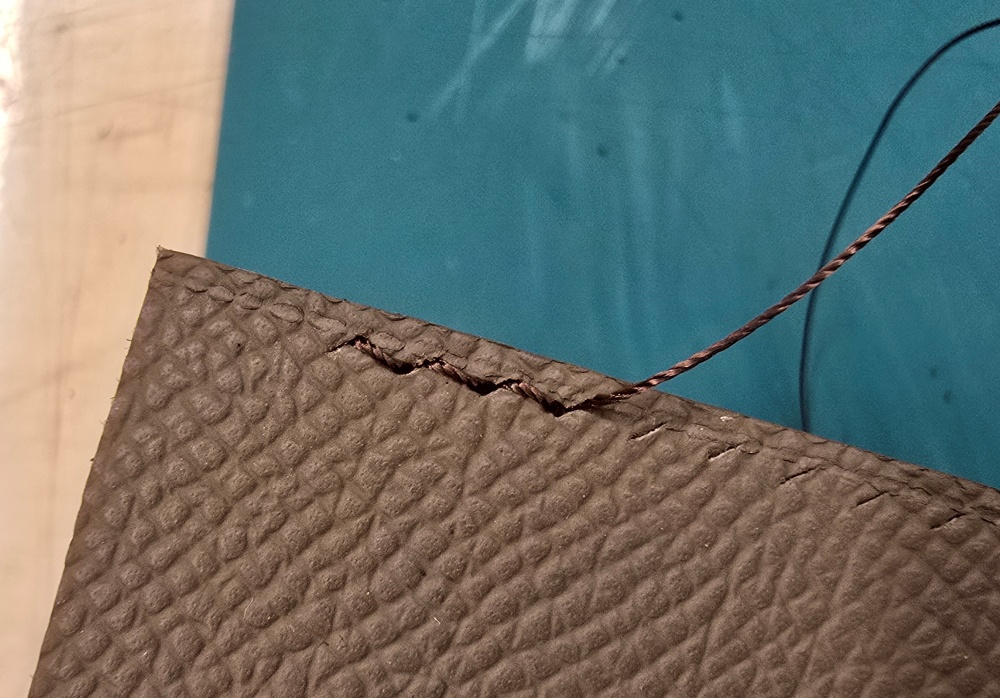
    If even a single step in the order gets twisted, irreversible problems occur in a chain reaction. If you miss a spot that needs to be glued first, the structure distorts, and if you assemble ignoring the order, there will be no space for the needle to enter, rendering the science of saddle stitchinguseless and resulting in an impossible-to-stitch state. Furthermore, failing to punch holes in advance prevents the proper use of the science of the awl, making a clean finish impossible and ultimately leading to a decline in overall quality.

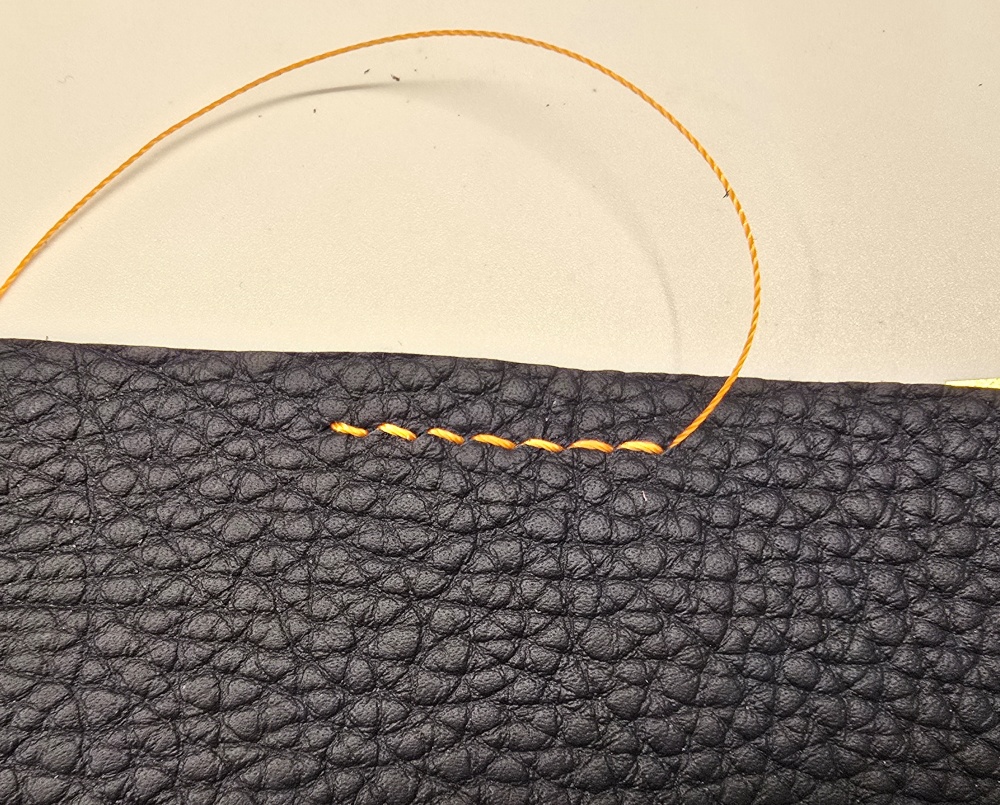
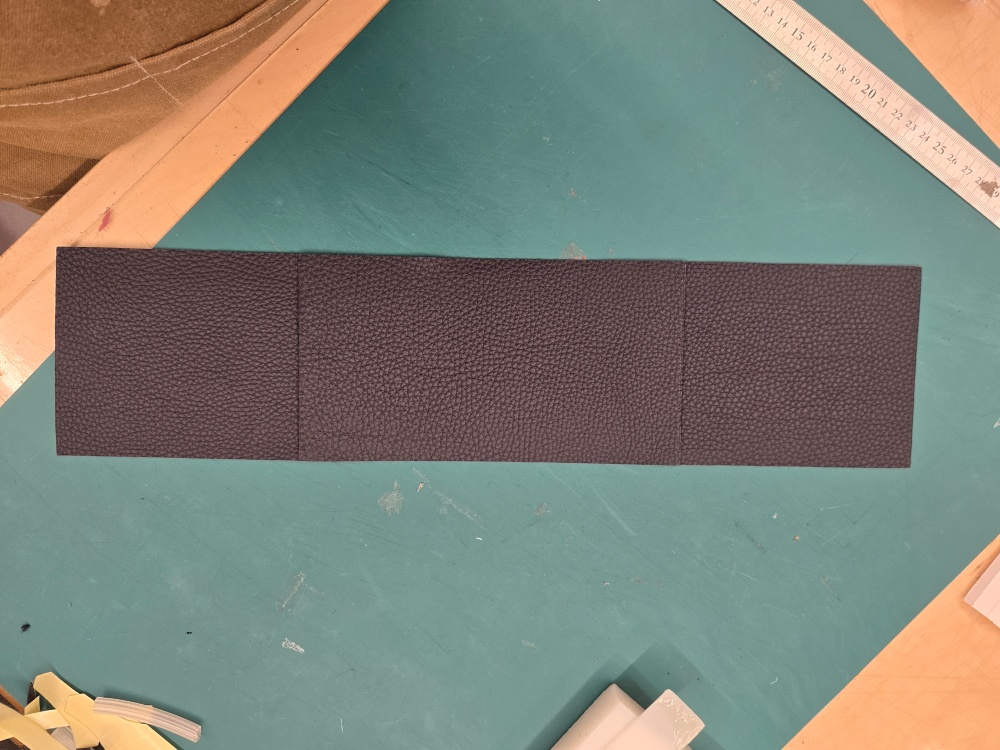
    접착 과정 사진

    Designing the Construction Order in Advance at the Pattern Stage

    The answer to Why a Good Bag is Already Completed on Paperultimately lies in the 'order'. When building a three-dimensional framework using traditional manual patterns rather than relying on grid paper, a meticulous calculation of the order in which these parts will be joined must already be completed in your mind. Perfect design is an insight that encompasses the entire construction process.

    박음질 과정 사진

    Luxury Brands Also Standardize Their Workflow

    Even in the workshops of luxury brands boasting decades of history, the assembly order is managed most strictly. The secret to maintaining consistent high-end quality regardless of the craftsman's touch is an unwavering construction manual established through numerous trials and errors.

    A Good PDF Pattern Includes the Construction Order

    For this reason, a highly perfected PDF pattern does not end with a simple list of dimensions and lines for cutting leather. It must include an 'Assembly Guide' that clearly indicates the order in which to skive, glue, and assemble. You must be able to fully understand the entire workflow just by looking at the pattern blueprint for it to be a truly good pattern.

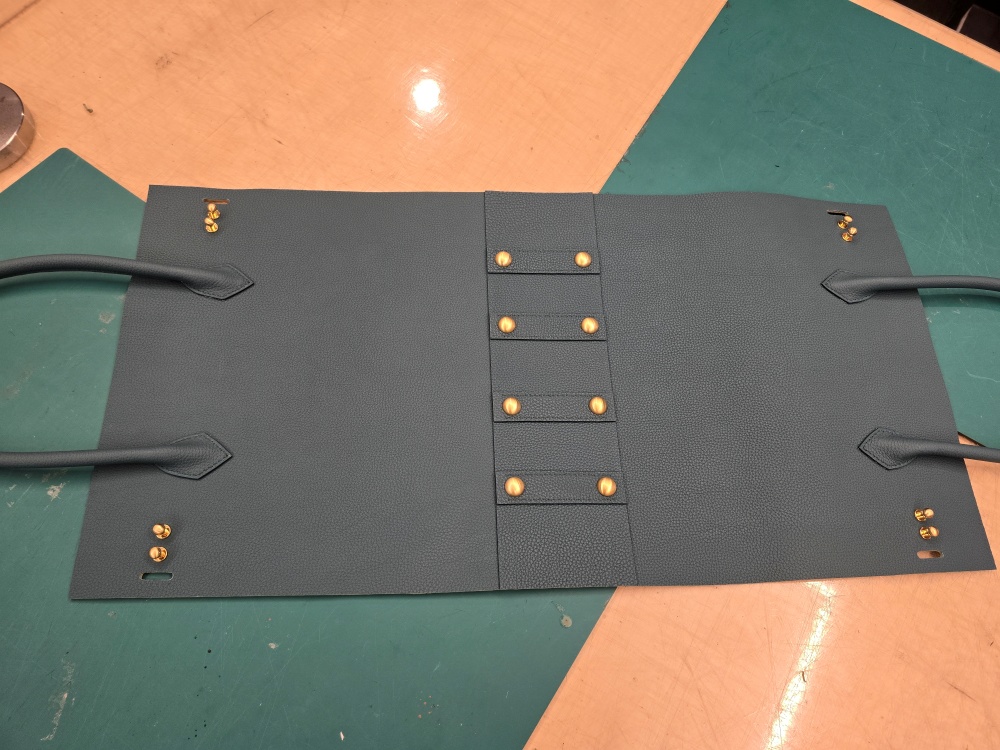
    완성 직전 사진

    Conclusion

    A good bag begins not with flashy techniques or hardware, but with the correct order and solid fundamentals. Slowly but solidly, the process of completing it while following the designated sequence is perhaps the true charm of leathercraft.

  • The Science of Saddle Stitch: Why Hand Stitching Outlasts Machine Stitching

    Those who have not deeply experienced leather crafting often think of stitching as simply a finishing act to connect cut pieces of leather. They might ask if it really matters whether it is stitched rapidly by a sewing machine or sewn stitch by stitch by an artisan's hands, as long as the resulting thread line looks beautiful on the surface.

    However, from the perspective of high-end leather engineering, stitching is not a mere combination. It is a "Structural Engineering" technique that determines the lifespan of a leather product. Today, we will explore the scientific reasons why traditional high-end leather workshops still insist on the "Saddle Stitch," a method dating back centuries, by looking closely at its structural differences from machine sewing.

    1. What is the Saddle Stitch?

    Definition and History

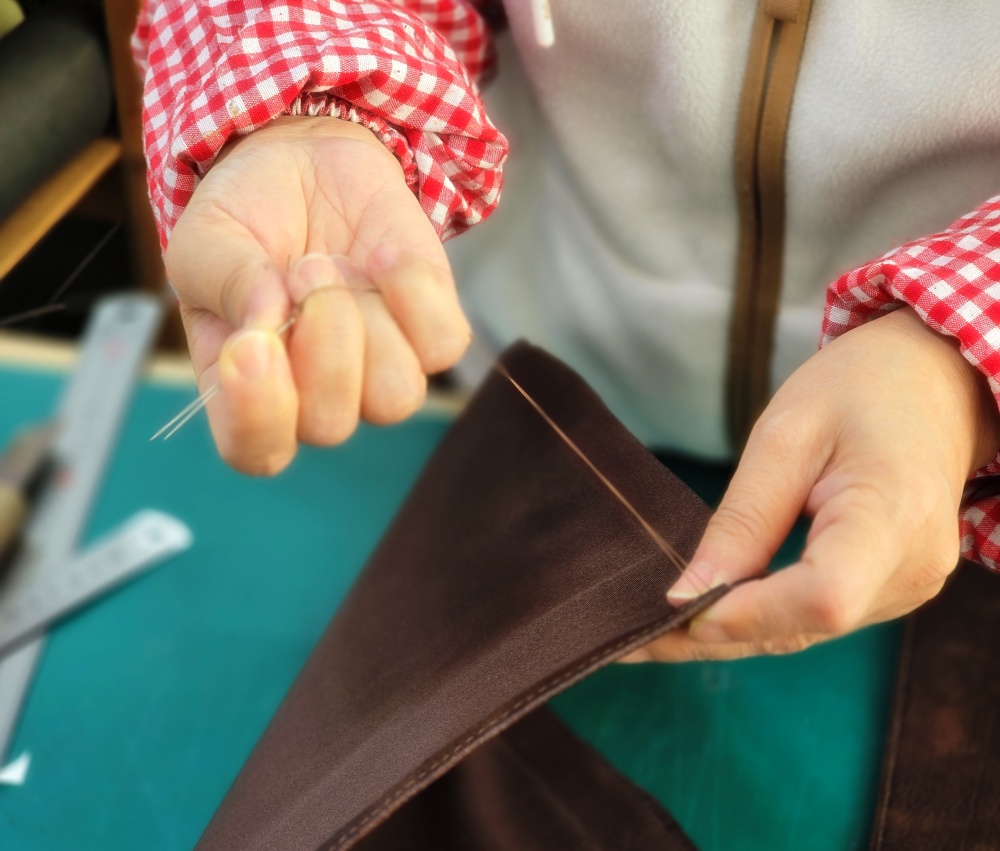
    The saddle stitch, as the name suggests, is a traditional hand-stitching technique originally used when making a horse's "Saddle." It involves connecting a needle to each end of a single thread, utilizing a total of two needles to cross both threads through a single punched hole. A saddle had to fully withstand the rough movements of a horse and the weight of the rider, which meant it required the toughest and most durable structure humanly conceivable.

    Why is it Still Used in High-End Bags?

    No matter how much cutting-edge computer sewing machines have developed today, the reason traditional high-end workshops insist on this demanding hand-stitching method is simple. It is due to its "independent durability" that machines can never replicate, combined with the refined proportional beauty unique to handwork. ..

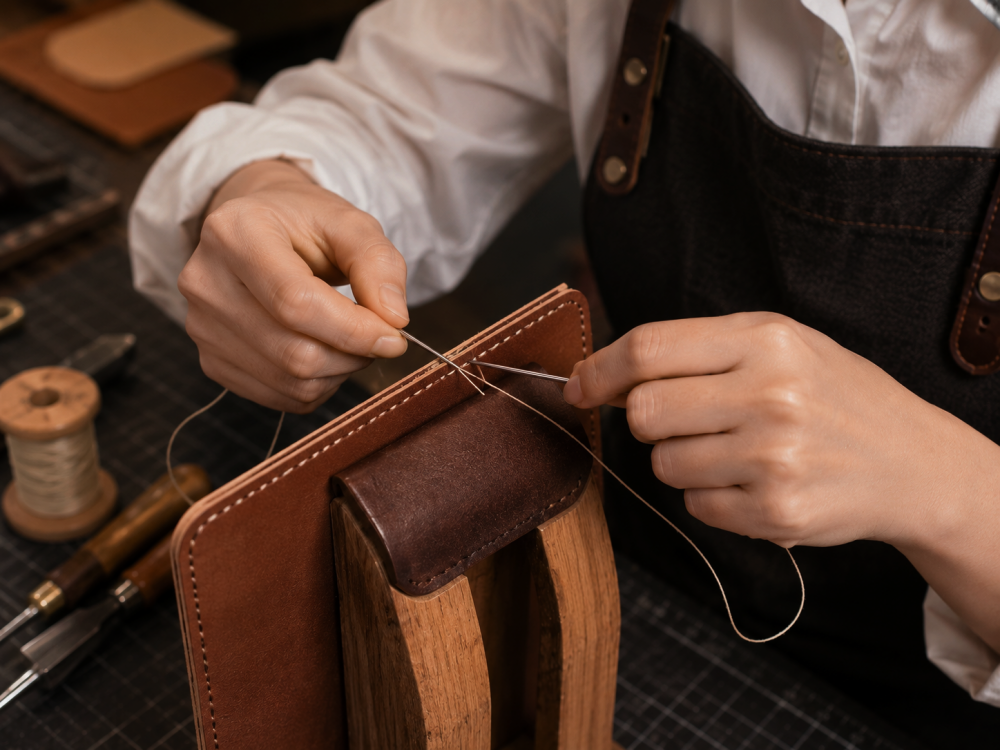
    두 개의 바늘과 린넨 실을 이용하여 포니 위에서 정밀하게 새들 스티치를 구현하는 장인의 손길)

    2. The Critical Structural Difference Between Machine and Hand Stitching

    o understand the difference between machine sewing and the saddle stitch, we must examine the "structure of the knot" and how the threads interlock inside the leather layers.

    CategoryLock StitchSaddle Stitch
    Number of ThreadsTop and bottom threads (2 different threads)Two needles on a single thread (1 continuous thread)
    Interlocking MethodThreads simply loop and twist past each other inside the leatherTwo threads completely cross and knot over each other inside the hole
    Tensile StressIf one part breaks, it unravels like dominoesIf one part breaks, the oppositethread maintains the structure

    The Limitation of Machines: The Lock Stitch

    A sewing machine works by having the top thread pierce through the leather to catch the bottom thread like a loop, pulling it back up. In other words, the two threads are merely "loosely hooked" to each other inside the leather. This structure has a fatal weakness. The moment a single stitch is severed due to friction, the tension holding the upper and lower threads is lost, causing three or four stitches to completely unravel in a domino effect.

    The Strength of Handwork: The Saddle Stitch

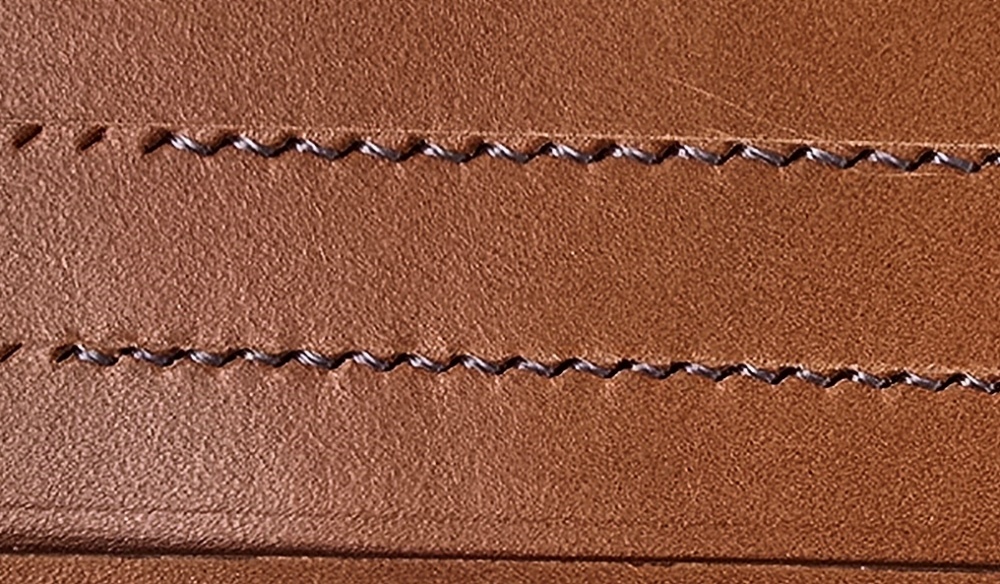
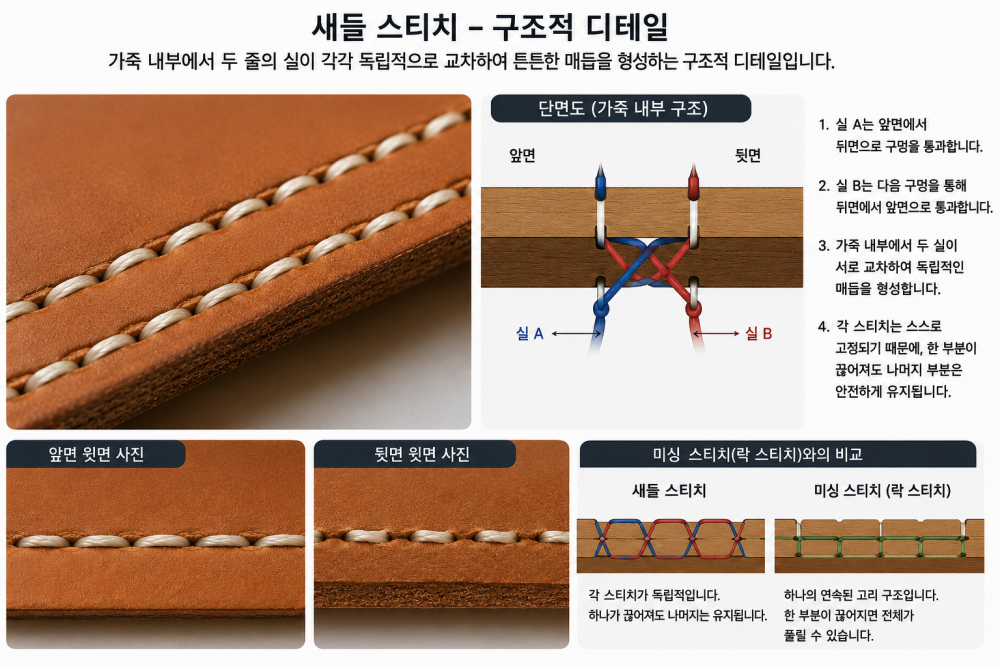
    On the other hand, the saddle stitch allows two lines of thread to cross perfectly in forward and reverse directions within a single hole. It forms a shape where the thread wraps tightly around the inside and outside of the leather like a Möbius strip. This structural difference dictates the lifespan of the bag.

    3. Why is the Saddle Stitch More Durable? The Scientific Principle

    The Principle of Independently Secured Threads

    Every time the saddle stitch passes through a leather hole, the threads form a knot as they move over. Because the two threads are tightly twisted by strong friction inside the leather, each individual stitch is secured as an entirely independent unit.

    The Difference When One Thread Breaks

    Suppose a bag has been used for years, and one line of thread on a high-friction corner finally wears down and breaks.

    • A machine-sewn bag unravels, the leather gap opens up, and the internal reinforcement materials become exposed.
    • In contrast, a saddle-stitched bag remains secure. The other line of thread coming from the opposite side continues to hold the leather together tightly, maintaining its tension thanks to the twisted structure inside the hole. This is the scientific secret that allows hand-stitched bags to be passed down through generations.
    가죽 내부에서 두 줄의 실이 독립적으로 교차하며 견고한 매듭을 형성하는 구조적 디테일

    4. Why an Artisan Chooses the Saddle Stitch Over Machines

    Durability

    Thanks to the structural resilience mentioned above, it perfectly withstands intense friction and the tensile stress caused by the weight of internal belongings.

    Repairability

    When a machine-sewn bag unravels, the entire line of stitching must often be ripped out and resewn from the beginning to look neat. In contrast, a saddle stitch allows for partial repairs (Après-vente), seamlessly blending a few new stitches exactly where the thread broke.

    Aesthetics

    Driven by the consistent tension of an artisan's hands along the pricking iron marks, the thread creates a flowing, three-dimensional diagonal slant that no machine can match. The symmetrical beauty between the front and back sides makes it a work of art in its own right.

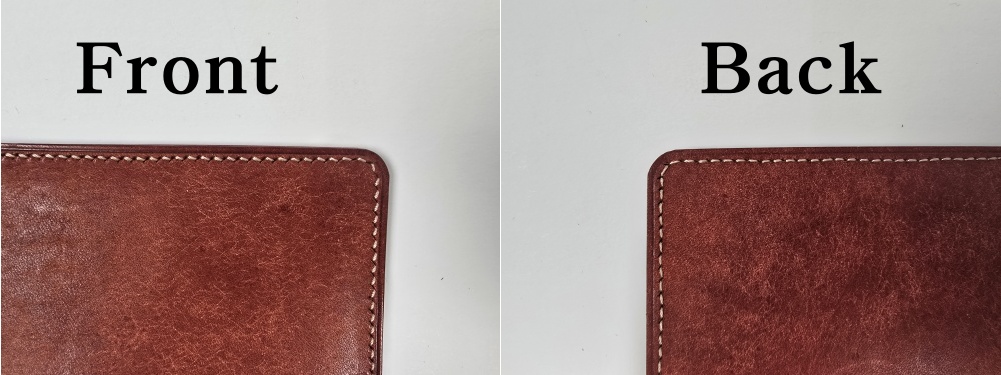
    앞면 : 사선 그리프 자리를 따라 칼같이 일정한 각도로 정렬된 새들 스티치 앞면의 유려한 사선 흐름뒷면 : 앞면과 완벽한 대칭을 이루며 한 치의 흐트러짐 없이 견고하게 마감된 새들 스티치 뒷면 라인)

    5. YEGAK's Standards: An Obsession with Structural Perfection

    At YEGAK, we reject stitching that serves as mere visual decoration. We only permit precise stitches that calculate the density of the hidden inner walls and reinforcement materials of the bag.

    • Thread Selection: Instead of the artificial gloss provided by synthetic threads (polyester), we insist exclusively on premium natural French linen thread. It ages beautifully alongside the leather, settling deep into the leather fibers over time.
    • Stitch Spacing: Depending on the size of the bag, the thickness of the leather, and the combination of reinforcements, we specify the exact stitch count during the manual pattern design phase, ranging from size 7 (3.85mm) to size 9 (3.0mm). If it is excessively dense, the leather will tear; if it is too wide, the structural stability compromises.
    • Needle Selection: We carefully select and use premium British saddle needles with rounded, precisely finished tips to ensure they glide smoothly through the leather fibers without forcefully tearing the internal structure.

    6. Conclusion

    "Saddle Stitch is not simply a sewing method. It is a structural engineering technique that determines the lifespan of a leather product."

    Slow but solid—crossing two needles to fill a single stitch takes dozens of times longer than a machine. However, that density of time becomes the lifespan of the bag, and it is the value YEGAK refuses to compromise on.

    In the next chapter, we will take an engineering approach to the foundation of the saddle stitch: "The Differences in Tensile Strength and Aging Between Natural Linen Thread and Polyester Thread."

  • French Skiving vs Standard Skiving: What's the Real Difference?

    The Tale of Two Edges: Demystifying Leather Skiving Techniques

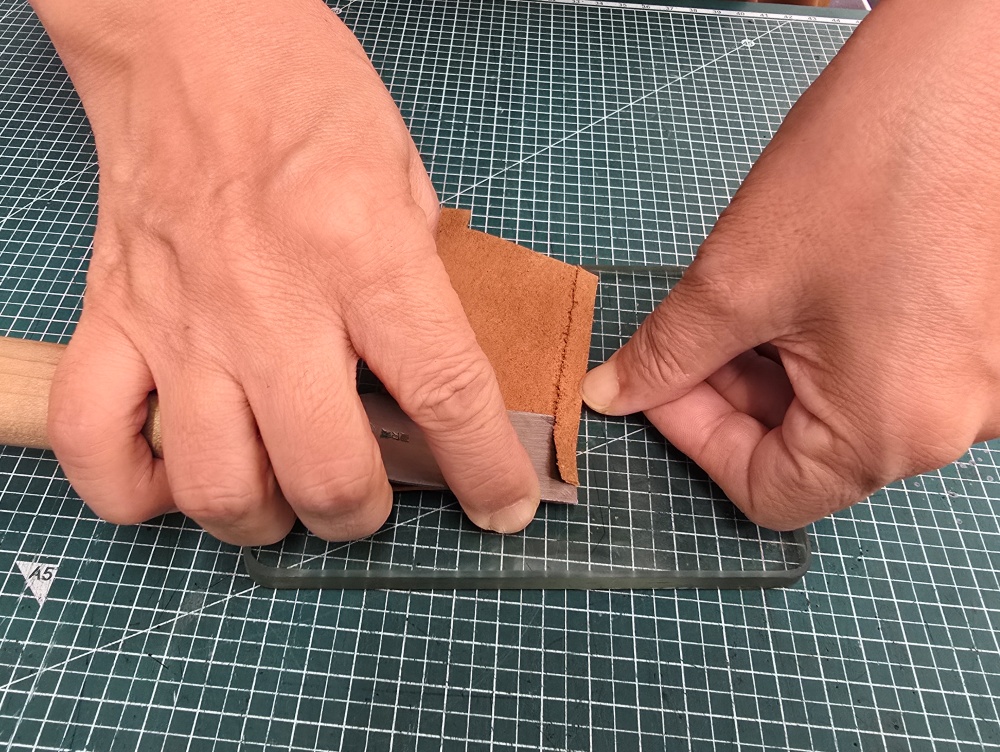
    사선 피할(단면 피할)과 평평한 바닥의 프렌치 피할 기법의 시각적 비교

    Walk into any high-end leather atelier, and you will find a tool that artisans constantly maintain: the skiving knife. Yet, many intermediate crafters often find themselves confused by technical terminology. Specifically, what is the actual mechanical difference between Standard Skiving and French Skiving?

    Choosing the wrong technique at a critical seam is the exact reason a bag fails to lay flush like a Hermès piece, turning instead into a bulky, amateurish lump. Let's deconstruct the mechanics of these two essential disciplines.


    1. Standard Skiving (Bevel Skiving): The Linear Incline

    Standard skiving—often called edge beveling—is the process of shaving the leather perimeter at a consistent, diagonal angle (usually between 15° to 30°).

    • The Geometry: It creates a smooth, continuous slope from the full thickness of the leather down to a feather-thin edge (e.g., sloping from 1.4mm down to 0.1mm)
    • When to Use It: This is your go-to technique for basic raw-edge construction. When you are stitching two panels together and painting the edge with edge coat (giardini/fenice), standard skiving eliminates the double-bulk, keeping the final edge sleek and uniform.
       
    고급 가죽 외곽선을 따라 정밀한 직선 베벨 경사로 구현된 피할 단면 클로즈업

    2. French Skiving (Channel Skiving): The Architectural Step-Down

    French skiving is a highly specialized, advanced technique where you carve a flat-bottomed rectangular channel into the leather's flesh side, rather than a diagonal slope

    • The Geometry: It creates a sharp, right-angled step-down (⎔). The center of the channel is perfectly flat and uniform in thickness.
    • When to Use It:** This is absolutely mandatory for **turn-top folded edges (시접)**, pocket T-slots, and premium wallet card slots. By carving a 0.6mm flat channel into a 1.4mm panel, the leather folds over with crisp, geometric perfection. It prevents the folded seam from bloating or creating an awkward exterior bump.
    프렌치 에져로 정밀하게 바닥을 파내어 완성한 가죽 표면의 계단식 건축학적 라인

    📊 Quick Reference: Technical Comparison

    Technical AttributeStandard Skiving (Edge Bevel)French Skiving
    Cut ShapeDiagonal Slope ( /Flat-Bottomed Step ( ⎔ )
    Primary ToolJapanese Utility Knife / Round KnifeFrench Edger / Flat-nosed Chisel Knife
    Best Used ForRaw-edge joinery, edge paintingFolded edges (turn-top), T-slots, lining tabs
    Difficulty LevelMedium (Requires steady hand angle)High (Requires exact depth control)

    3. Beginner Pitfalls: The Cost of a Dull Blade

    Achieving a clean French skive on a soft, premium chrome leather (like French Crispe Goatskin) is notoriously difficult for beginners. Here are the two most common mistakes recorded in the YEGAK archive:

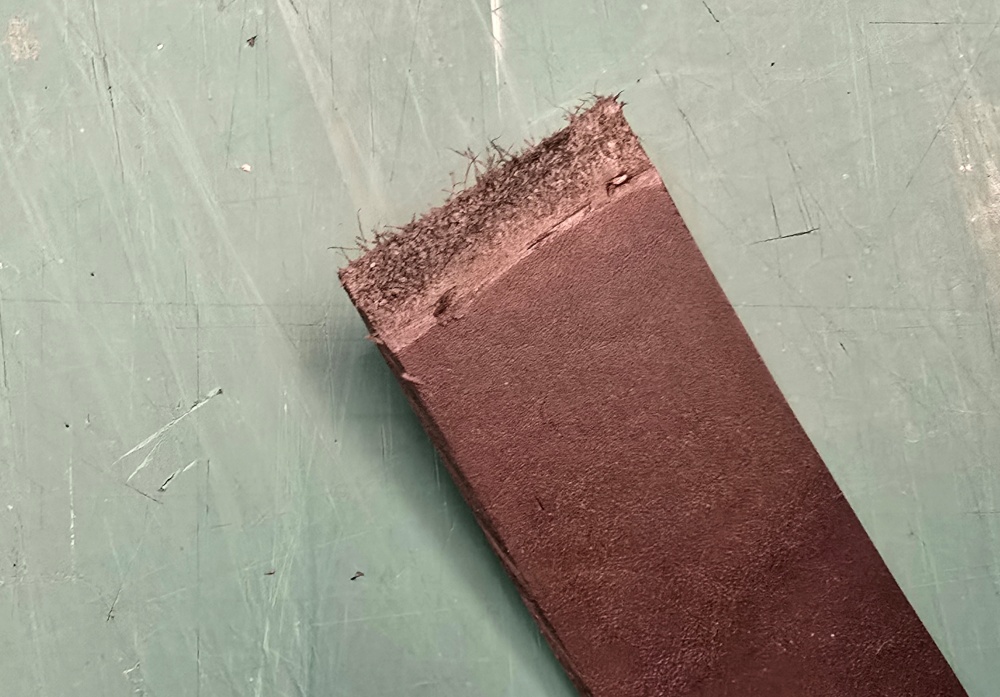
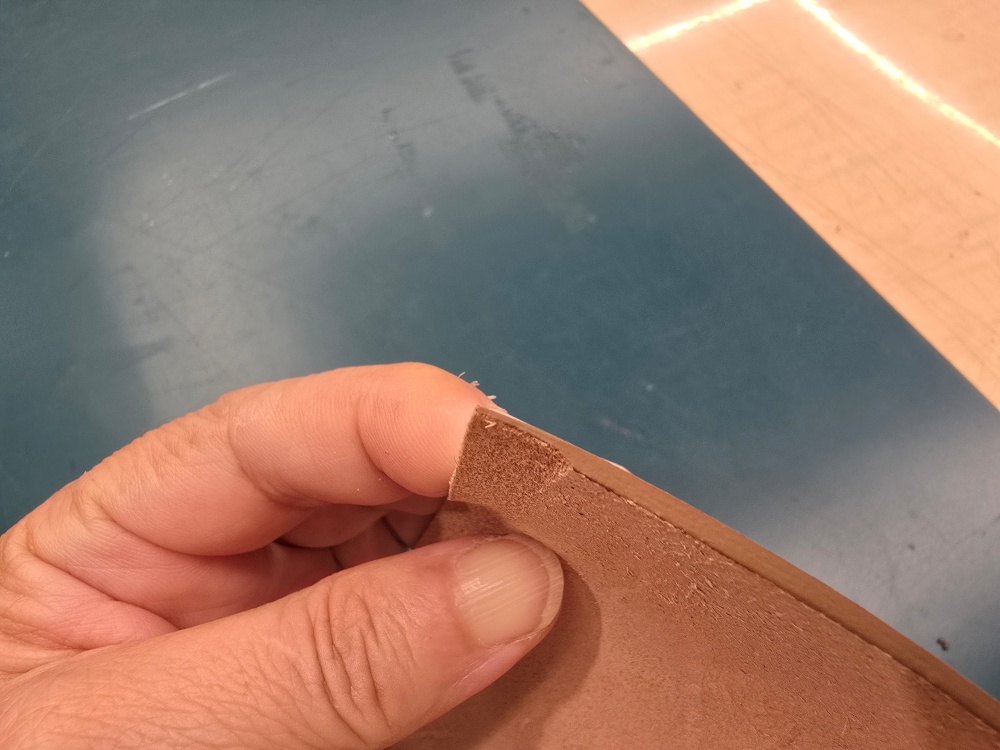
    • The Chattered Gouge: Because chrome leather stretches, a dull blade will "hop" and bite into the leather unevenly, leaving ugly corrugated gouges. When you apply water-based adhesive, these uneven depths telegraph directly onto the smooth exterior grain
    • The Perimeter Rip:During a standard bevel skive, if the artisan pulls the knife too aggressively at the very edge, the thin 0.1mm foil of leather will stretch and tear, ruining the entire panel alignment
    무딘 칼날로 인해 표면이 불규칙하게 파이고 섬유 조직이 짓눌린 흔한 피할 실수 사례

    The Master's Secret: Mirror-Polished Maintenance

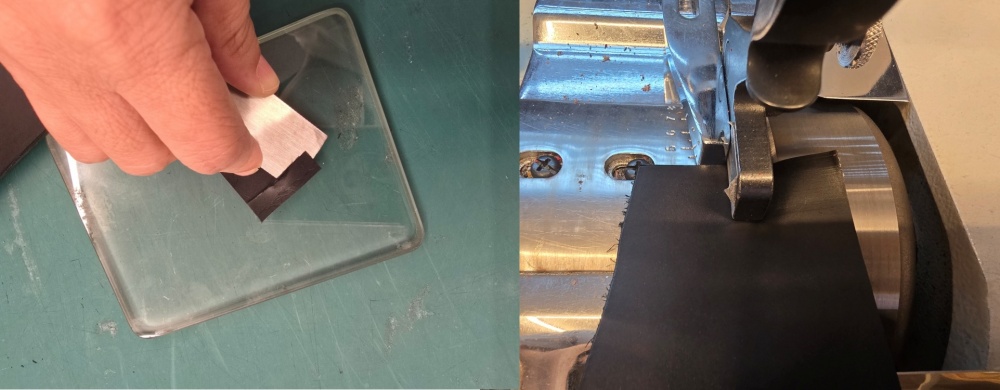
    The secret to taming soft chrome leather isn't brute force; it is microscopic sharpness. Before executing a French skive, a master artisan always strops the blade on leather loaded with chromium oxide compound until it achieves a mirror finish. The blade must effortlessly slice through the dense collagen fibers using only the weight of the hand.


    The YEGAK Knowledge Graph: Internal Link Building

    To master the complete physical architecture of high-end bag building, connect this practical guide with our foundational engineering theories:

  • The Science of Leather Skiving: Taming Fiber Density with Razor Precision

    Shaving the Invisible: Why Skiving is More Than Mere Thickness Control

    To the untrained eye, leather skiving is merely a mechanical task of shaving down the surface to make the hide thinner. However, to a high-end artisan, skiving is a highly sophisticated process of engineering calculations to precisely redistribute structural strength. It serves as the invisible foundational framework that determines whether a bag will maintain its razor-sharp architectural silhouette or slowly collapse from the seams.

    Raw, natural hides exhibit inconsistent structural densities across different quadrants. By utilizing a razor-sharp knife to control this fiber matrix at a microscopic level, the artisan gains absolute command over exactly where the leather must yield flexibly and where it must remain perfectly rigid.


    Key PointKey Point)
    Skiving is not an act of whittling away the essence of the leather; it is a deliberate recalculation of physical thickness to achieve seamless three-dimensional joinery and fluid structural transitions.


    1. Micro-Mechanics: Collagen Fiber Density and Blade Resistance

    Every square millimeter of full-grain leather possesses its own unique internal matrix. The upper grain layer (corium) houses a tightly interwoven network of collagen fibers, exerting immense tensile strength. Conversely, descending toward the lower flesh side, the fibers disperse in a loose and irregular matrix.

    As the skiving knife penetrates this organic web, the blade encounters constantly fluctuating resistance vectors. If the artisan's blade is not polished to a mirror finish, it will fail to shear the fibers cleanly, instead pushing or tearing the loose underlying tissue. Precision skiving initiates with a profound, tactile comprehension of this structural density through the fingertips. The artisan continuously calibrates the knife angle in real time to glide smoothly through the dense fiber walls without inducing structural stress within the leather.

    2. Architectural Technique: The Dichotomy of French Skiving and Standard Beveling

    In premium construction, a simple diagonal bevel is never sufficient. YEGAK classifies this margin control as a strict technical discipline.

    • Standard Edge Beveling: A technique that shears a linear slope at a single angle along the perimeter. It is primarily utilized to reduce the clumsy bulk of raw margins prior to basic stitched joinery.
    • French Skiving (Channel Skiving): A highly sophisticated, stepped skiving discipline. The artisan precisely excavates a flat-bottomed rectangular channel into the flesh side of the leather. This is the foundational technique that allows wallet card slots (T-slots) or concealed fold lines to bend with razor-sharp clarity, laying completely flush without protruding clumsily.

    3. Structural Standards: Precise Thickness Calibration for Individual Parts

    A master artisan executes distinct mechanical formulas dictated by the physical stress points concentrated on the bag. Below are the rigid technical benchmarks enforced within the YEGAK curriculum.

    • Folded Edges (Turn-Tops): Margins of a 1.4mm panel are micro-skived down to a 0.6mm gauge, securing an absolute flush interface when folded over.
    • Zipper Terminals: Shaved down sharply to 0.4mm to accommodate the thick canvas fabric of luxury zippers while blocking any clumsy accumulation of bulk.
    • Corner Gussets: Compound skiving is executed across multiple vectors down to 0.5mm to realize complex, three-dimensional curves, allowing the leather to wrap around radiuses seamlessly without creasing.
    • Handle Tabs: As core load-bearing components supporting the bag's full weight, these structures maintain a substantial thickness of 1.2mm to 1.5mm, utilizing minimal beveling to preserve the dense, natural fiber networks.

    Artisan’s Note
    A finely tuned blade exposes the integrity of the tannery. If the leather tissue delaminates or tears apart during a 0.5mm micro-skive, it serves as evidence that the hide lacks the collagen density required to anchor a high-end architecture over the long term.


    4. The Anatomy of Failure: The Structural Cost of Faulty Skiving

    Improper skiving stands as the primary culprit behind the premature structural collapse and diminished lifespan of a handmade leather object.

    • The Over-Skived Tear: Shaving a mere 0.1mm too deep cleanly severs the dense corium layer, leaving only weak flesh-side strands. Under physical tension, this boundary inevitably ruptures.
    • The Compressed Wrinkle: A dull blade pushes fibers forward instead of shearing them. This induces a subsurface accumulation of tissue, manifesting on the grain face as irreparable, erratic wrinkling post-assembly.
    • Delamination: An inconsistent, gouged skiving path prevents premium water-based adhesives from forming a continuous molecular bond, triggering catastrophic structural separation when exposed to shifting humidity levels.

    5. Calibrating the Blade: The Equation of Golden Equilibrium

    How does one tame fiber density with razor precision? The artisan continuously calculates three interconnected variables:

    1. Material Moisture Content: The structural elasticity of vegetable-tanned fibers responds sensitively to shifts in atmospheric humidity.
    2. Blade Geometry: The exact angle of the blade's bevel commands the initial resistance threshold encountered upon entering the dense collagen matrix.
    3. Anatomical Grain Direction: Mapping pattern orientation and cutting vectors according to whether the hide quadrant is a rigid shoulder, a dense butt, or a loose flank.

    The YEGAK Knowledge Graph: Internal Link Building

    To command absolute control over high-end architecture, precision skiving mechanics must be flawlessly synchronized with material science and traditional stitch work. Continue your technical evolution:

    • Foundational Asset #1: Review the core chemical architecture of your canvas in [The Ultimate Guide to Vegetable-Tanned Leather].
    • Foundational Asset #2: Master the physics of material thickness in [How Leather Thickness Determines Structural Integrity].
    • Next Technical Discipline: Decoding the Mechanical Tension of Joinery – [The Science of the Saddle Stitch: Secrets of Thread Trajectory and Silhouette Control] (Upcoming Release)
    • Advanced Engineering: Commanding the Geometry of Equilibrium – [Pattern Engineering: Architectural Stability and the Golden Ratio] (Upcoming Release)

  • 실의 궤적이 만드는 실루엣 : 새들스티치(Saddle Stitch)의 역학과 장력의 비밀

    가죽공예품을 바라볼 때, 사람들의 시선이 가장 먼저 머무는 곳은 단연 단면을 따라 흐르는 ‘바느질선’입니다. 비단결처럼 매끄럽게 흐르는 올곧은 사선스티치는 그 자체로 아름다운 장식이자, 제품의 구조를 지탱하는 단단한 뼈대가 됩니다.

    기계로 박아내는 미싱 바느질이 넘볼수 없는 손바느질, 즉 ‘새들스티치(Saddle Stitch)’에는 단순한 수작업을 넘어선 정밀한 구조 역학과 장력의 비밀이 숨겨져 있습니다. 패턴 설계와 피할을 통해 입체적인 형태를 잡았다면, 이제는 그 형태에 영혼을 불어넣는 바느질의 메커니즘을 이해해야 할 때입니다.

    1. 미싱이 결코 흉내 낼 수 없는 손바느질, 새들스티치의 구조

      많은 이들이 손바느질을 고집하는 이유를 단순히 ‘정성’이나 ‘감성’이라는 단어로 포장하곤 합니다. 하지만 전문가의 관점에서 새들스티치는 감성이 아닌 ‘철저한 역학적 우수성’에 기반합니다.

      일반적인 재봉틀(미싱)바느질은 윗실과 아랫실이 가죽 중간에서 서로 고리를 걸어 당기는 구조입니다. 만약 이 구조에서 실 한곳이 끊어지면 도미노처럼 앞뒤의 실들이 연쇄적으로 풀려버리는 치명적인 약점을 가집니다

      반면 에르메스를 비롯한 하이엔드 공방에서 고집하는 새들스티치는 하나의 실 양끝에 두개의 바늘을 꿰어 가죽의 타공 구멍 안에서 두줄의 실이 완벽하게 교차(X자 형태)하며 나아갑니다. 이는 한쪽 실이 마찰로 인해 끊어지더라도 반대편에서 넘어온 다른 실이 구멍 속에서 매듭을 꽉 붙잡아주기 때문에 바느질선이 결코 쉽게 풀리지 않습니다. 혹독한 환경을 견뎌야 하는 말의 안장(Saddle)을 만들때 쓰이던 기술인 만큼, 대를 이어 물려 쓸 수 있는 내구성의 주춧돌이 바로 이 새들스티치입니다.

      2. 프랑스 린카블레(Lin Cable)실과 최고급 가죽이 만날때

      훌륭한 바느질은 소재에 대한 깊은 이해에서 출발합니다. 가죽의 텍스처와 완벽한 조화를 이루는 실을 선택하는 것 또한 전문가의 감각영역입니다.

      제가 프랑스산 크리스페 고트스킨이나 최고급 유럽산 가죽을 다룰때 언제나 곁에 두는 실이 있습니다. 바로 프랑스의 오랜 전통을 자랑하는 천연 리넨사, ‘린카블레(Lin Cable)입니다. 나일론이나 폴리에스테르 같은 화확 섬유실은 장력이 강하고 매끄럽지만, 시간이 흐를수록 천연가죽 특유의 유연한 에이징(Aging)속도를 따라가지 못해 가죽을 파고들거나 홀로 겉도는 이질감을 주곤합니다.

      반면 린카블레는 천연 마(Lin)를 정밀하게 꼬아 밀랍(Waxing)을 입힌 실로, 바늘을 통과할 때 가죽 단면에 부드럽게 안착합니다. 특히 조직이 유연하면서도 짱짱한 프랑스 코트스킨의 타공 땀에 실이 스며들때, 천연소재끼리 맛물리며 생기는 특유의 견고함과 은은한 광택은 화확섬유가 결코 흉내 낼 수 없는 깊이를 선사합니다. 시간이 흐를수록 가죽과 함께 낡아가며 멋을 더하는것, 그것이 명품의 실이 가져야할 미덕입니다.

      3. 20년 경력자가 말하는 가죽 두께별 밀리미터(mm)장력조절법

      새들스티치를 할 때 흔히 하는 실수는 무조건 실을 강하게 잡아당기는 것입니다 양손의 장력을 제어하지 못하면 사선 모양이 비뚤어지거나 가죽면이 쭈글쭈글하게 우는 대참사가 발생합니다. 20년의 세월 동안 몸으로 체득한 실전 장력 조절의 핵심 기준은 다음과 같습니다

      • 그리프(목타)땀수와 실 두께의 조화 : 정밀한 소품이나 슬림한 지갑류를 제작할 때는 보통 3.38mm(화란 규격 8호 그리프를 사용하며, 실 역시 린카블레 532나 632 같은 얇은 규격을 매칭합니다. 반면 두꺼운 가방류는 3.85mm나 4.0mm땀수에 린카블레 432를 매칭하여 시각적 안정감을 줍니다
      • 가죽 두께에 따른 양손의 밀당 : 피할을 거쳐 0.6mm~0.8mm 수준으로 슬림해진 내부 포켓부위를 바느질 할때는, 평소 장력의 60~70% 감각으로 실을 부드럽게 놓아주듯 당겨야 가죽이 쪼그라들지 않습니다. 반대로 1.5mm 이상의 본판 가죽과 보강재가 겹쳐진 단단한 부위는 양손의 힘을 균일하게 100%로 주어 실이 가죽 안착점에 정확히 파고들도록 ‘착’감기는 느낌으로 당겨주어야 합니다.

      이 손끝의 미세한 장력 차이가 실의 흐름을 일정하게 만들고, 제품 전체의 실루엣을 단단하게 잡아주는 결정적 디테일이 됩니다

      4. 전문가의 감각을 그대로 옮긴 도면 자료실

      새들스티치의 올곧은 사선 궤적은 결국 완벽한 타공에서 시작되며, 그 타공은 도면(패턴)의 정밀함에서 출발합니다. 바느질이 들어갈 치수와 가국이 접히는 곡률을 계산하지 않은 도안은 바느질 땀수를 어긋나게 만들고, 결국 장력을 아무리 조절해도 극복할 수 없는 구조적 한계를 만듭니다.

      오직 자와 송곳으로 가죽의 수축률과 두께, 그리고 바느질 한 땀의 오차까지 역학적으로 계산해 낸 오리지널 수동 패턴은 제작자에게 완벽한 바느질 가이드라인이 되어줍니다.

      단순한 도안을 넘어 실전 제작 프로세스의 메커니즘을 100% 반영하여 설계된 ‘예각 스타일 오리지널 패턴 PDF’는 글로벌 가죽 공예인들이 바느질의 실패없이 완벽한 사선 실루엣을 구현할 수 있도록 돕는 최고의 맵(Map)이 될 것입니다. 손끝의 장력이 만드는 한땀의 가치, 그 견고한 장인 정신의 세계를 곧 공개될 도면 자료실에서 직접 확인해 보시기 바랍니다.