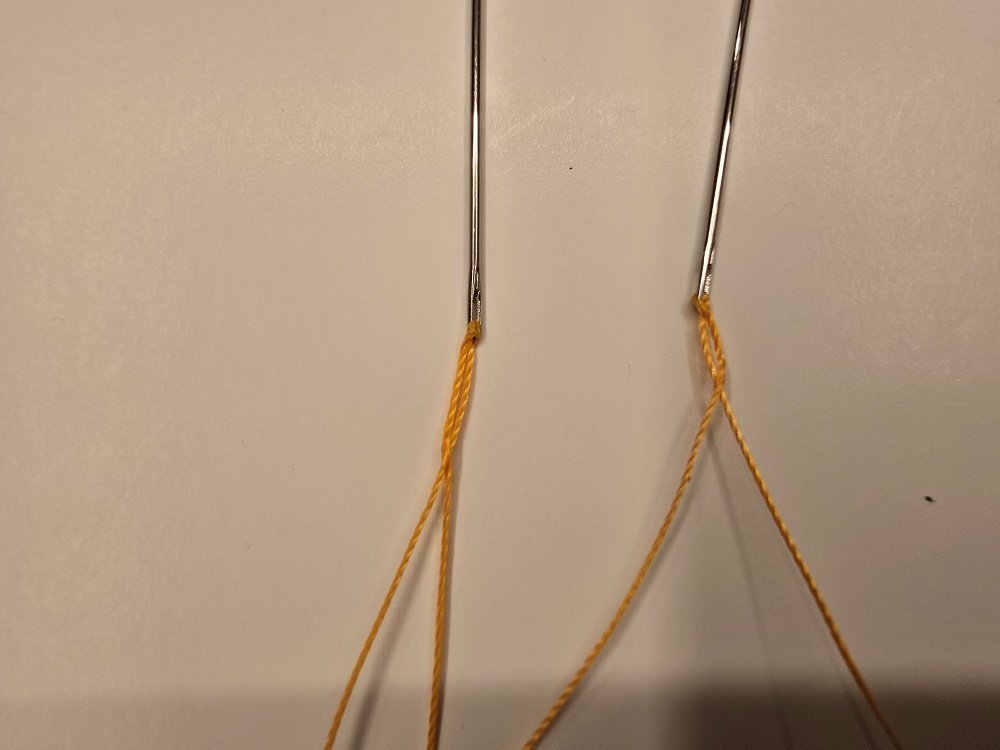
Attaching thread to a needle may seem like a short and simple step in leathercraft. However, an improper connection can cause the thread to slip out during stitching or create a bulky area around the needle eye that catches in the stitching holes.
First, use the guide on How to Choose Leathercraft Needlesto select a needle that matches the thread thickness and the size of the stitching holes. The area where the needle and thread meet must then be kept slim and smooth.
The purpose of securing thread to a needle is not to tie it as tightly as possible. The goal is to prevent the thread from slipping out while keeping the connection between the needle eye and thread smooth enough to pass naturally through the stitching holes.
Why the Thread Should Be Locked Instead of Knotted
Tying a knot directly behind the needle eye creates an area thicker than the needle shaft. As this bulky section repeatedly passes through the stitching holes, it can enlarge the holes, abrade the thread and lift the leather surface as the needle is pulled through.
In hand-stitched leathercraft, the short end of the thread is pierced and locked instead of being tied in a knot. The thread tightens around itself behind the needle eye, connecting the needle and thread without creating unnecessary bulk.
1. Prepare a Clean Thread End
Before threading the needle, refer to When Considering Leathercraft Thread Thickness and Pricking-Iron Spacing—and decide which thread to use. If the thread is too thick, it will be difficult to pass through the needle eye. Forcing it through can loosen the twist or cause the end to fray.
Cut the thread cleanly with sharp scissors and use your fingers to straighten any loose strands. Even a stable bonded thread such as Vinymo MBT can catch in the needle eye if its end becomes flattened unevenly or begins to separate. Shape the end into a slim, neat point before threading it through the eye.
When using waxed thread, avoid applying too much wax to the end. A buildup of wax may make the thread appear easier to insert, but it can create a bulky locking section behind the needle eye.
2. Pass the Thread Through the Needle Eye
Pass the prepared thread end through the needle eye, leaving a few centimetres of thread on the short side. If this end is too short, the pierced section may come loose. If it is too long, the doubled section behind the eye will become unnecessarily long and interfere with stitching.
If the thread will not pass through the needle eye, do not keep twisting and forcing it through. Recheck the combination of needle-eye size and thread thickness. If the thread continues to rub heavily against the inside of the eye after insertion, the needle may be too small.
3. Pierce the Centre of the Short Thread End
Hold the short end that has passed through the needle eye and locate the space between the thread strands. Do not insert the needle through the edge of the thread. Guide it through the centre of the thread thickness.
Apply pressure gradually so that the needle does not cut or scrape the individual strands. Piercing the centre accurately prevents the locked section from becoming uneven and helps the thread align smoothly with the needle shaft.
If the piercing point is too close to the end, the thread may pull free under stitching tension. If it is too far from the needle eye, the doubled section becomes too long and creates additional friction as it passes through the stitching holes.
4. Tighten the Thread Loop Behind the Needle Eye
After piercing the thread, slowly slide the pierced section towards the needle eye to form a small loop. Move the loop behind the eye, then pull the long thread and short end in sequence to tighten the connection.
Pulling too hard at once can distort the thread twist or crumple the short end. Tighten it gradually while smoothing the connection with your fingers so that the needle and thread remain aligned.
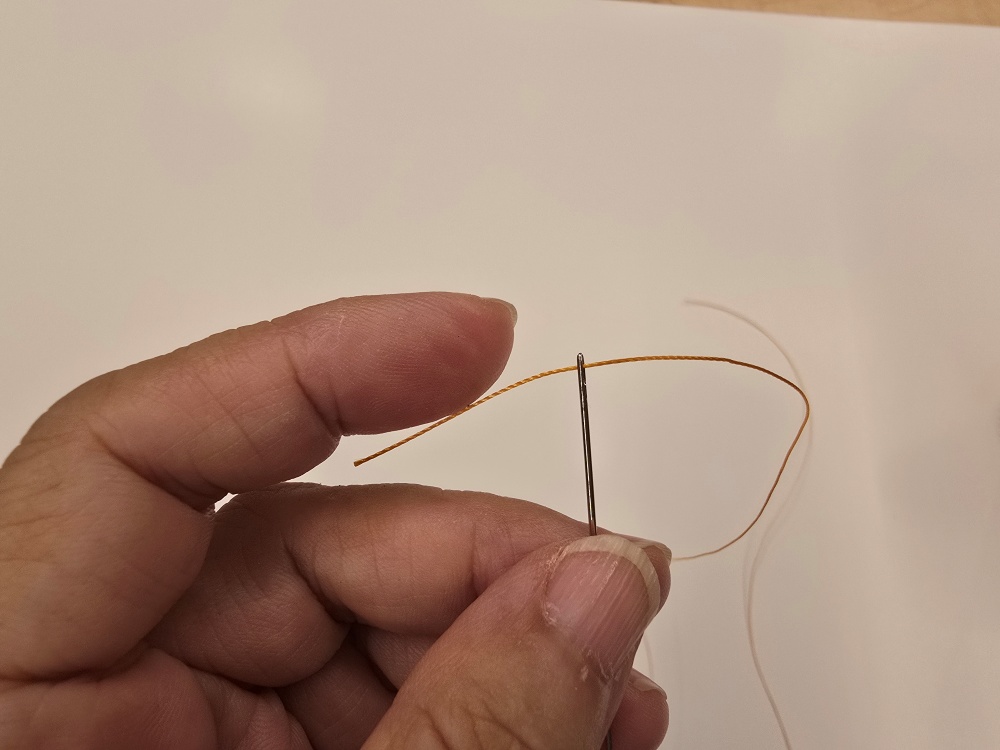
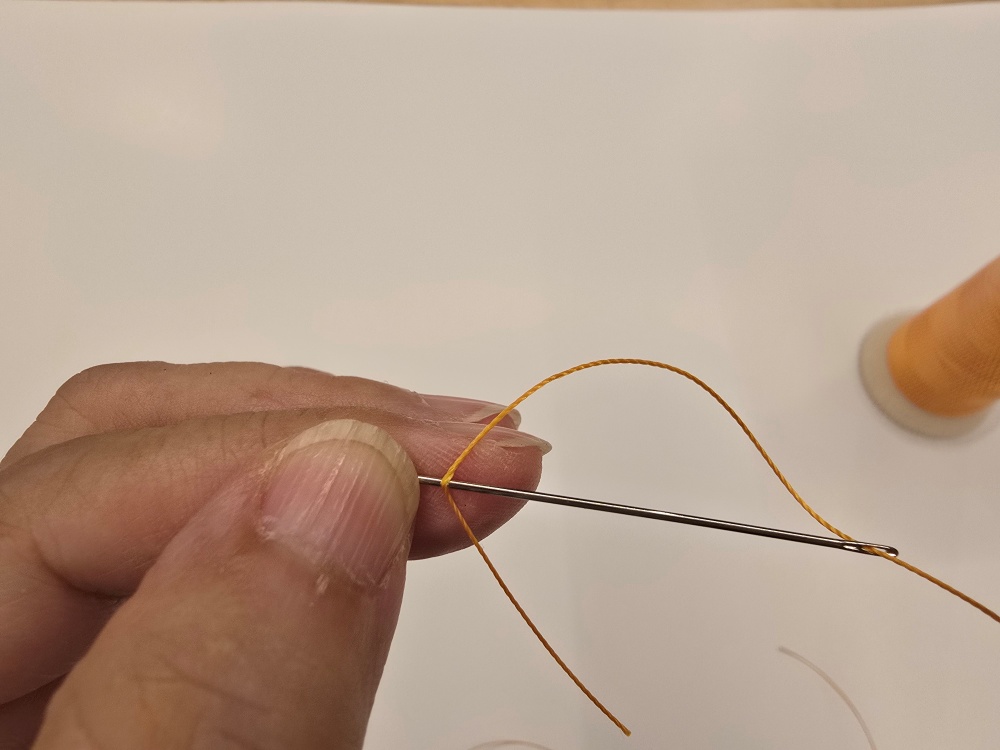
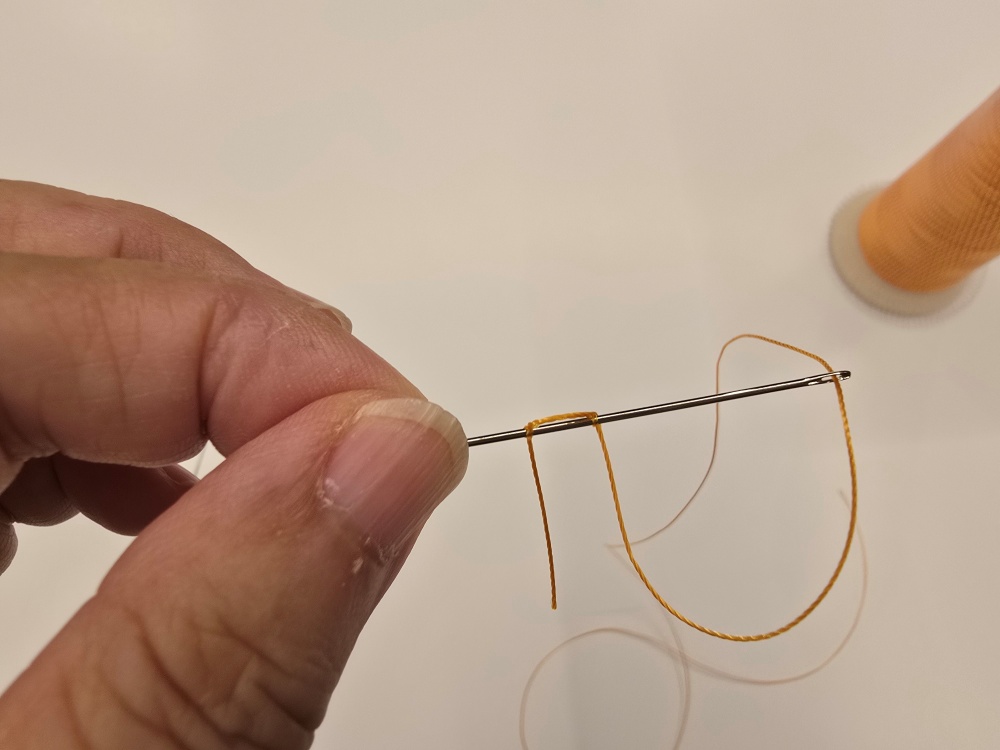
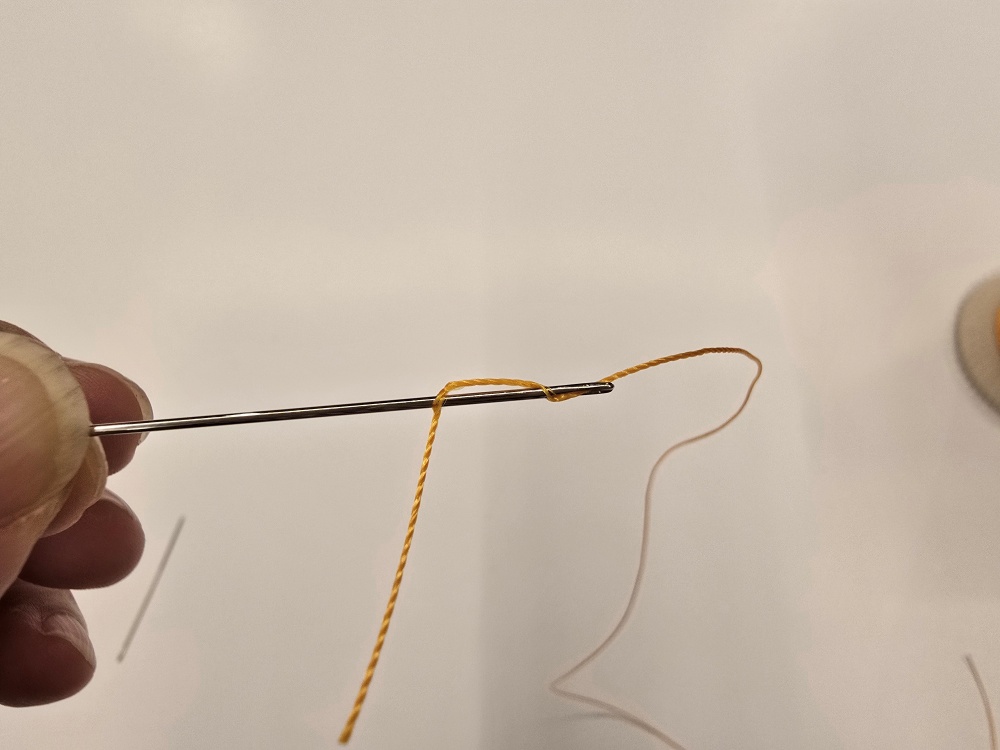
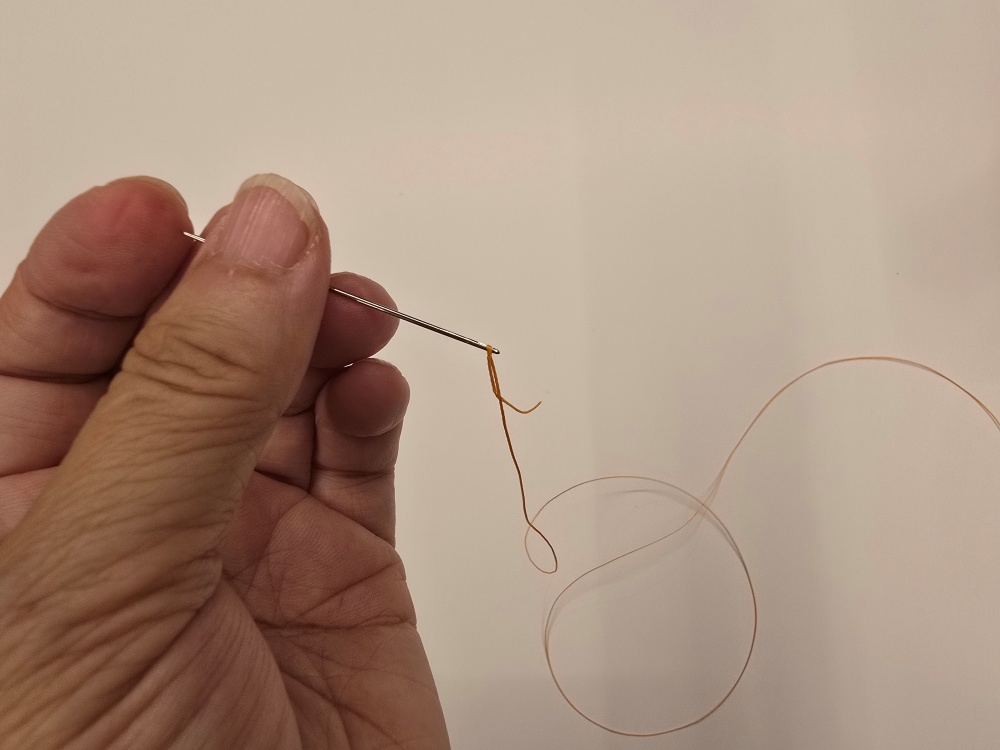
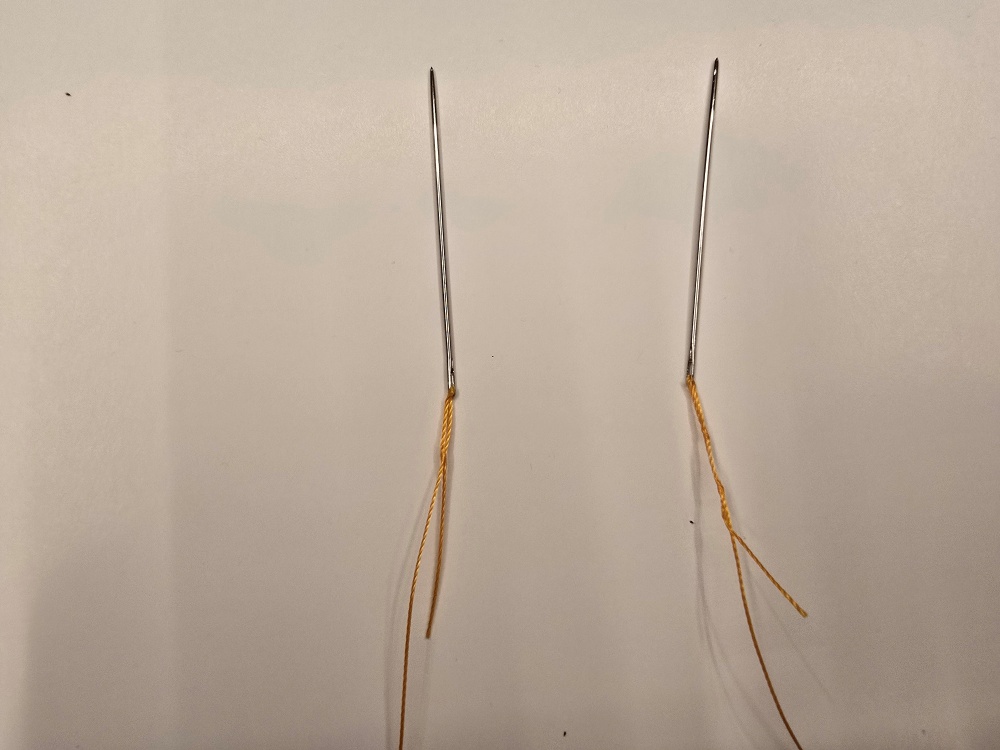
Run your fingers over the completed connection. It should not have a noticeable ridge or bulky lump. If the area behind the needle eye feels much thicker than the needle shaft, recheck the piercing position and the length of the doubled thread.
5. Secure the Second Needle in the Same Way
Saddle stitching uses one needle at each end of a single length of thread. Secure the first needle, check the thread centre and required length, and then attach the second needle to the opposite end in the same way.
Keep the locked sections on both needles as similar in length and thickness as possible. If one side is thicker or longer, the two needles will feel different as they pass through the holes, and the centre of the thread may gradually shift to one side.
After attaching both needles, pull the thread gently to confirm that neither end slips free. Even if the locking sections remain secure, reconsider the needle-and-thread combination if the thread rubs heavily inside the eye or begins to fray.
More Piercings Do Not Always Create a Better Connection
Piercing the short end several times may create a stronger lock, but it also makes the connection thicker. This bulky section can repeatedly catch in the stitching holes, especially when using thick thread or small holes.
Do not treat a fixed number of piercings as a universal rule. Consider the thread material and thickness, the size of the needle eye and how smoothly the connection passes through the stitching holes. Begin with one piercing and add another only when the thread slips too easily and the additional thickness will not obstruct the holes.
Accurate thread-end length and piercing position are more important than creating unnecessary bulk in an attempt to increase the locking strength.
Problems Caused by an Improper Thread Connection
An improper connection between the needle and thread can cause the following problems:
- The thread slips out of the needle after only a few stitches.
- Thread bunches behind the needle eye and catches in the stitching holes.
- The leather surface lifts whenever the needle is pulled through.
- The thread begins to fray around the locked section.
- The thread repeatedly twists or forms loops around the needle.
- The working lengths on the two needles quickly become uneven.
- The needle is so difficult to pull through that pliers are required at every hole.
If these problems continue, do not try to overcome them with additional hand strength. Check the needle-eye size, thread thickness, bulk of the locked section and condition of the stitching holes in that order.
Test the Connection Before Stitching the Finished Piece
After securing the thread, test several stitches on a scrap of the same leather before working on the finished piece. Whenever possible, prepare the test sample with the same number of leather layers and the same hole size as the actual stitching area.
During the test, check whether the locked section catches in the holes, whether the thread slips out and whether repeated pulling damages the thread surface.
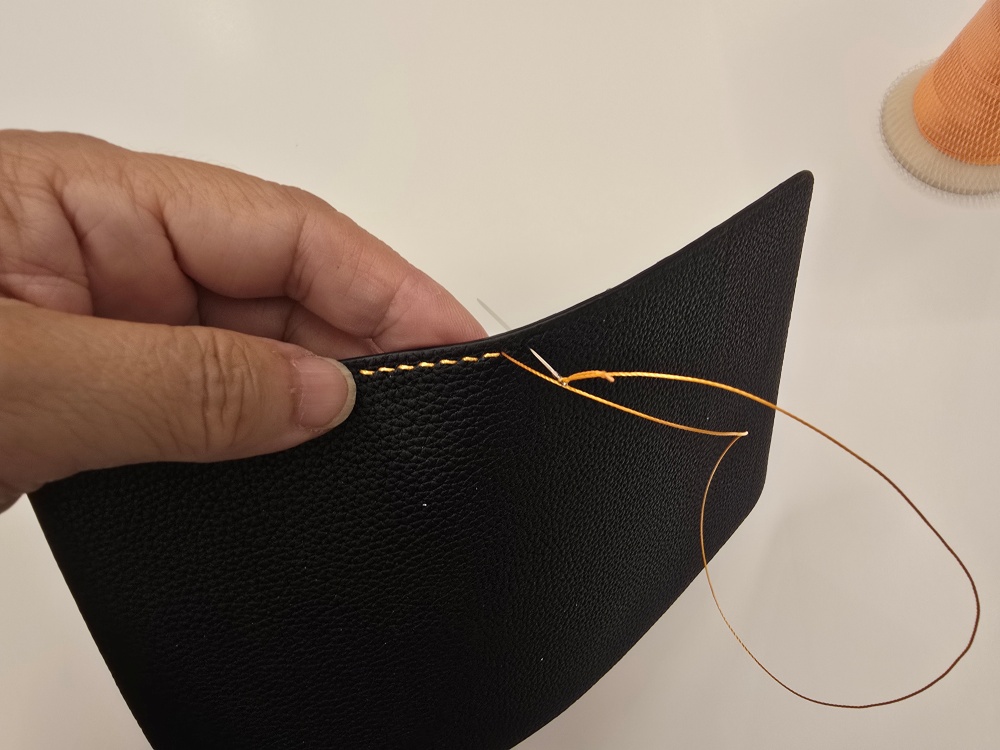
A properly secured thread should pass naturally through the holes with the needle while remaining attached when pulled gently by hand. It should stay connected throughout stitching but still be removable from the needle without damaging the thread when necessary.
A Small Connection Supports Stable Saddle Stitching
Securing thread to a needle is a brief preparation step, but it directly affects both stitching speed and stitch quality.
If the connection is too loose, the thread will slip out during stitching. If it is too thick, it can damage both the thread and the stitching holes. Prepare a clean thread end, pierce its centre accurately and tighten it smoothly behind the needle eye.
Only when this connection is prepared correctly can the reason saddle stitching lasts longer than machine stitching—the consistent crossing of two needles and two thread paths—be properly maintained. Good hand stitching begins before the first stitch, with an accurate connection between the needles and thread.
Leave a Reply