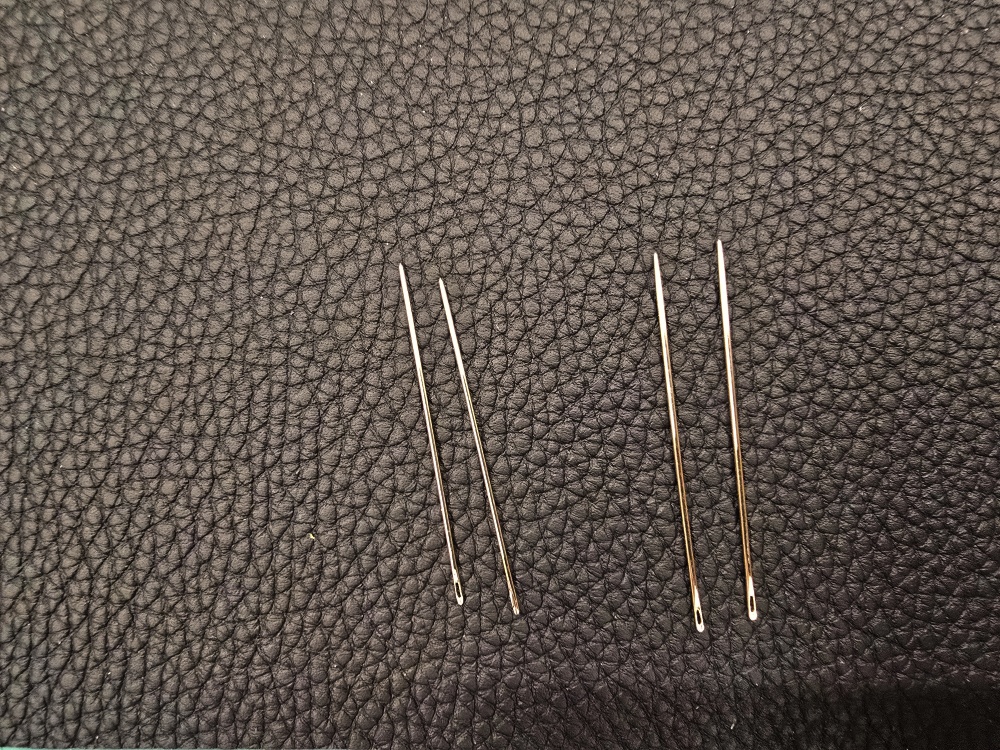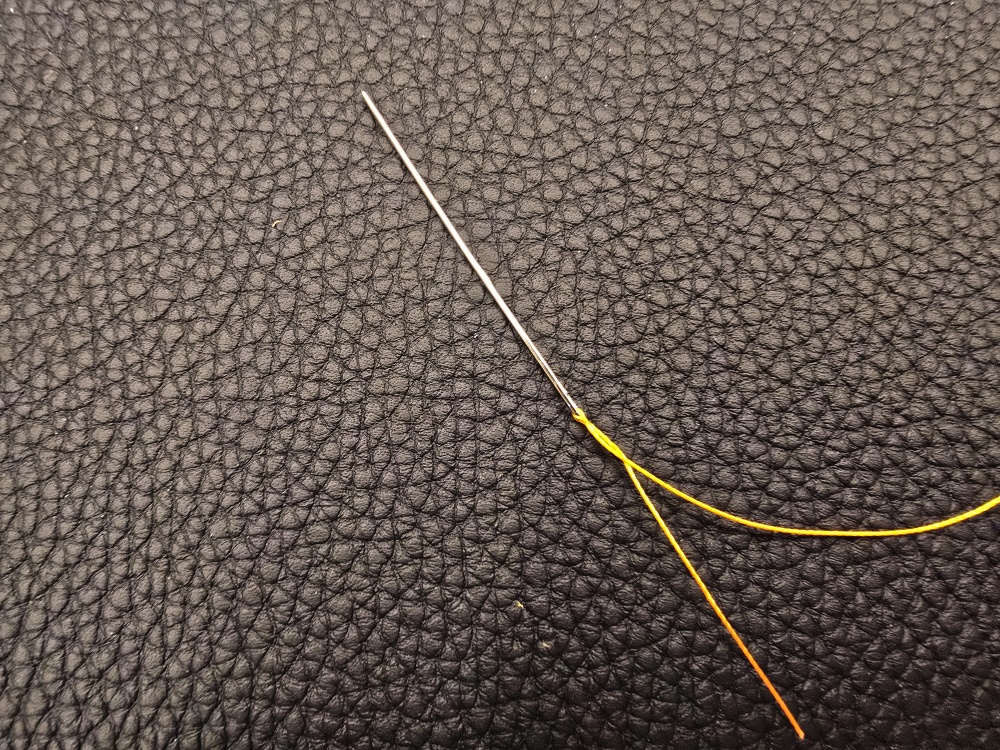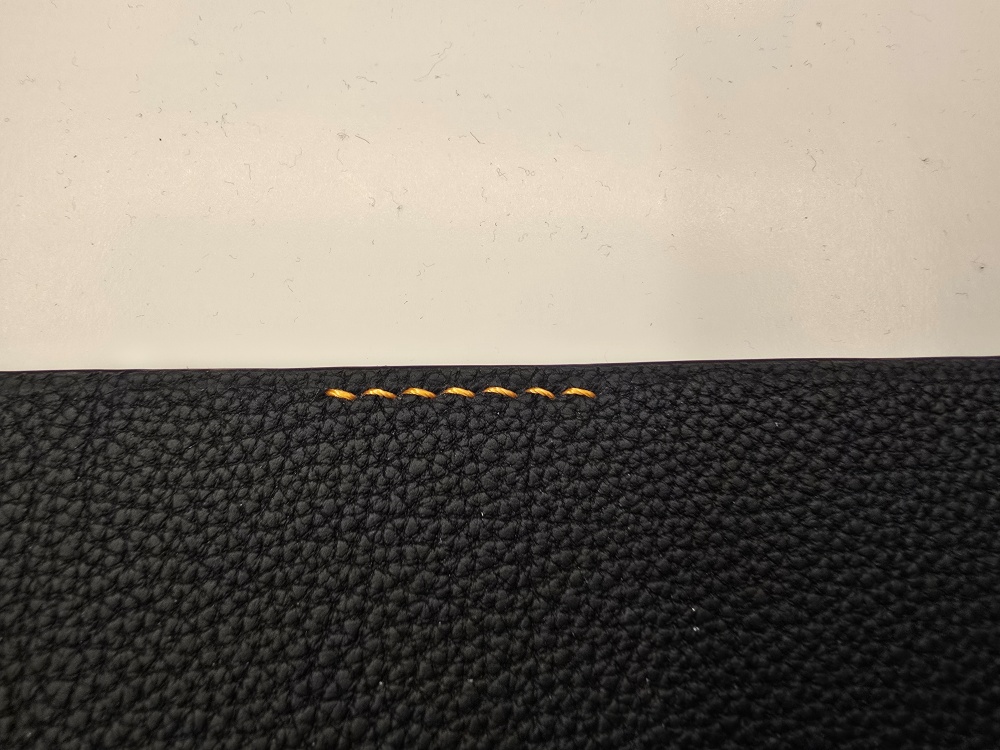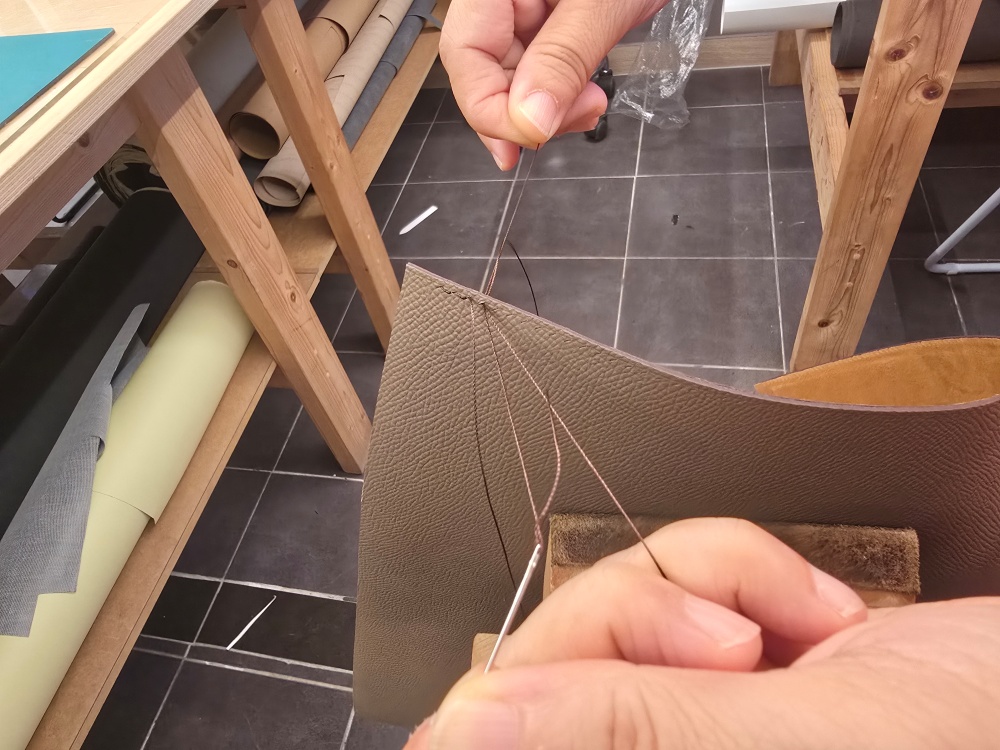
Tag: Leathercraft Needles

  • 가죽공예 새들 스티치에서 실이 꼬이는 이유: 바늘 회전·실 방향·손의 움직임

    Why Thread Twists During Leathercraft Saddle Stitching: Needle Rotation, Thread Direction, and Hand Movement

    How to Secure Thread to a Leathercraft Needle—even when both needles have been attached correctly, the thread may continue to twist during stitching. Thread twisting is often caused not by the thread itself but by repeated needle orientation, movements of the left and right hands, and the way the thread is pulled.

    When the thread twists, small loops form around the needle. These loops can tighten like knots as they pass through the stitching holes. This increases friction and fraying on the thread surface and makes it difficult to maintain consistent stitching tension.

    Thread Rotates Slightly Each Time the Needle Moves

    The needle rotates slightly as it is held between the fingers, passed through a hole and grasped again from the opposite side. This may not be noticeable after one or two stitches, but repeated rotation in the same direction gradually adds twist to the entire thread.

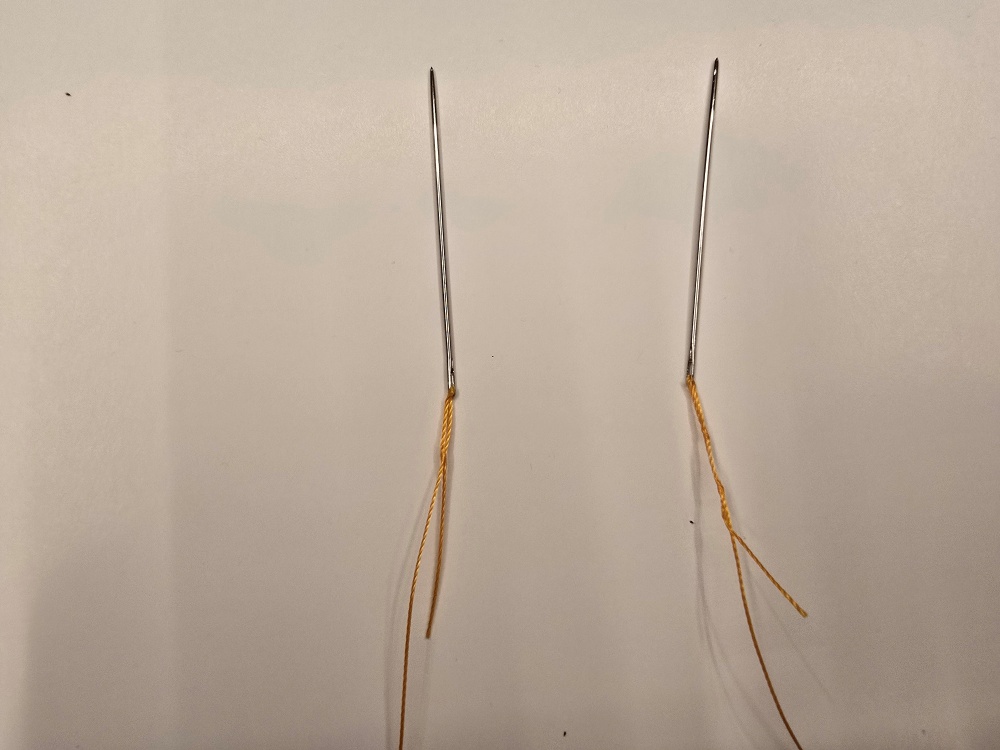
    Untwisted thread hangs naturally between the two needles and does not form large loops when placed on the work surface. Thread with accumulated twist begins to coil around itself or form small loops near the needles when the tension is released.
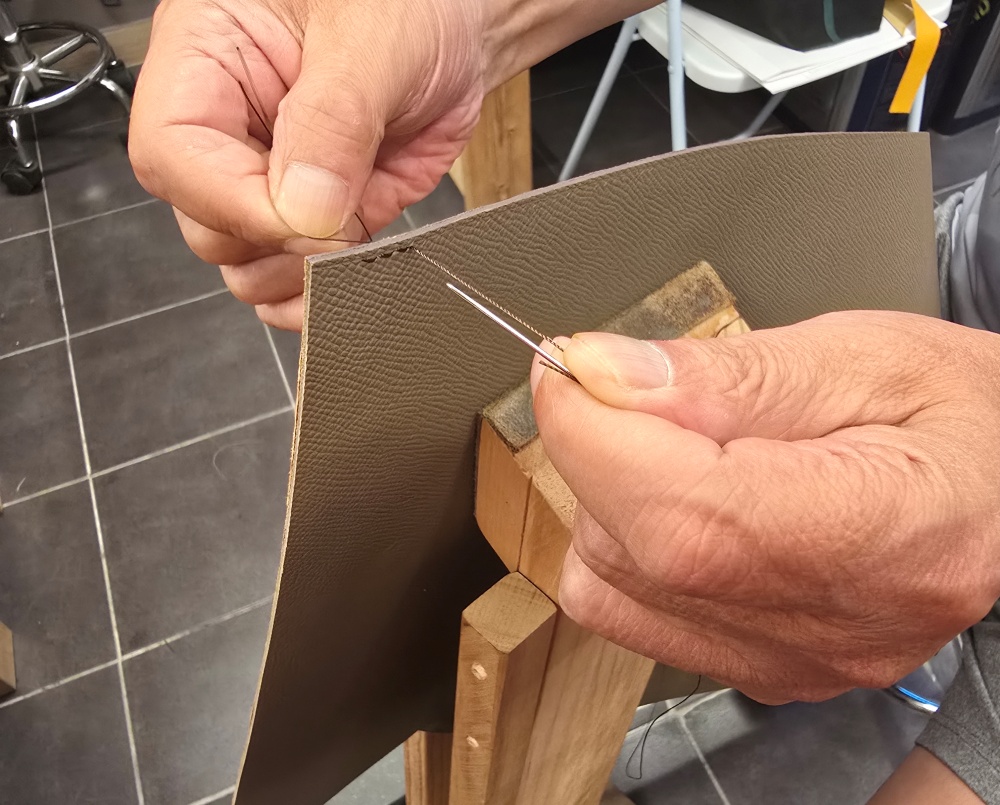
    두 개의 바늘 사이에서 꼬이지 않고 곧게 펼쳐진 새들 스티치 실

    Even a stable bonded thread such as Vinymo MBT can develop twist when the needle is repeatedly turned in the same direction. Thread type alone cannot completely prevent twisting.

    Do Not Roll the Needle Between Your Fingers

    Rolling the needle between the thumb and index finger while inserting it causes the attached thread to rotate as well. Twisting the needle like a screwdriver because it does not pass through easily also causes thread twist to accumulate quickly.

    Hold the same side of the needle shaft and pass it through with as little rotation as possible. When receiving the needle with the opposite hand, grasp and pull it through without rolling it between the fingers.
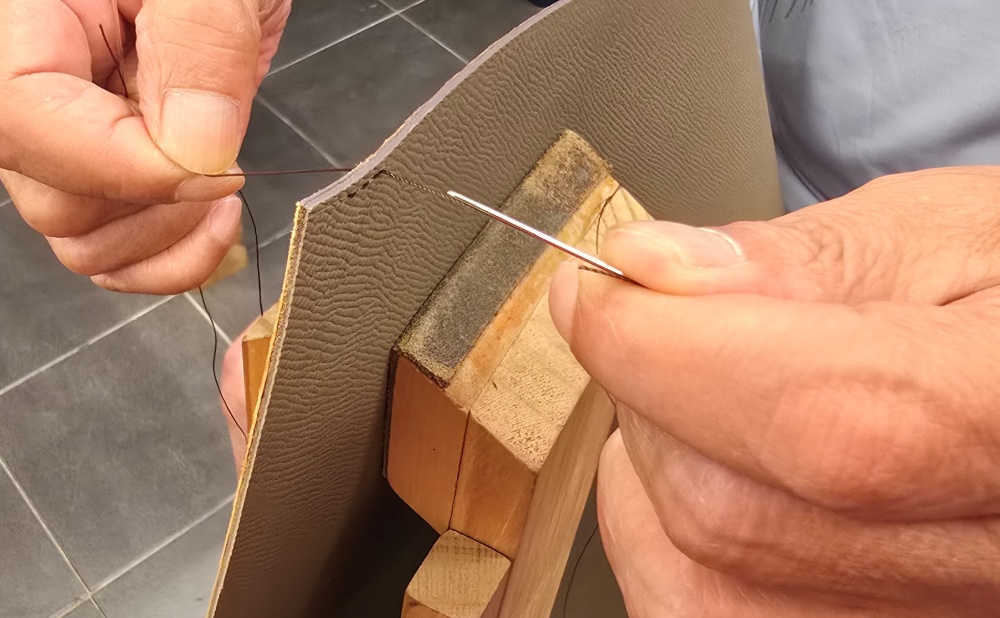
    바늘 회전으로 실이 바늘 몸통 주변에 꼬인 모습

    If the needle does not pass through naturally, check the direction and size of the stitching hole and the thickness of the needle before attempting to force it through by twisting.

    Keep the Passing Order of the Two Needles Consistent

    Saddle stitching passes two needles through the same stitching hole in sequence. Either the left or right needle may be passed first depending on the stitching method, but the same order should be maintained after stitching begins.

    If the passing order and thread position keep changing, the two thread paths may cross unnecessarily outside the hole, or one needle may pierce the opposite thread. To maintain the reason saddle stitching lasts longer than machine stitching—the consistent crossing structure inside each hole—the hand sequence must remain the same for every stitch.

    Decide where the thread will be positioned after passing the first needle and which side the second needle will follow. Repeat the same movement for every stitch.

    Pull the Thread in the Same Direction for Every Stitch

    If one side is pulled upwards and the other downwards inconsistently after both needles have passed through, the two sides of the thread develop different rotational forces and tension.

    Choose a pulling direction that suits the shape of the piece and the desired stitch angle, and use that same direction for every stitch. Tighten the thread while checking that both sides have balanced tension instead of pulling hard in a single motion.

    A consistent pulling direction stabilises both the stitch angle and the way the thread settles against the leather surface.

    Twisting Becomes More Noticeable with Thick Thread and Small Holes

    When Considering Leathercraft Thread Thickness and Pricking-Iron Spacing—when this relationship is poorly balanced, forcing thick thread through small holes creates additional friction. As the thread is pulled through, surface friction can turn existing twist into small loops or visible fraying.

    If the thread snaps out of the hole whenever the needle is pulled or its surface quickly becomes rough, check not only your hand movements but also the combination of thread, needle and stitching-hole size.

    Do Not Prepare More Thread Than Necessary

    Excessively long thread repeatedly rubs against the workbench, clothing and stitching pony, increasing both twisting and friction. Pulling a long length through each hole also makes the receiving hand more likely to rotate the needle unconsciously.

    Allow enough thread for the seam length, number of leather layers and stitch spacing, but avoid preparing more than the work requires. Check the condition of the thread more frequently when stitching a long perimeter.

    Release the Tension and Check the Thread Every Few Stitches

    Thread twist should be detected before a small loop tightens into a knot. Every few stitches, spread the two needles apart and check whether the thread hangs naturally.

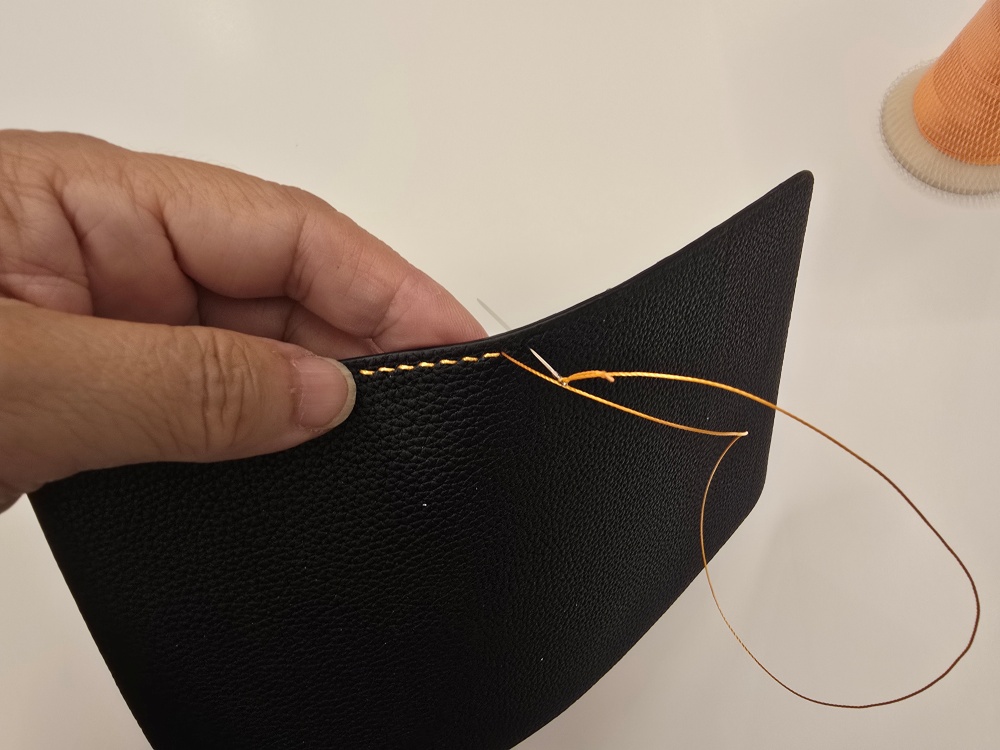
    If the thread begins to coil around itself, let one needle hang down and rotate naturally to release the accumulated twist. Run your fingers lightly along the thread to check for small loops or rough areas.
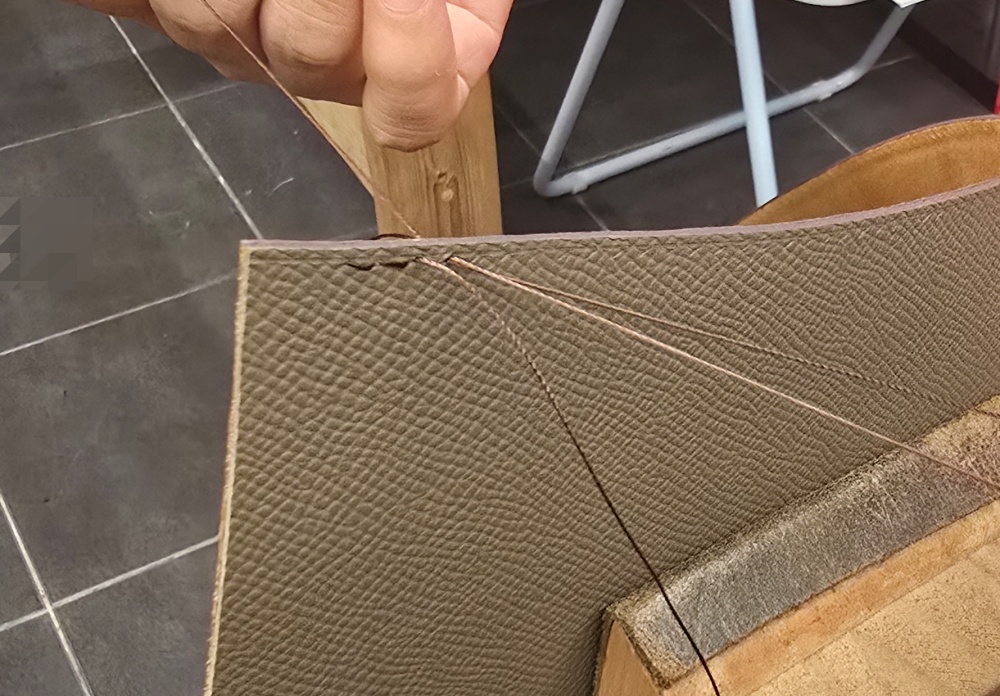
    바늘을 아래로 늘어뜨려 새들 스티치 실의 꼬임을 푸는 모습

    Pulling hard after a loop has formed can tighten it into a knot and damage the thread surface. If you feel resistance, stop pulling and inspect the thread first.

    Consistent Hand Movements Reduce Thread Twisting

    The key to preventing thread twist during saddle stitching is not a special tool but consistent, repeatable hand movement.

    Hold each needle in the same orientation without rolling it, and maintain a consistent passing order and pulling direction. Releasing accumulated twist every few stitches helps keep both the thread condition and stitch tension stable along long seams.

    Good hand stitching is not the ability to pull the thread harder. It is the ability to control two needles and one thread so that they move in the same sequence and direction.
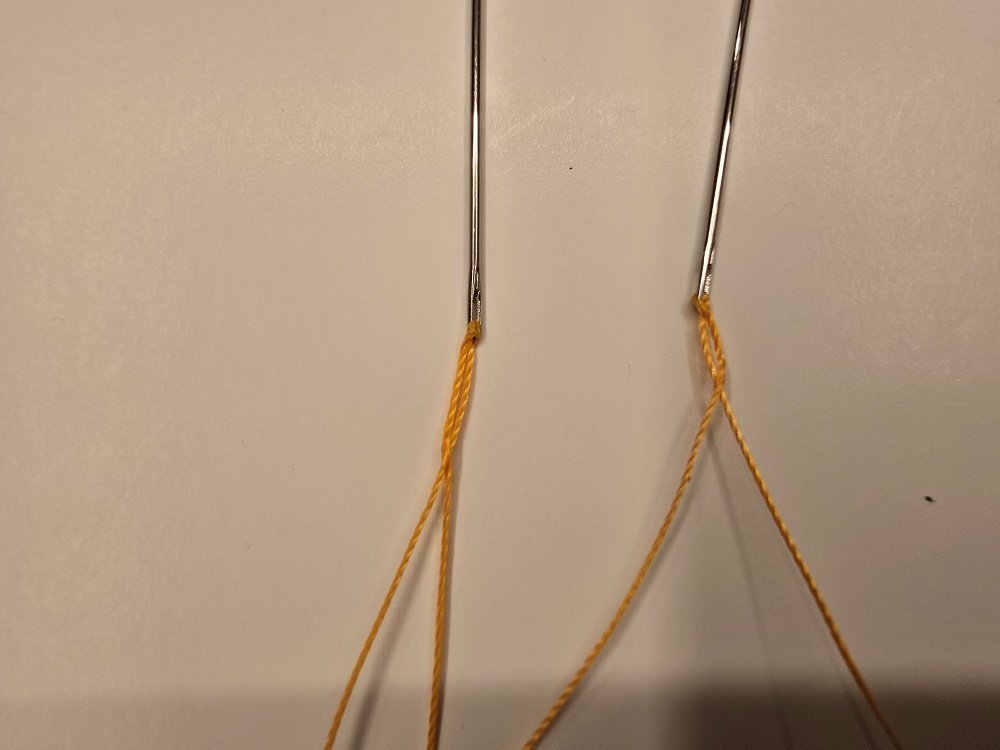
  • 가죽공예 바늘에 실을 고정하는 방법: 실 빠짐을 막는 잠금 연결과 실 끝 정리

    How to Secure Thread to a Leathercraft Needle: A Locking Method That Prevents Slipping

    Attaching thread to a needle may seem like a short and simple step in leathercraft. However, an improper connection can cause the thread to slip out during stitching or create a bulky area around the needle eye that catches in the stitching holes.

    First, use the guide on How to Choose Leathercraft Needlesto select a needle that matches the thread thickness and the size of the stitching holes. The area where the needle and thread meet must then be kept slim and smooth.

    The purpose of securing thread to a needle is not to tie it as tightly as possible. The goal is to prevent the thread from slipping out while keeping the connection between the needle eye and thread smooth enough to pass naturally through the stitching holes.

    Why the Thread Should Be Locked Instead of Knotted

    Tying a knot directly behind the needle eye creates an area thicker than the needle shaft. As this bulky section repeatedly passes through the stitching holes, it can enlarge the holes, abrade the thread and lift the leather surface as the needle is pulled through.

    In hand-stitched leathercraft, the short end of the thread is pierced and locked instead of being tied in a knot. The thread tightens around itself behind the needle eye, connecting the needle and thread without creating unnecessary bulk.

    1. Prepare a Clean Thread End

    Before threading the needle, refer to When Considering Leathercraft Thread Thickness and Pricking-Iron Spacing—and decide which thread to use. If the thread is too thick, it will be difficult to pass through the needle eye. Forcing it through can loosen the twist or cause the end to fray.

    Cut the thread cleanly with sharp scissors and use your fingers to straighten any loose strands. Even a stable bonded thread such as Vinymo MBT can catch in the needle eye if its end becomes flattened unevenly or begins to separate. Shape the end into a slim, neat point before threading it through the eye.

    When using waxed thread, avoid applying too much wax to the end. A buildup of wax may make the thread appear easier to insert, but it can create a bulky locking section behind the needle eye.

    2. Pass the Thread Through the Needle Eye

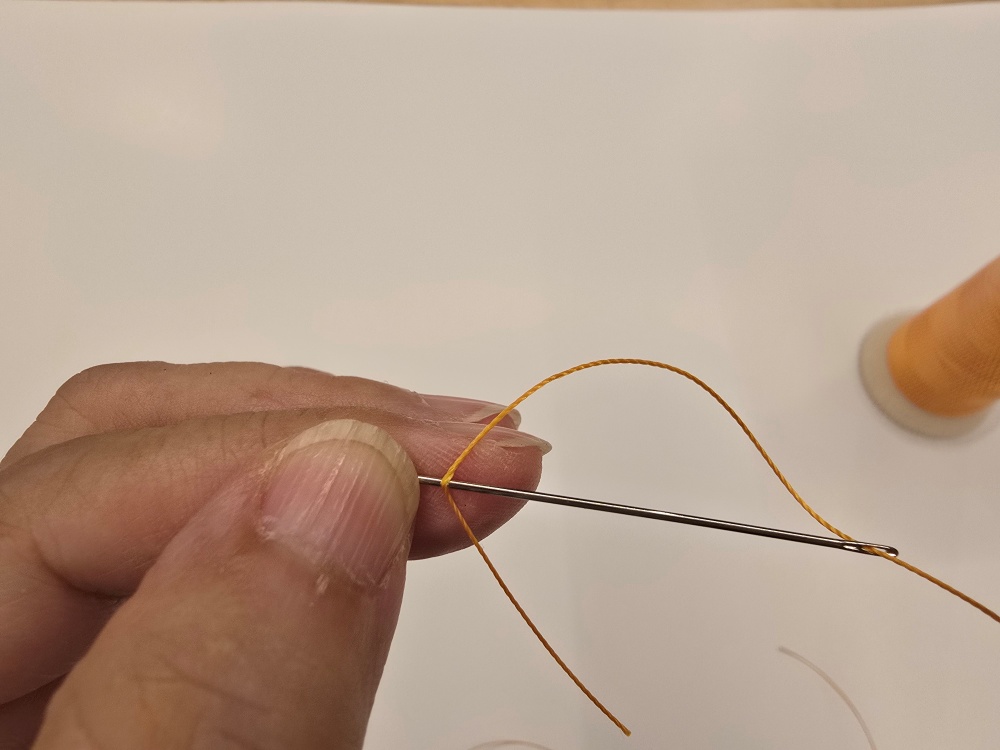
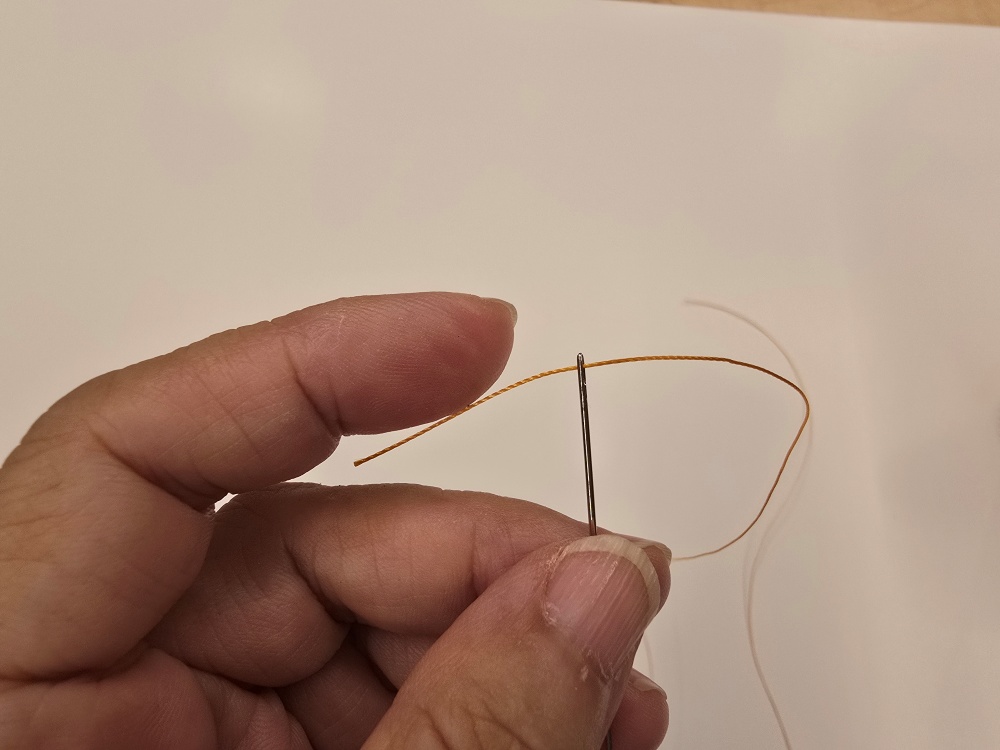
    Pass the prepared thread end through the needle eye, leaving a few centimetres of thread on the short side. If this end is too short, the pierced section may come loose. If it is too long, the doubled section behind the eye will become unnecessarily long and interfere with stitching.

    If the thread will not pass through the needle eye, do not keep twisting and forcing it through. Recheck the combination of needle-eye size and thread thickness. If the thread continues to rub heavily against the inside of the eye after insertion, the needle may be too small.

    3. Pierce the Centre of the Short Thread End

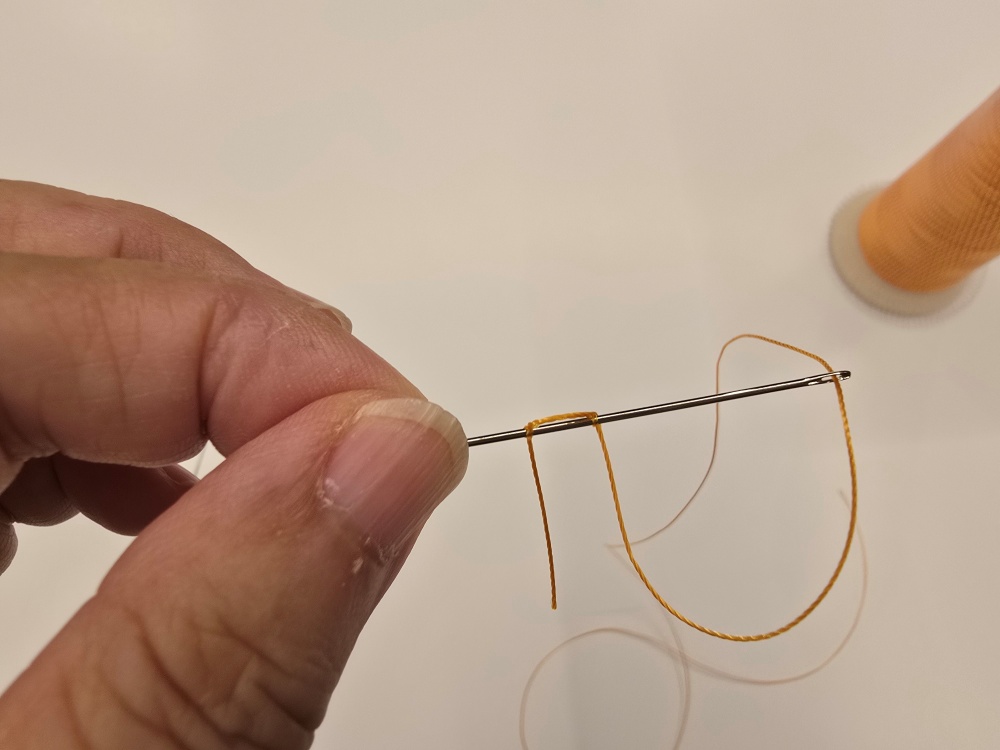
    Hold the short end that has passed through the needle eye and locate the space between the thread strands. Do not insert the needle through the edge of the thread. Guide it through the centre of the thread thickness.

    Apply pressure gradually so that the needle does not cut or scrape the individual strands. Piercing the centre accurately prevents the locked section from becoming uneven and helps the thread align smoothly with the needle shaft.

    If the piercing point is too close to the end, the thread may pull free under stitching tension. If it is too far from the needle eye, the doubled section becomes too long and creates additional friction as it passes through the stitching holes.

    4. Tighten the Thread Loop Behind the Needle Eye

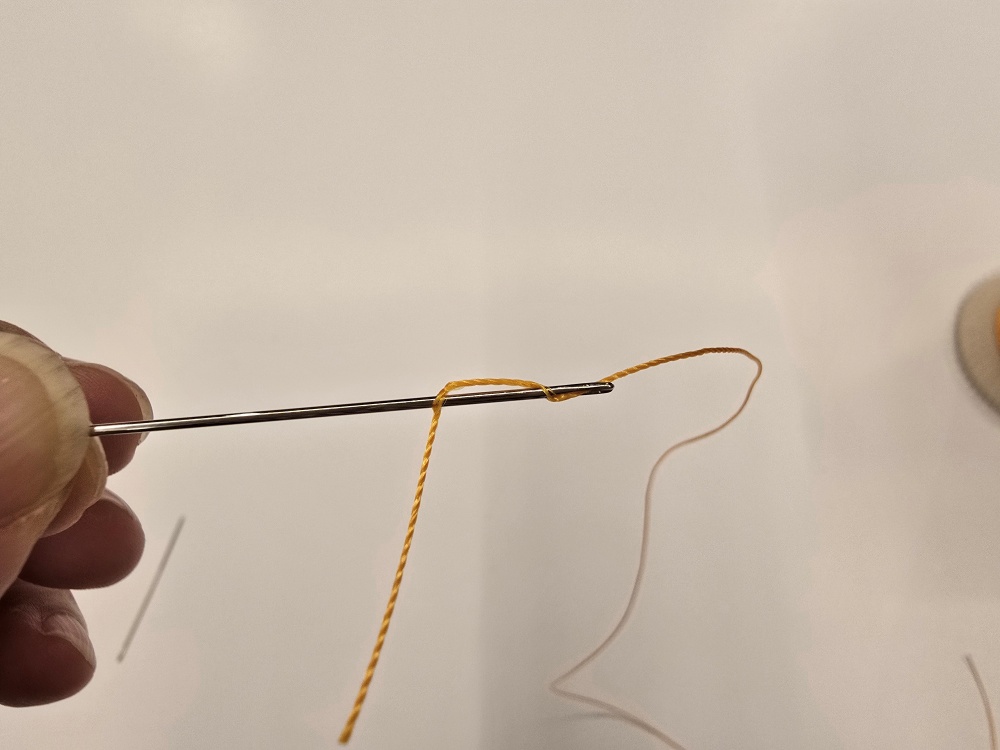
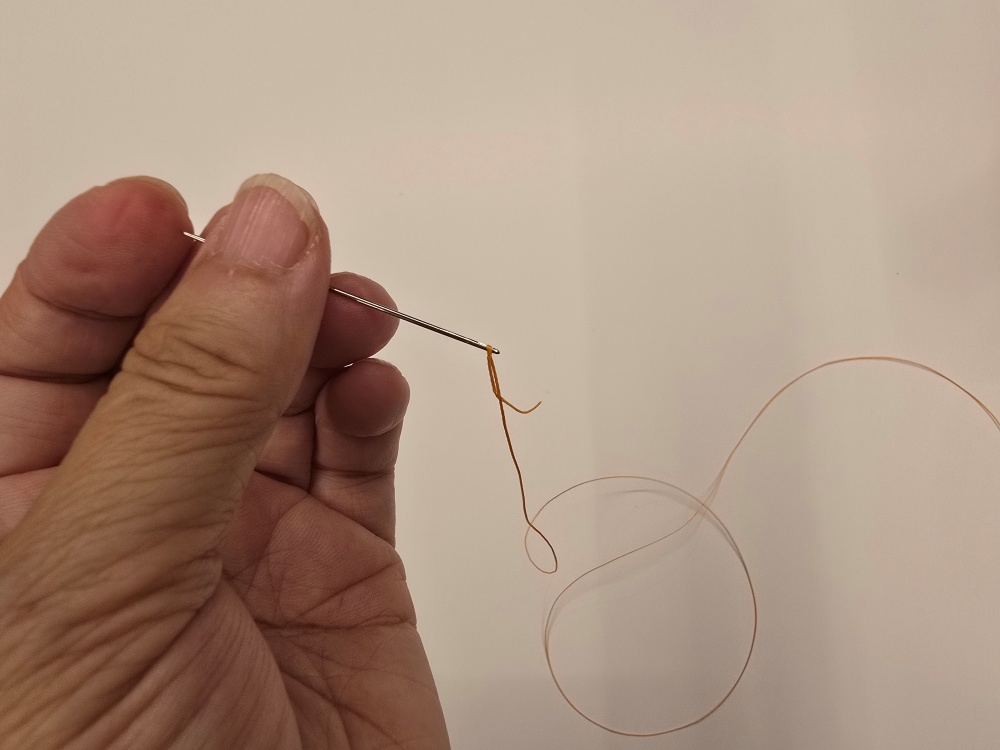
    After piercing the thread, slowly slide the pierced section towards the needle eye to form a small loop. Move the loop behind the eye, then pull the long thread and short end in sequence to tighten the connection.

    Pulling too hard at once can distort the thread twist or crumple the short end. Tighten it gradually while smoothing the connection with your fingers so that the needle and thread remain aligned.

    실을 바늘귀에 통과시킨다
    짧은 실 끝의 중심을 1회 관통한다
    짧은 실 끝의 중심을 2회 관통한다
    긴실을 잡아당겨서 관통된 실 부분을 바늘귀부근으로 잡아당긴다
    짧은 실을 긴실쪽으로 쭉 잡아당겨서 고리르 조여 공정한다

    Run your fingers over the completed connection. It should not have a noticeable ridge or bulky lump. If the area behind the needle eye feels much thicker than the needle shaft, recheck the piercing position and the length of the doubled thread.

    5. Secure the Second Needle in the Same Way

    Saddle stitching uses one needle at each end of a single length of thread. Secure the first needle, check the thread centre and required length, and then attach the second needle to the opposite end in the same way.

    Keep the locked sections on both needles as similar in length and thickness as possible. If one side is thicker or longer, the two needles will feel different as they pass through the holes, and the centre of the thread may gradually shift to one side.

    After attaching both needles, pull the thread gently to confirm that neither end slips free. Even if the locking sections remain secure, reconsider the needle-and-thread combination if the thread rubs heavily inside the eye or begins to fray.

    More Piercings Do Not Always Create a Better Connection

    Piercing the short end several times may create a stronger lock, but it also makes the connection thicker. This bulky section can repeatedly catch in the stitching holes, especially when using thick thread or small holes.

    Do not treat a fixed number of piercings as a universal rule. Consider the thread material and thickness, the size of the needle eye and how smoothly the connection passes through the stitching holes. Begin with one piercing and add another only when the thread slips too easily and the additional thickness will not obstruct the holes.

    Accurate thread-end length and piercing position are more important than creating unnecessary bulk in an attempt to increase the locking strength.

    가죽공예 바늘의 정상적인 실 고정과 두껍게 뭉친 실 고정 비교

    Problems Caused by an Improper Thread Connection

    An improper connection between the needle and thread can cause the following problems:

    • The thread slips out of the needle after only a few stitches.
    • Thread bunches behind the needle eye and catches in the stitching holes.
    • The leather surface lifts whenever the needle is pulled through.
    • The thread begins to fray around the locked section.
    • The thread repeatedly twists or forms loops around the needle.
    • The working lengths on the two needles quickly become uneven.
    • The needle is so difficult to pull through that pliers are required at every hole.

    If these problems continue, do not try to overcome them with additional hand strength. Check the needle-eye size, thread thickness, bulk of the locked section and condition of the stitching holes in that order.

    Test the Connection Before Stitching the Finished Piece

    After securing the thread, test several stitches on a scrap of the same leather before working on the finished piece. Whenever possible, prepare the test sample with the same number of leather layers and the same hole size as the actual stitching area.

    During the test, check whether the locked section catches in the holes, whether the thread slips out and whether repeated pulling damages the thread surface.

    A properly secured thread should pass naturally through the holes with the needle while remaining attached when pulled gently by hand. It should stay connected throughout stitching but still be removable from the needle without damaging the thread when necessary.

    바늘에 실을 고정한 뒤 가죽 자투리에 시험 바느질하는 모습

    A Small Connection Supports Stable Saddle Stitching

    Securing thread to a needle is a brief preparation step, but it directly affects both stitching speed and stitch quality.

    If the connection is too loose, the thread will slip out during stitching. If it is too thick, it can damage both the thread and the stitching holes. Prepare a clean thread end, pierce its centre accurately and tighten it smoothly behind the needle eye.

    Only when this connection is prepared correctly can the reason saddle stitching lasts longer than machine stitching—the consistent crossing of two needles and two thread paths—be properly maintained. Good hand stitching begins before the first stitch, with an accurate connection between the needles and thread.

  • 가죽공예 바늘 선택법: 실 굵기·타공 크기·바늘 끝의 관계

    How to Choose Leathercraft Needles: Thread Thickness, Hole Size, and Needle Tip Shape

    A leathercraft needle is not simply a tool for carrying thread through leather. If the needle thickness, eye size, and tip shape do not match the thread and stitching holes, unnecessary resistance occurs with every stitch. This can wear the thread or enlarge the holes in the leather.

    Even with the same leather and thread, the choice of needle affects the resistance felt by the hands, stitching speed, and stitch alignment on both the front and back. Choosing a good needle is not about buying the most expensive product. It is about finding the right combination for the thread and stitching holes being used.

    the reason saddle stitching lasts longer than machine stitching—the answer lies in its structure, where two needles attached to opposite ends of a single thread cross through the same hole. Both needles must therefore pass steadily through the same hole without piercing the thread already inside it.

    Leathercraft Needles Are Not Designed to Create New Holes

    Ordinary fabric-sewing needles have sharp points that pass directly between woven fibers. In contrast, leathercraft needles used for saddle stitching carry the thread through holes that have already been made with a pricking iron or awl.

    If the needle tip is too sharp, it may leave the existing hole and create a new path through the leather. It may also pierce the thread that has already passed through from the opposite side. When the thread is pierced, moving to the next stitch becomes difficult, and pulling it by force can damage its surface.

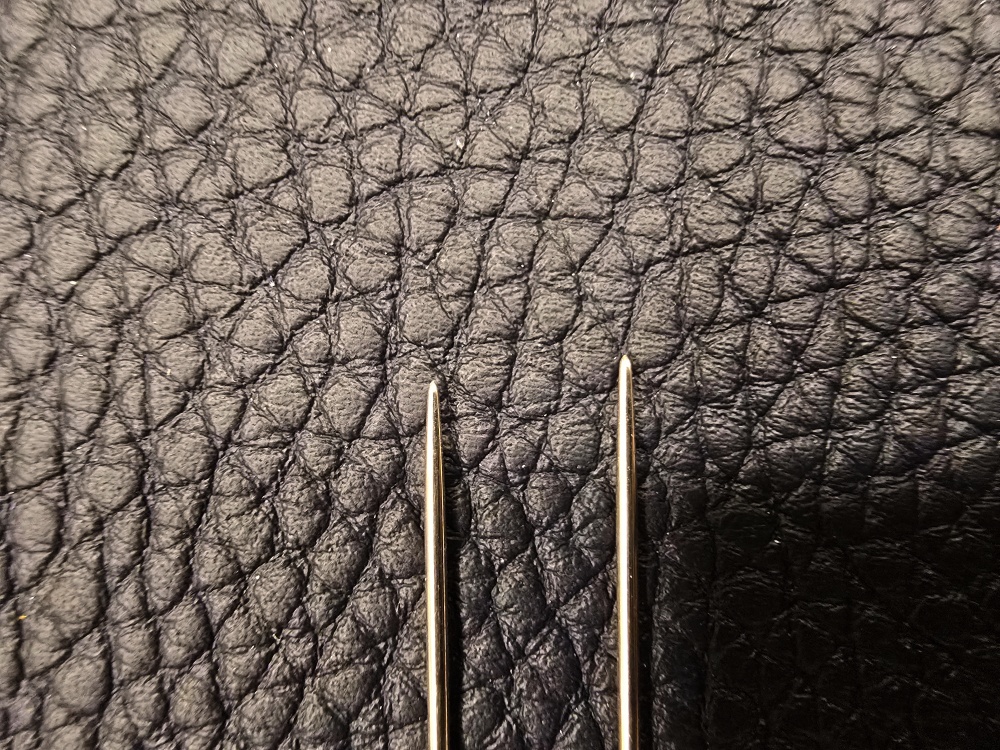
    For leather hand-stitching, a needle with a rounded and smoothly finished tip is generally suitable. The rounded tip follows the direction of the existing stitching hole while reducing damage to the leather fibers and thread.

    A Rounded Needle Tip Must Still Have a Smooth Surface

    Not all round-tipped needles have the same quality. Fine scratches or rough areas on the tip or shaft can scrape the thread and leather as the needle passes through the hole.

    Slowly run your fingers along the needle tip and shaft to check for rough spots. If the needle catches fibers when lightly passed through a soft cloth, its surface may contain a small scratch or burr.

    Continuing to use a needle with a bent or flattened tip repeatedly presses against one side of the stitching hole. If the needle keeps moving in an unintended direction inside the leather or the thread frays without an obvious reason, inspect the needle surface and tip first.

    끝이 둥근 가죽공에바늘

    The Needle Eye Must Match the Thread Thickness

    When Considering Leathercraft Thread Thickness and Pricking-Iron Spacing—once this has been determined, check whether the thread passes through the needle eye without excessive force.

    If the needle eye is too small, threading becomes difficult and the thread rubs against the edge of the eye every time it passes through. When the thread is pierced to lock it onto the needle, the secured section becomes two or more layers thick and takes up more space during actual stitching.

    If the needle eye is excessively large, the needle shaft is often thicker as well. Repeatedly passing a thick needle through small stitching holes can enlarge them and place unnecessary pressure along the stitch line.

    After attaching the thread to the needle, check that the secured section does not protrude far beyond the thickness of the needle shaft. A smooth transition from the needle to the thread reduces resistance as it passes through the stitching hole.

    The Needle Must Not Be Thicker Than the Stitching Hole

    Why awl holes determine stitch quality—the size and direction of the passage followed by the needle and thread determine where each stitch is positioned.

    A properly selected needle should pass through with reasonable hand pressure without enlarging the stitching hole. A tool may occasionally be needed around an especially thick section, but if pliers are required for every hole, recheck the relationship between the needle and hole size.

    If the leather surface lifts or the hole expands into a round shape every time the needle passes through, the needle may be too thick. If the needle is too thin and flexible, it may bend while passing through several layers and make it difficult to emerge accurately through the hole on the back.

    Needle thickness should not be determined in isolation. Consider the total assembled leather thickness, the size and shape of the stitching holes, the thread thickness, and the stability of the needle when it is held and pushed through the leather.

    가죽공에 바늘 굵기 비교

    Thick Leather Does Not Always Require a Thick Needle

    Where several leather layers are joined, the needle must travel through a longer passage and encounters greater internal friction. Replacing it with a thicker needle simply because it does not pass easily may enlarge the stitching holes even further.

    First confirm that the holes on the front and back are connected in the same direction. If the components shifted during gluing or the awl was tilted, even a thin needle will not pass through naturally.

    In a thick joint, it is safer to realign the existing passage with an awl before inserting the needle than to force the hole wider with the needle itself. The goal is not to create a new hole, but to ensure that the existing holes on the front and back form one continuous passage.

    Thicker leather does not automatically require a thicker needle. What is needed is a needle with enough rigidity to resist bending while remaining thin enough not to enlarge the existing holes.

    Problems Caused by Needles That Are Too Thick or Too Thin

    A needle that is too thick can cause the following problems:

    • Excessive force is required to pass through the hole.
    • The stitching hole becomes larger than its original size.
    • The leather surface lifts as the needle passes through.
    • The stitch line becomes distorted around curves or corners.
    • The hole remains visibly large even after the thread has been tightened.
    • Finger and wrist fatigue increases during long stitching sessions.

    A needle that is too thin can cause the following problems:

    • The needle bends easily while passing through several leather layers.
    • It becomes difficult to maintain a stable direction while locating the hole on the back.
    • A small needle eye creates friction against thick thread.
    • The needle shaft may deform when the needle is pulled forcefully.
    • The narrow gripping area may make the needle more difficult to control.

    Needle thickness cannot be judged by the product number alone. Numbering systems and actual dimensions vary between manufacturers, so the needle must be tested with the thread and stitching holes that will be used.

    The Inside of the Needle Eye Must Also Be Inspected

    Even if the outside of the needle eye appears smooth, a rough inner edge can scrape the same section of thread with every stitch. The problem may not be visible at first, but along a long stitch line the thread surface can gradually fray and its twist may loosen.

    Before using a new needle, insert a short piece of thread through the eye and move it back and forth several times. If a particular section of thread begins to fray or lose color, inspect the finish inside the needle eye.

    A needle with a deformed eye or visible rust should not remain in use. It may leave metal marks on the leather surface or stain light-colored thread.

    The Thread Attachment Must Be Compact and Smooth

    For saddle stitching, the thread is often pierced and locked onto the needle so that it does not slip out of the eye. Overlapping the thread too many times or creating a large knot makes the section behind the needle excessively thick.

    A bulky attachment rubs against the leather every time it passes through a hole and may disturb the thread’s twist. On light-colored leather, wax and thread residue may also collect around the stitching holes.

    The thread should be secured firmly enough not to slip from the needle, while the transition from the needle shaft to the thread remains as flat as possible. Even a stable bonded thread such as Vinymo MBT can create excessive resistance if the attachment around the needle is too bulky.

    When using wax, do not concentrate a large amount in one area. Apply only the necessary amount in a thin, even layer to prevent buildup on the thread surface and around the needle eye.

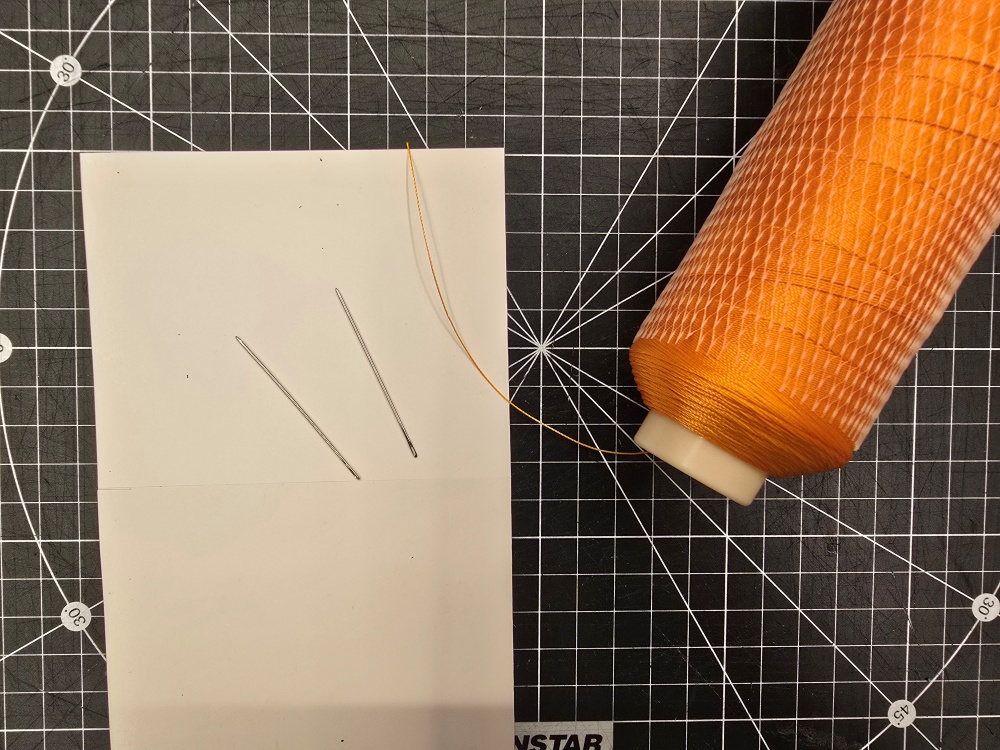
    비니모 MBT 실을 가죽공예 바늘에 고정한 모습

    Saddle Stitching Requires Two Needles in the Same Condition

    Saddle stitching uses a needle on each end of a single thread, with both needles crossing through the same hole. The two needles should therefore have the same thickness, length, and tip condition so that hand movement and passing resistance remain consistent on both sides.

    If one needle is new while the other is bent or worn, they may follow different paths even when the same force is applied. When replacing needles, inspect both together and replace them as a pair when their conditions differ significantly.

    If a needle bends during work, repeatedly forcing it back in the opposite direction can cause metal fatigue and sudden breakage. Replace the needle if the tip is damaged or the shaft shows visible deformation.

    Choose the Needle After Test-Stitching the Actual Materials

    Do not make the final needle choice based only on the number printed on the package. Prepare a test piece using the leather, reinforcement, and lining in the same order and combined thickness as the actual project.

    Check the combination in the following order:

    1. Determine the thread thickness and pricking-iron spacing for the project.
    2. Choose a needle whose eye accepts the thread without excessive force.
    3. Attach the thread to the needle using the same method that will be used during stitching.
    4. Make stitching holes of the same size as those planned for the project.
    5. Check whether the needle passes through without enlarging the holes.
    6. Inspect both the front and back to confirm that the stitches sit consistently.
    7. Sew at least ten stitches and check for thread wear and hand fatigue.
    8. Bend the test piece and check whether the holes stretch or the thread rises above the surface.

    A needle may appear to pass smoothly during a short test, while hand fatigue and thread wear accumulate along a longer stitch line. When stitching a long perimeter such as that of a bag, consider not only how easily the needle passes but also whether it maintains the same performance throughout the work.

    가죽공예 바늘 선택을 위한 시험 바느질

    A Good Needle Works Invisibly Between the Thread and Hole

    A properly selected needle does not force the stitching holes wider or damage the thread. It follows the intended passage and connects the front and back consistently.

    If stitching requires excessive force, the thread repeatedly frays, or the needle continues to bend, do not assume that hand technique is the only cause. Recheck the needle thickness, eye size, tip shape, and relationship between the thread and stitching holes.

    The key to choosing leathercraft needles is not memorizing a particular size number or brand. It is finding a combination in which the thread is secured properly in the eye, the needle does not distort the stitching holes, and both needles move with the same resistance.

    The needle is not visible in the finished piece, yet it passes through every stitch. When the needle, thread, and stitching holes are properly balanced, the rhythm of hand-stitching becomes stable and only the intended stitch line remains on the leather surface.