Tag: Vinymo MBT

  • 가죽공예 새들 스티치 실 길이 계산법: 4배·3.5배와 두께 보정

    How to Calculate Thread Length for Leathercraft Saddle Stitching: 4×, 3.5×, and Thickness Adjustments

    One of the first things to determine before saddle stitching is the thread length. If the thread is too short, a new thread must be joined before the seam is finished. If it is excessively long, it repeatedly rubs against the workbench and stitching pony, increasing friction and twisting.

    To Reduce Thread Twisting During Saddle Stitching—both the initial thread length and your hand movements must be appropriate. However, simply multiplying the seam length by a fixed number cannot determine the correct thread length for every project.

    In my own work, I generally prepare thread at approximately four times the seam length. I use more than four times the length for short stitching sections and approximately 3.5 times the length for long seams. For thick leather or areas where several layers are joined, I prepare additional thread beyond the basic calculation.

    Measure the Actual Seam Length First

    When calculating the thread length, measure the actual seam from the first stitching hole to the last, rather than measuring the entire leather component.

    A straight seam can be measured with a ruler. For curves or the perimeter of a bag, it is more accurate to follow the stitching line with a flexible tape measure or a separate piece of thread and then straighten it to check the length. Remember to include corners where the stitching direction changes and any continuous sections around the perimeter.

    Apply the appropriate multiplier to the measured seam length, then make sure the calculated length also provides enough thread to secure the needles and hold them comfortably while stitching.

    Prepare Approximately Four Times the Length for a Standard Seam

    When the leather thickness and pricking-iron spacing are within the range you normally use, and the seam is neither unusually short nor long, approximately four times the seam length can be used as the basic starting point.

    For example, if the actual seam is 30 cm long, begin by calculating approximately 120 cm of thread. This is not an absolute formula. It is a starting point that should be adjusted according to the leather, thread, and stitching method you normally use.

    Even when two seams are both 30 cm long, the amount of thread they consume can differ depending on the leather thickness, stitch spacing, and number of corners.

    Prepare More Than Four Times the Length for a Short Stitching Section

    For a short seam, simply calculating four times its length may not provide enough working allowance to secure both needles and hold and pull the thread comfortably.

    A certain amount of thread is always needed for securing the needles and tightening the final stitch, regardless of how short the seam is. For short sections such as handle attachments or reinforcing stitches, prepare more than four times the seam length.

    Trying to reduce a small amount of leftover thread can result in running out before the short seam is complete. It is better to prioritise enough length for a secure finish than to save a small amount of material.

    Use Approximately 3.5 Times the Length for a Long Seam

    For a long seam such as the perimeter of a bag, approximately 3.5 times the seam length can be used as the starting point. Applying the full four-times rule to a long seam may create more thread than necessary, causing it to rub repeatedly against the workbench, clothing, and stitching pony.

    The longer the thread, the farther it must be pulled through each stitch, making friction and twisting more likely to accumulate. When using your usual leather thickness and stitching conditions, reducing the length to approximately 3.5 times the seam length can make a long seam easier to manage.

    However, if a long seam includes many thick sections or passes through several layers, do not rely on the 3.5-times calculation alone. Add extra thread to account for the increased thickness.
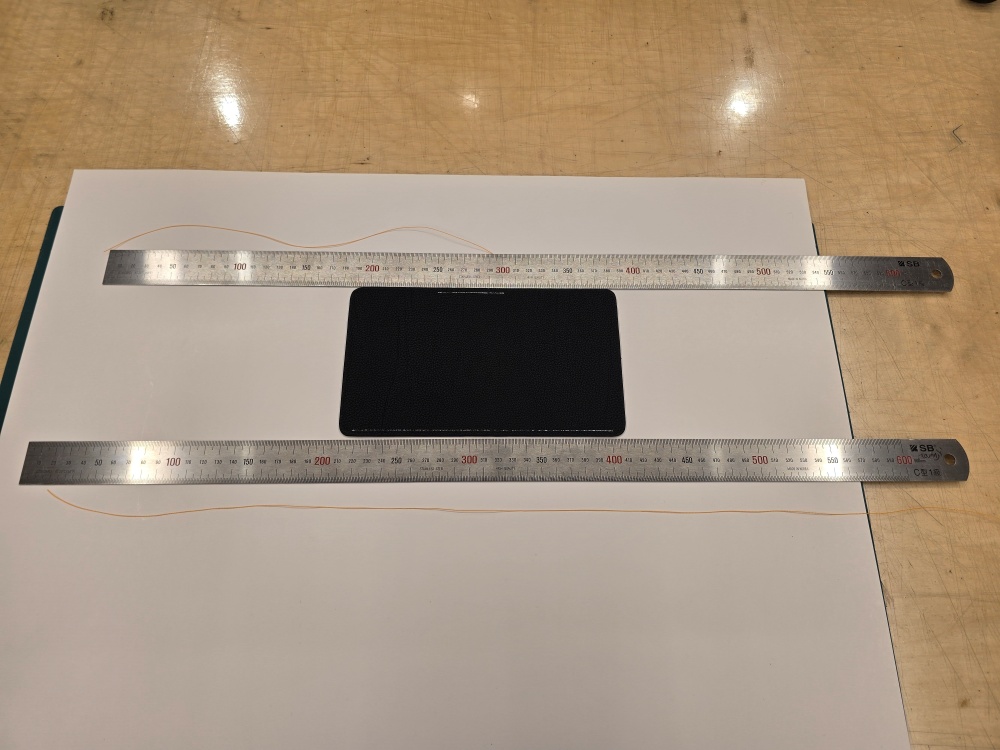
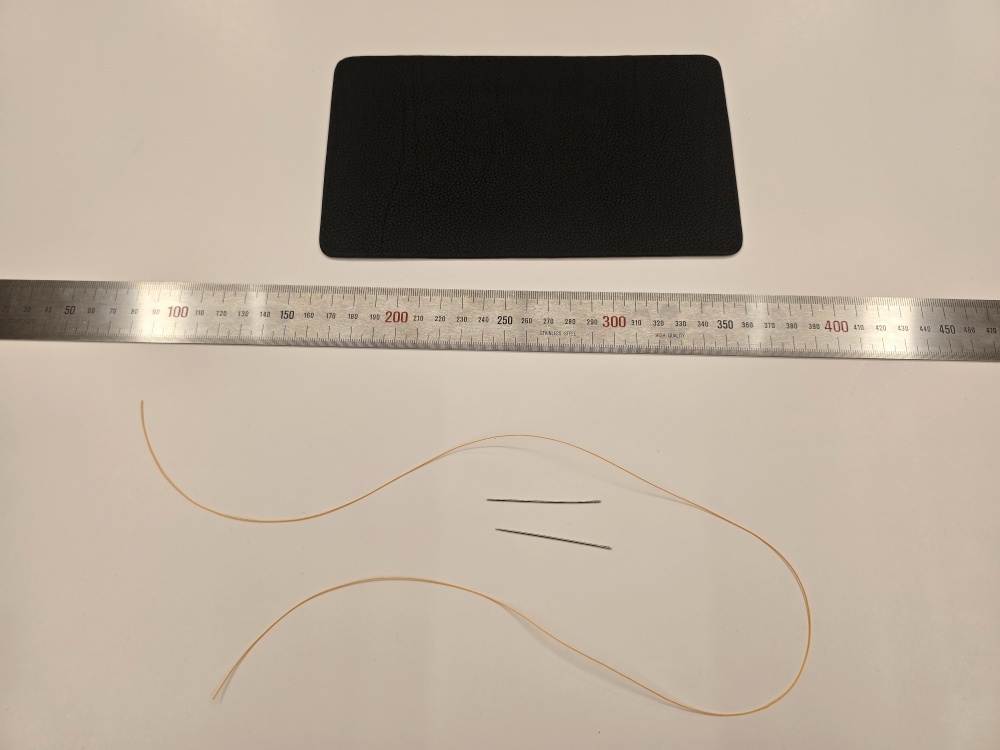
    짧은 봉제선과 긴 봉제선에 다르게 준비한 새들 스티치 실

    Thick Leather Requires More Than the Basic Calculation

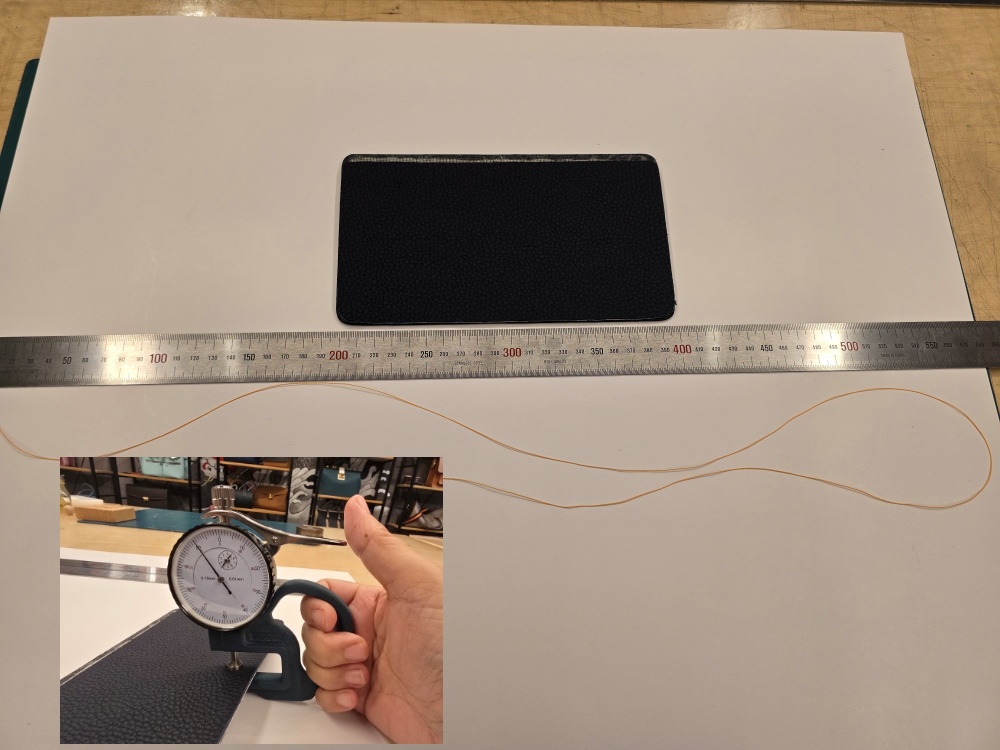
    Even when two seams have the same length, thicker leather increases the internal distance that the thread must travel with every stitch. Thread consumption also increases where multiple layers of leather, reinforcement, and lining overlap.

    When Considering Leathercraft Thread Thickness and Pricking-Iron Spacing—you must also account for the final assembled thickness. Thick leather combined with thick thread or close stitch spacing may require more thread than the basic multiplier provides.
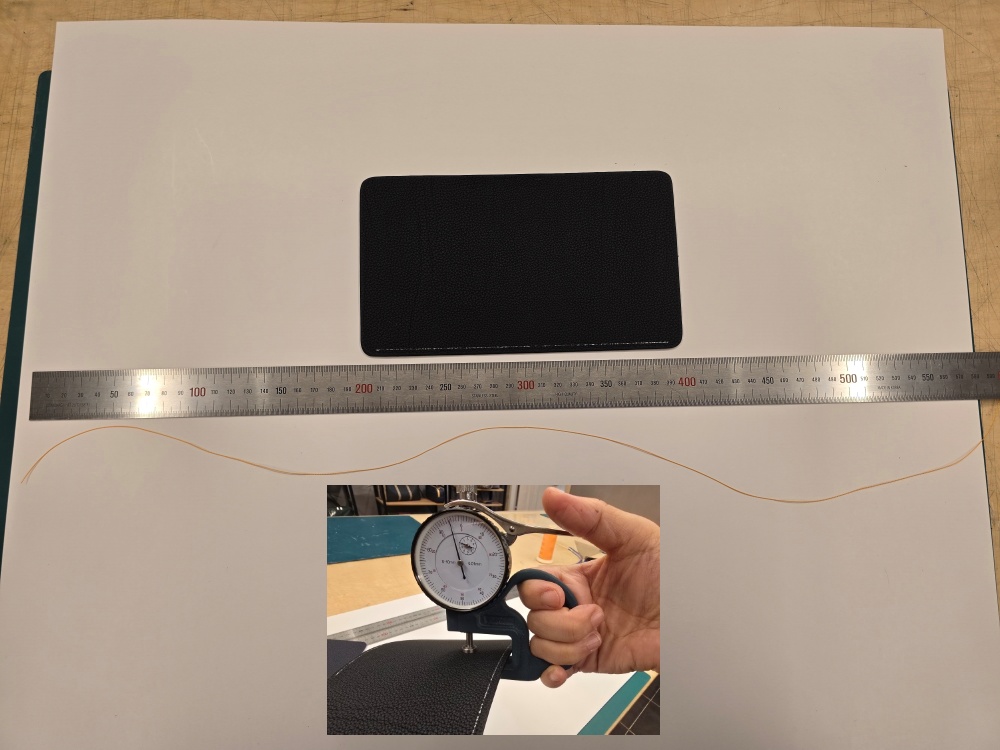
    봉제선 길이는 같지만 결합 두께가 다른 가죽 시험편 , 가죽두께 2mm
    봉제선 길이는 같지만 결합 두께가 다른 가죽 시험편, 가죽두께 4mm

    For thick handles, strap attachments, and areas where several components meet, calculate the standard four-times length or the 3.5-times length for a long seam and then add an extra allowance. The safest way to determine this allowance is to consider the final leather thickness and the results of a test stitch.

    Test the Calculation When Using New Materials or Conditions

    When using a new leather thickness, thread size, or pricking-iron spacing, prepare a test piece with the same materials before applying the calculation to the finished item.

    Record the seam length of the test piece and the initial thread length. After stitching, measure the thread remaining on both sides. If too much thread remains, reduce the multiplier slightly for the next project. If there was not enough thread to finish comfortably, increase the allowance as needed.
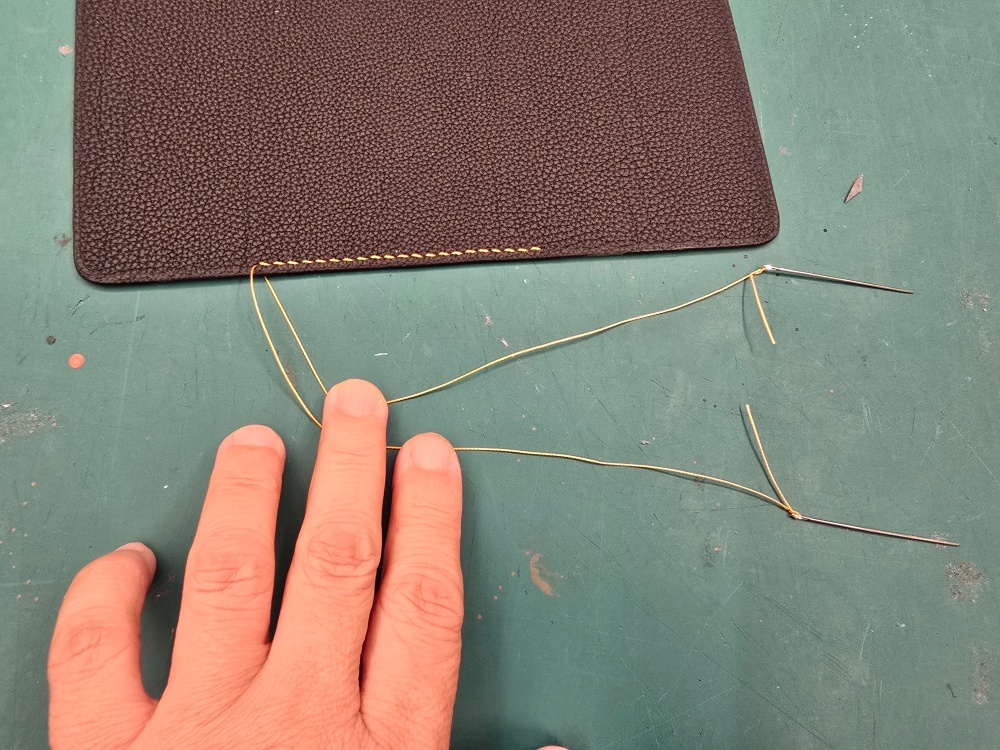
    계산한 실로 시험 바느질한 뒤 양쪽에 남은 실의 길이

    Repeating this process creates a practical adjustment standard for the leather thicknesses and threads you use most often, based on the four-times rule for standard seams and the 3.5-times rule for long seams.

    Calculate Thread Length Using Both a Multiplier and the Working Conditions

    The key to calculating saddle-stitching thread length is not to apply one fixed multiplier to every project.

    • Standard seam: approximately four times the seam length
    • Short stitching section: more than four times the seam length
    • Long seam: approximately 3.5 times the seam length
    • Thick or multilayered section: add extra allowance to the basic calculation

    After calculating the length, follow How to Secure Thread to a Leathercraft Needle—attach a needle to each end, and confirm that enough thread remains to hold and pull comfortably.

    Choosing the correct thread length is not simply a way to save material. It is an important part of saddle-stitching preparation that reduces unnecessary friction and twisting while helping maintain consistent tension along a long seam.
  • 가죽공예 새들 스티치에서 실이 꼬이는 이유: 바늘 회전·실 방향·손의 움직임

    Why Thread Twists During Leathercraft Saddle Stitching: Needle Rotation, Thread Direction, and Hand Movement

    How to Secure Thread to a Leathercraft Needle—even when both needles have been attached correctly, the thread may continue to twist during stitching. Thread twisting is often caused not by the thread itself but by repeated needle orientation, movements of the left and right hands, and the way the thread is pulled.

    When the thread twists, small loops form around the needle. These loops can tighten like knots as they pass through the stitching holes. This increases friction and fraying on the thread surface and makes it difficult to maintain consistent stitching tension.

    Thread Rotates Slightly Each Time the Needle Moves

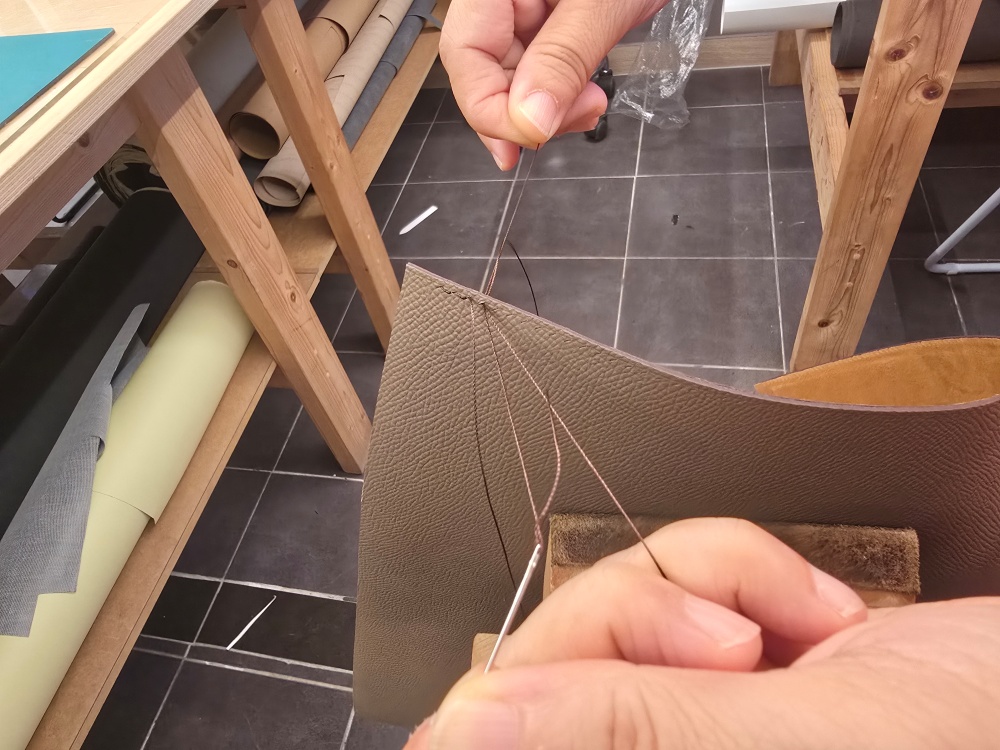
    The needle rotates slightly as it is held between the fingers, passed through a hole and grasped again from the opposite side. This may not be noticeable after one or two stitches, but repeated rotation in the same direction gradually adds twist to the entire thread.

    Untwisted thread hangs naturally between the two needles and does not form large loops when placed on the work surface. Thread with accumulated twist begins to coil around itself or form small loops near the needles when the tension is released.

    두 개의 바늘 사이에서 꼬이지 않고 곧게 펼쳐진 새들 스티치 실

    Even a stable bonded thread such as Vinymo MBT can develop twist when the needle is repeatedly turned in the same direction. Thread type alone cannot completely prevent twisting.

    Do Not Roll the Needle Between Your Fingers

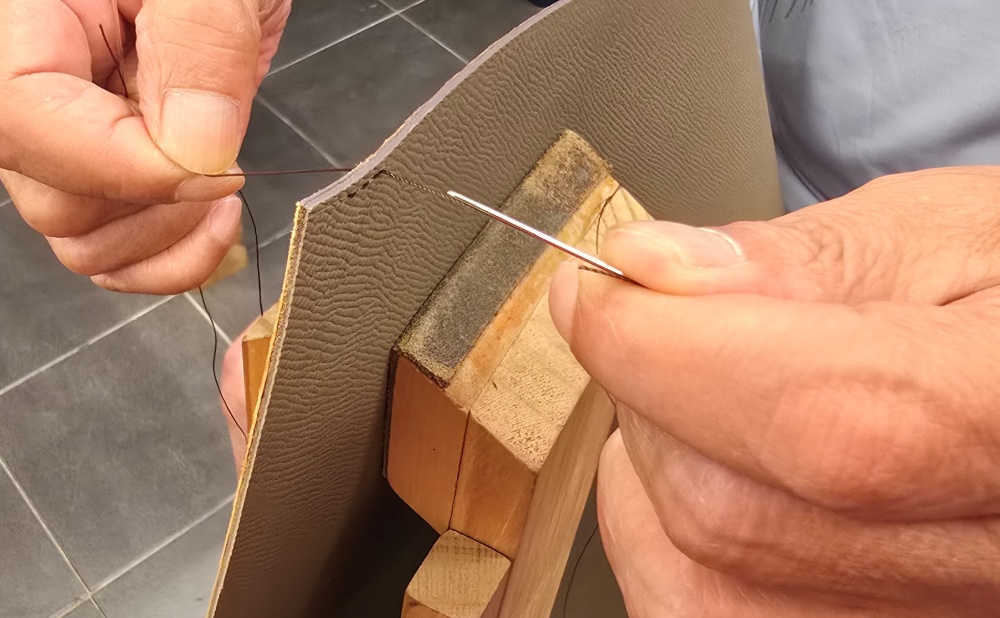
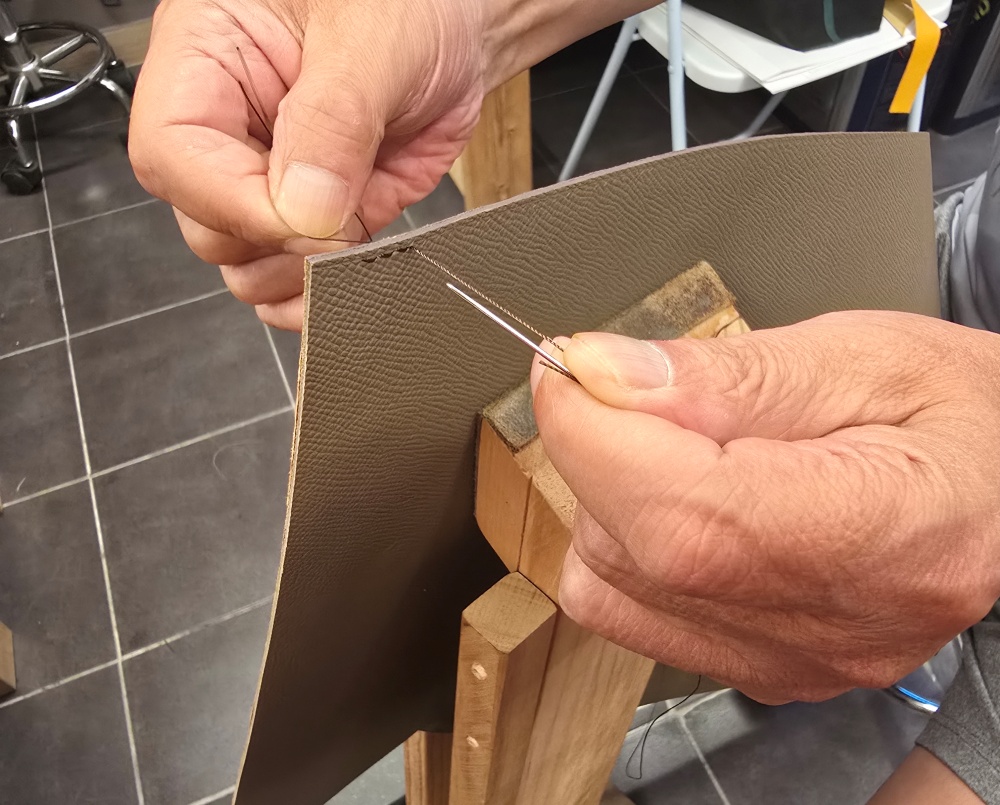
    Rolling the needle between the thumb and index finger while inserting it causes the attached thread to rotate as well. Twisting the needle like a screwdriver because it does not pass through easily also causes thread twist to accumulate quickly.

    Hold the same side of the needle shaft and pass it through with as little rotation as possible. When receiving the needle with the opposite hand, grasp and pull it through without rolling it between the fingers.

    바늘 회전으로 실이 바늘 몸통 주변에 꼬인 모습

    If the needle does not pass through naturally, check the direction and size of the stitching hole and the thickness of the needle before attempting to force it through by twisting.

    Keep the Passing Order of the Two Needles Consistent

    Saddle stitching passes two needles through the same stitching hole in sequence. Either the left or right needle may be passed first depending on the stitching method, but the same order should be maintained after stitching begins.

    If the passing order and thread position keep changing, the two thread paths may cross unnecessarily outside the hole, or one needle may pierce the opposite thread. To maintain the reason saddle stitching lasts longer than machine stitching—the consistent crossing structure inside each hole—the hand sequence must remain the same for every stitch.

    Decide where the thread will be positioned after passing the first needle and which side the second needle will follow. Repeat the same movement for every stitch.

    Pull the Thread in the Same Direction for Every Stitch

    If one side is pulled upwards and the other downwards inconsistently after both needles have passed through, the two sides of the thread develop different rotational forces and tension.

    Choose a pulling direction that suits the shape of the piece and the desired stitch angle, and use that same direction for every stitch. Tighten the thread while checking that both sides have balanced tension instead of pulling hard in a single motion.

    A consistent pulling direction stabilises both the stitch angle and the way the thread settles against the leather surface.

    Twisting Becomes More Noticeable with Thick Thread and Small Holes

    When Considering Leathercraft Thread Thickness and Pricking-Iron Spacing—when this relationship is poorly balanced, forcing thick thread through small holes creates additional friction. As the thread is pulled through, surface friction can turn existing twist into small loops or visible fraying.

    If the thread snaps out of the hole whenever the needle is pulled or its surface quickly becomes rough, check not only your hand movements but also the combination of thread, needle and stitching-hole size.

    Do Not Prepare More Thread Than Necessary

    Excessively long thread repeatedly rubs against the workbench, clothing and stitching pony, increasing both twisting and friction. Pulling a long length through each hole also makes the receiving hand more likely to rotate the needle unconsciously.

    Allow enough thread for the seam length, number of leather layers and stitch spacing, but avoid preparing more than the work requires. Check the condition of the thread more frequently when stitching a long perimeter.

    Release the Tension and Check the Thread Every Few Stitches

    Thread twist should be detected before a small loop tightens into a knot. Every few stitches, spread the two needles apart and check whether the thread hangs naturally.

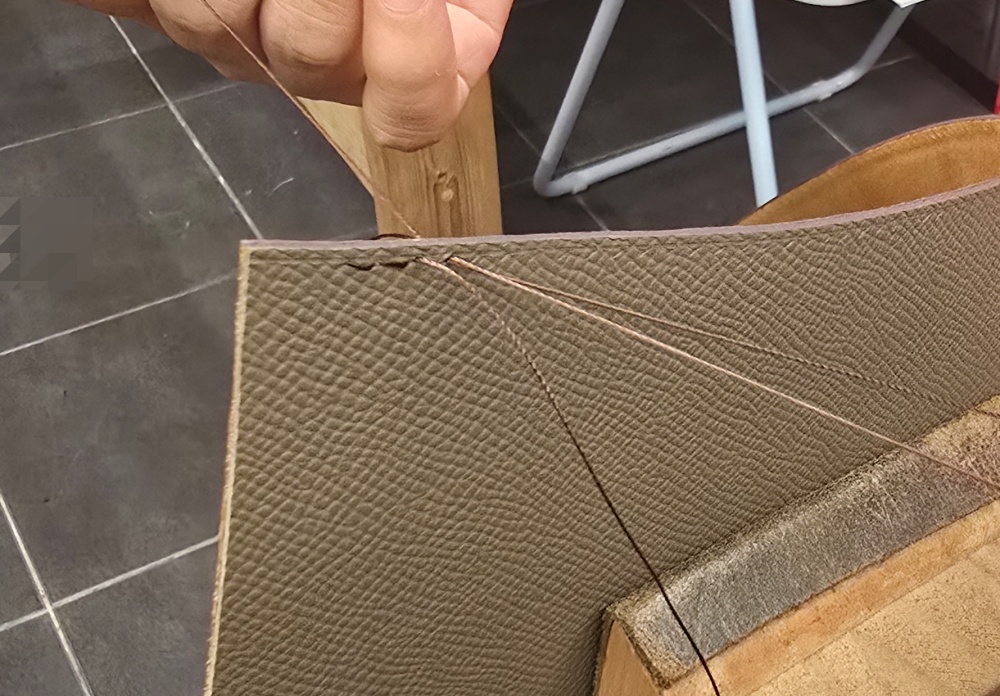
    If the thread begins to coil around itself, let one needle hang down and rotate naturally to release the accumulated twist. Run your fingers lightly along the thread to check for small loops or rough areas.

    바늘을 아래로 늘어뜨려 새들 스티치 실의 꼬임을 푸는 모습

    Pulling hard after a loop has formed can tighten it into a knot and damage the thread surface. If you feel resistance, stop pulling and inspect the thread first.

    Consistent Hand Movements Reduce Thread Twisting

    The key to preventing thread twist during saddle stitching is not a special tool but consistent, repeatable hand movement.

    Hold each needle in the same orientation without rolling it, and maintain a consistent passing order and pulling direction. Releasing accumulated twist every few stitches helps keep both the thread condition and stitch tension stable along long seams.

    Good hand stitching is not the ability to pull the thread harder. It is the ability to control two needles and one thread so that they move in the same sequence and direction.

  • 가죽공예 실 굵기와 목타 간격의 관계: 스티치 비례가 완성도를 결정한다

    The Relationship Between Leathercraft Thread Thickness and Chisel Spacing: Stitch Proportions Determine the Final Quality

    In leathercraft, thread is not simply a material for connecting pieces of leather. The thickness of the thread and the spacing of the stitches change the impression and balance of the bag, determining how refined the finished piece looks.

    Even with the same leather and the same pattern, the stitches can look delicate, overly heavy, or sparse depending on which thread and chisel you choose.

    To create good stitches, you shouldn't just choose the thread thickness; you must judge the chisel spacing, leather thickness, and the size of the piece as a single proportion.

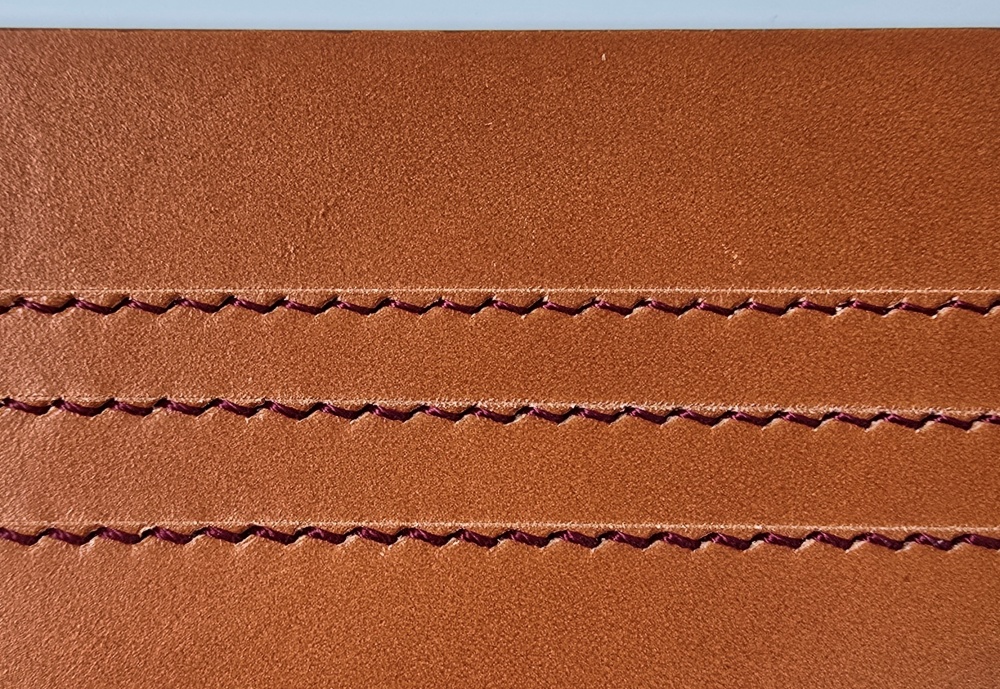
    같은 목타 간격에서 실 굵기를 달리한 가죽 스티치 비교

    Thread Thickness Cannot Be Chosen in Isolation

    Using a thick thread makes the stitches look distinct and gives them a strong presence. However, if only the thread becomes thicker while the chisel spacing remains narrow, the stitches may push against each other, looking cramped, or the area around the holes may be unnecessarily emphasized.

    Conversely, a thin thread creates a delicate and calm impression, but if the chisel spacing is too wide, the stitch line may appear disconnected or give an impression of lacking strength compared to the size of the piece.

    Thread is not necessarily more luxurious just because it's thicker, nor more precise just because it's thinner. The most appropriate thread is the one that naturally suits the size of the piece, the thickness of the leather, and the stitch spacing.

    When choosing a thread, you should first look at the proportion the thread will occupy at the edge of the leather after stitching, rather than the thickness of the thread itself.

    Chisel Spacing Creates the Rhythm of the Stitches

    Chisel spacing determines the speed and rhythm at which the stitches are repeated. If the spacing is narrow, the stitches become dense, creating a delicate impression. If the spacing is wide, each stitch becomes clearly visible, creating a more relaxed and powerful atmosphere.

    Characteristics of Narrow Chisel Spacing

    • It suits small items like small wallets or cardholders well.
    • It is great for creating a refined impression when using thin leather and relatively thin thread.
    • Using it with thick thread can make the stitches overly dense.

    Characteristics of Wide Chisel Spacing

    • It suits large and structural parts like bags or handles well.
    • When combined with a moderately thick thread, it can highlight the presence of the stitches.
    • Using a thread that is too thin can make the spaces between the stitches look empty.
    같은 실을 사용하고 목타 간격을 달리한 가죽 스티치 비교

    Even if the indicated spacing of the chisel is the same, the actual impression of the stitches can vary depending on the shape of the blade, the size of the hole, and the angle at which the chisel is struck. Therefore, rather than choosing a chisel based solely on numbers, it is safer to confirm it through an actual test stitch.

    How to Understand Vinymo MBT Numbers and Thread Thickness

    Vinymo MBT is a thread I frequently use when making actual bags and accessories. The twist does not unravel easily, and the condition of the thread remains relatively stable during stitching, making it useful for repetitive work.

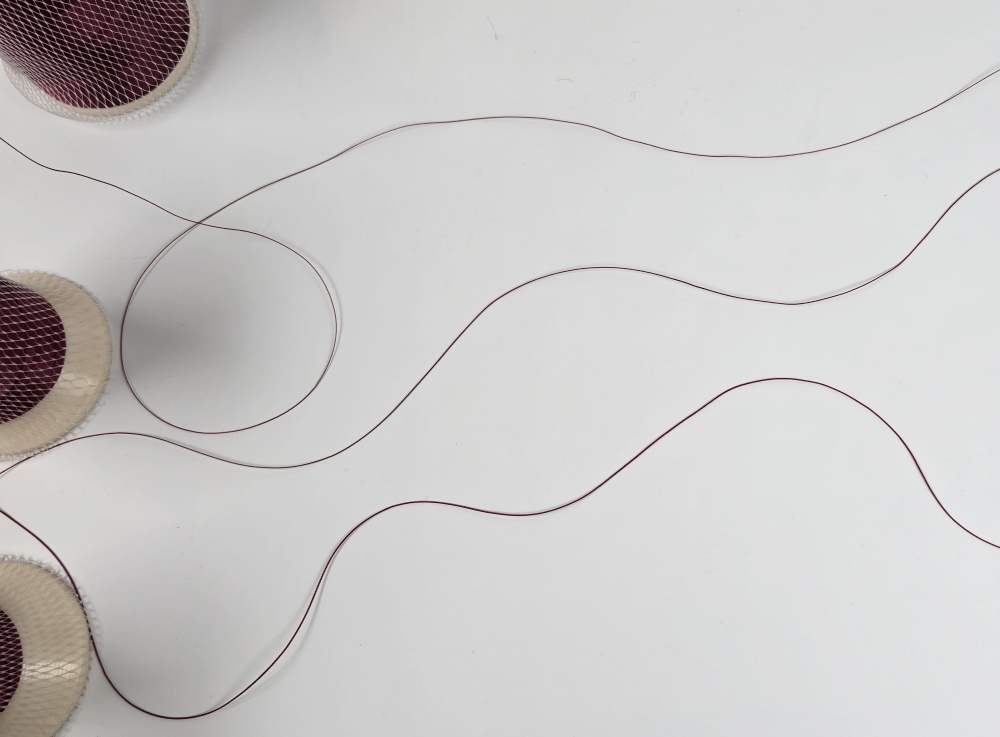
    For Vinymo MBT, the thread generally becomes thicker as the number gets smaller. For example, #8 is thinner than #5, and #1 is thicker than #5.

    However, you should not determine the thread based on the number alone. Even with the same number, the impression of the finished stitches can vary depending on the thread's color, wax treatment, pulling tension, and the needles and chisels used.

    The reason use Vinymo MBT more oftenis not simply because the thread is strong. It is because it is easy to predict the condition of the thread during work and good for maintaining a consistent balance in the finished stitches.

    굵기가 다른 비니모 MBT 실과 풀어 놓은 실 가닥

    Look at the Final Thickness, Not Just a Single Piece of Leather

    A common mistake when determining thread thickness is to only look at the thickness of a single piece of leather. However, in actual bag making, leather is often folded, reinforcements and linings are added, and multiple layers of leather are stacked.

    Therefore, when choosing a thread, you should judge based on the final thickness of the part to be stitched, not a single piece of cut leather.

    • How many layers of leather are stacked?
    • Are folded parts or reinforcements included?
    • Do the stitches play a role in holding the structure?
    • Are they stitches to be emphasized decoratively?
    • What is the overall size of the finished piece?

    If you choose a thick thread looking only at a single thin piece of leather, the stitches may become overly heavy in the finished stage. Conversely, using a thread that is too thin on thick handles or parts where multiple layers overlap can make the stitches look weak relative to the structure.

    Test Stitching is the Smallest Design Process

    Before striking the chisel directly on the finished product, it is advisable to do a test stitch on a scrap of the same leather. If possible, you should stack the same number of leather pieces as the actual production part and prepare the gluing and edge finishing similarly.

    During the test stitch, check the following items:

    • Is it too tight when the thread passes through the chisel hole?
    • Does the leather surface pucker or do the holes gape when the thread is pulled?
    • Is the angle of the stitches consistent on the front and back?
    • Is the thread thickness too strong or too weak compared to the size of the piece?
    • Does the spacing of the stitches connect naturally even on curved parts?

    You should also examine the relationship between the awl hole size and stitch qualityEven if the proportion of the thread and chisel is appropriate, if the holes are too large or inconsistent, the stitch line will not remain neat.

    가죽 자투리에 실 굵기와 목타 간격을 바꾸어 시험 바느질하는 모습

    Test stitching is not a process that wastes materials. It is a design process that discovers potential proportional errors in the finished product at the lowest cost.

    Adjusting the Presence of Stitches According to the Size of the Piece

    In small accessories, a single stitch takes up a large proportion of the overall design. Therefore, using relatively thin thread and narrow spacing is good for creating a delicate and calm impression.

    On the main body of a medium-sized bag, the thread and chisel should not be overly conspicuous while stably tidying up the leather edges. Here, it is important to look at the thickness of the leather and the location of the stitches together to find a medium proportion.

    For handles, strap connections, and outlines that emphasize structure, you can utilize relatively thick thread or wide spacing. However, since using thick thread does not necessarily increase durability, the size of the holes and the stitching tension must also be adjusted.

    Good Stitches Do Not Stand Out Before the Bag

    Refined stitches certainly elevate the perfection of a bag. However, if the stitches are revealed too strongly, the stitch line may be seen before the shape of the bag and the texture of the leather.

    Rather than showing off, good stitches tidy up the edges of the leather, follow the lines of the pattern, and quietly support the structure of the bag.

    Choosing thread thickness and chisel spacing is not a simple material selection, but a process of designing the proportions of the entire bag.

    Rather than memorizing the numbers of threads and chisels like a correct answer, you need the habit of looking at the final thickness of the leather, the size of the piece, and the role the stitches will play together. That small difference in judgment changes the impression of the finished bag and creates stitches that look stable even as time passes.