Tag: Leathercraft Tools

  • 가죽공예 망치 사용법: 타격면·무게·치즐 타공 기준

    How to Use a Leathercraft Mallet: Face, Weight, and Accurate Pricking Iron Punching

    When punching leather with a pricking iron, many leatherworkers focus only on the tooth spacing and shape of the iron. However, the depth and direction of the holes are also affected by the mallet face, weight, striking position, and condition of the workbench.

    Even when using the same pricking iron, the tool may tilt if the mallet strikes away from the center of the head or if the striking face is badly worn. In a leather workshop, a mallet should not be treated simply as a tool for hitting hard. It should be selected for its ability to transfer the required force accurately to the pricking iron.

    Inspect the Face of a Leathercraft Mallet First

    A mallet used with pricking irons and punches must have a flat striking face. If one side is worn or the center has developed a deep indentation, the force will not be transferred evenly to the head of the tool. Even when the pricking iron is held upright, an uneven impact can push it to one side and cause the teeth to enter the leather at an angle.

    Repeatedly striking a metal pricking iron with a metal hammer can deform the head or spread its edges. Unless the tool is specifically designed to be struck with metal, it is better to use a mallet face made of nylon, urethane, rawhide, or another material that absorbs some of the impact. Before beginning work, check the striking face for cracks and deep grooves.
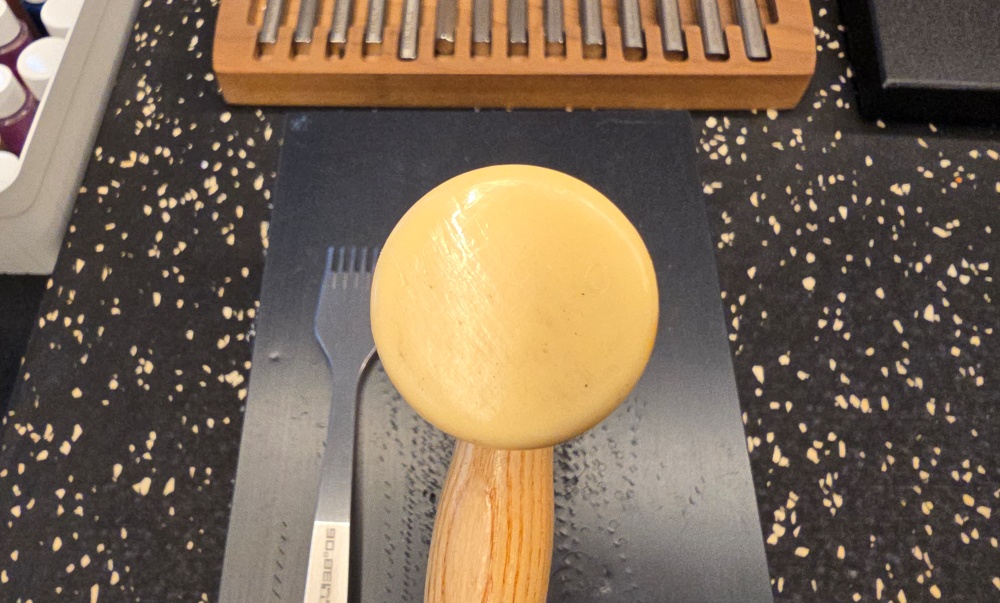
    가죽공예 망치의 평평한 타격면을 확인하는 모습

    A Heavier Mallet Is Not Always Better

    If the mallet is too light, the same position may need to be struck repeatedly, increasing the possibility that the leather or pricking iron will move. A mallet that is too heavy can drive the iron deeper than necessary and place unnecessary strain on the wrist and arm.

    The appropriate weight depends on the thickness and number of leather layers, the number of teeth on the pricking iron, and the firmness of the punching board. Before working on the actual piece, make test holes in a scrap of the same leather to determine how much force is required. To learn how to test cutting, bonding, and hand-stitching conditions in advance, see [Why Leathercraft Test Scraps Matter: Checking Cutting, Bonding, and Hand-Stitching Conditions]for more details.

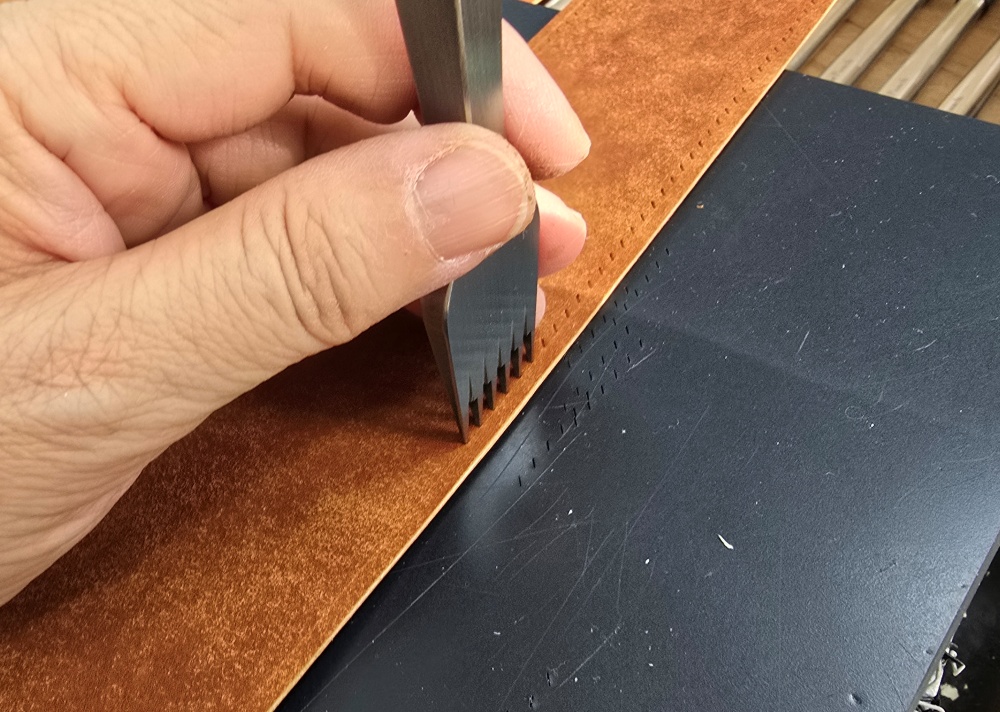
    Strike the Center of the Pricking Iron Head

    When the mallet strikes the edge of the pricking iron head, the impact moves away from the tool’s central axis. If this happens repeatedly, the iron can tilt to one side, causing the holes on the front and back of the leather to become misaligned. Before striking, check that the mallet will come down on the center of the pricking iron head.

    The No. 7 pricking iron used in the workshop has approximately 3.8 mm tooth spacing, while the No. 9 iron has approximately 3.0 mm spacing. Two-tooth and seven-tooth irons have different head widths, but the striking principle remains the same. Even with a wide seven-tooth iron, the force should be directed to the center of the head rather than alternated between its two ends.
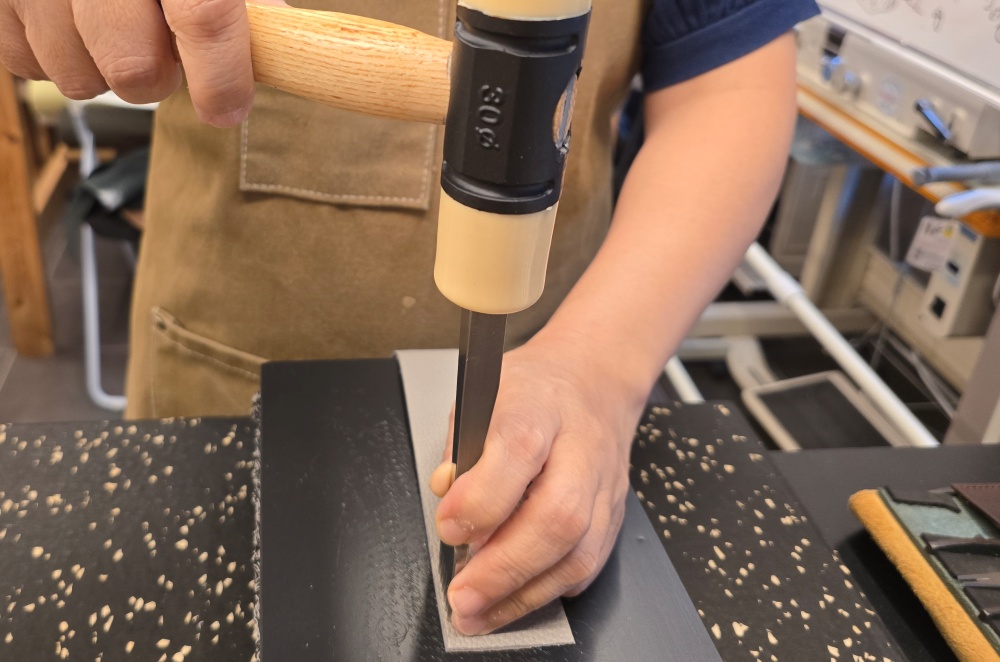
    가죽공예 망치로 치즐 머리 중앙을 타격하는 모습

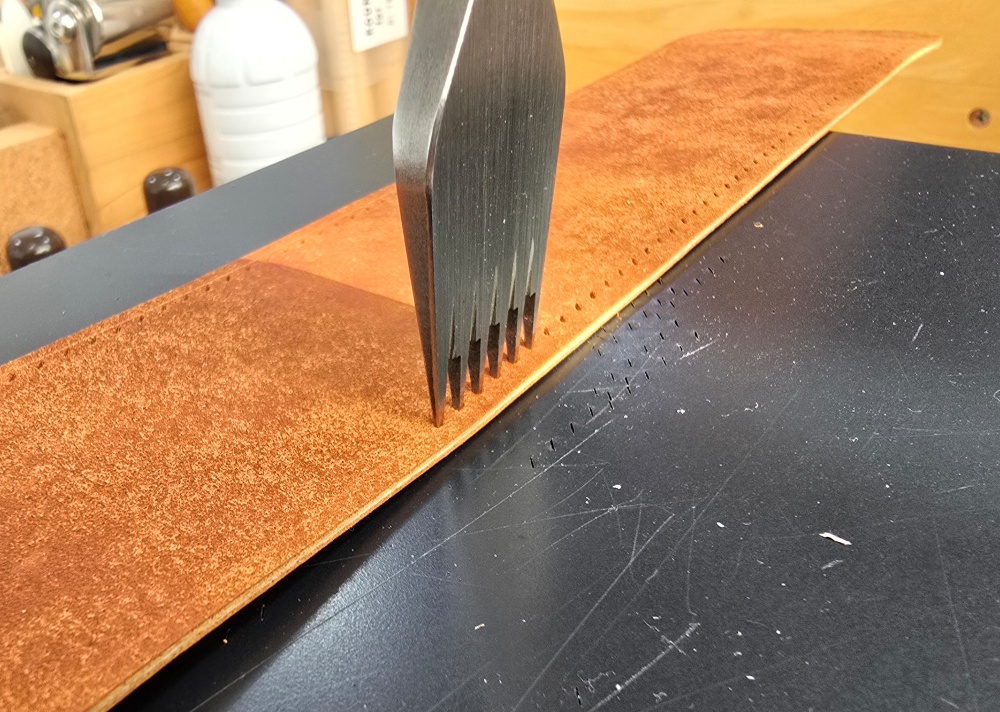
    Keep the Pricking Iron at 90 Degrees While Striking

    The pricking iron must be held at a 90-degree angle in both the front-to-back and side-to-side directions. Even if it appears vertical from the front, a sideways tilt can cause the holes on the back of the leather to move away from the divider line.

    When using a European-style pricking iron, align the divider line with the right side of the iron and hold the tool vertically. Set the direction of the pricking iron before raising the mallet. For details on the spacing and correct positioning of No. 7 and No. 9 pricking irons, see How to Use European-Style Pricking Irons: No. 7 and No. 9 Spacing and Correct Punching Positionwhere they are explained in detail.
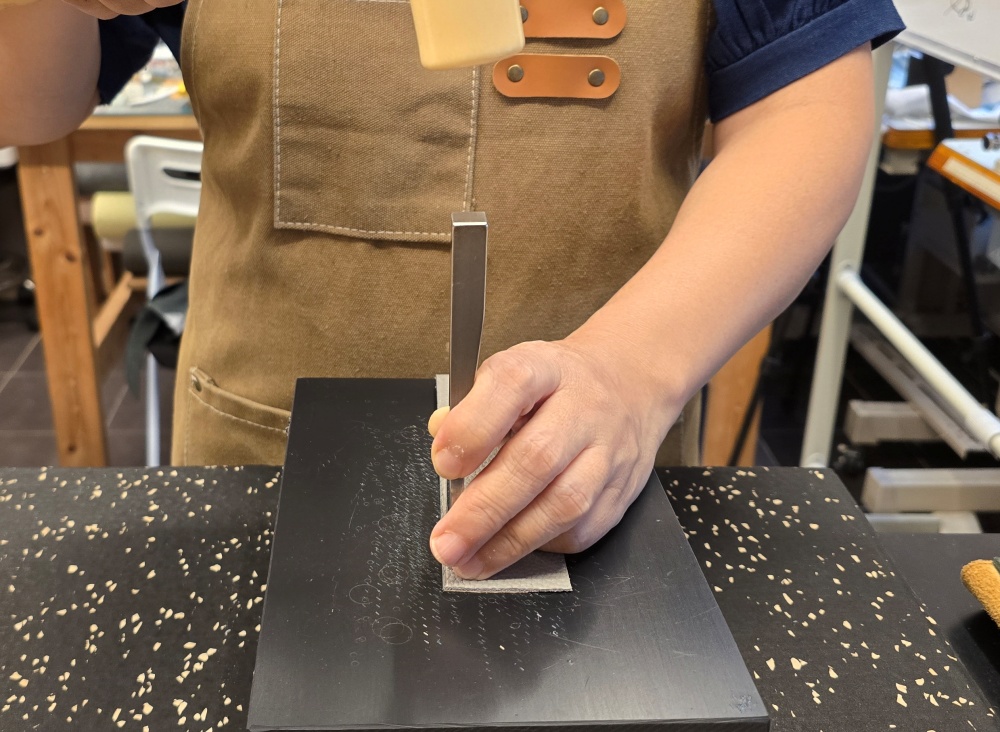
    유럽형 치즐을 가죽에 수직으로 세워 타공하는 자세

    Do Not Change the Position of the Pricking Iron Between Strikes

    When working with thick leather or bonded layers, a single strike may not drive the pricking iron deep enough. Instead of using excessive force, keep the iron in the same position and maintain its vertical angle while dividing the force across the required number of strikes.

    If the pricking iron moves after the first strike, do not strike it again immediately. Check and correct its position first. Continuing to strike after the tool has shifted can enlarge the holes or tear their entry and exit points. After punching, pull the iron vertically out of the leather without twisting it.

    The Punching Board and Workbench Must Absorb the Impact

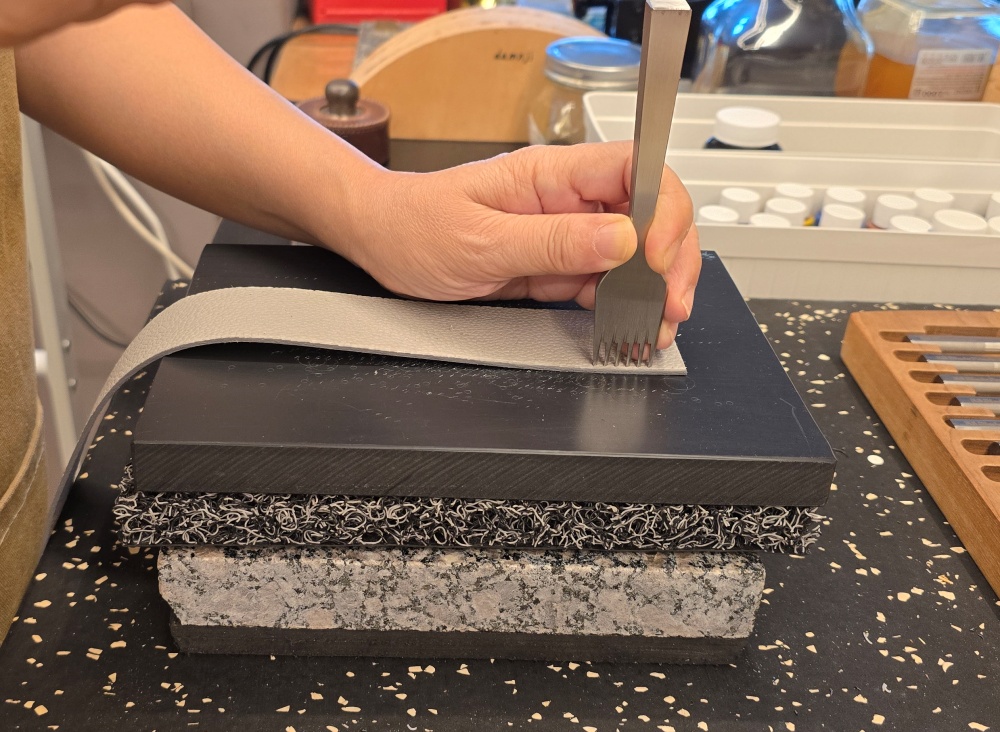
    The force from the mallet travels through the pricking iron, leather, punching board, and workbench. If the workbench moves or the punching board is too thin, the impact will be lost downward and the same area may need to be struck repeatedly. If the supporting surface is too hard, the teeth can hit it forcefully and become damaged.

    The punching board should be placed on a flat, stable workbench so that it does not move during use. If the surface has developed deep grooves, it will no longer support the leather evenly and should be repositioned or replaced. For guidance on arranging the supporting layers to protect pricking iron teeth and reduce noise, see How to Use a Leathercraft Punching Board: Protecting Pricking-Iron Teeth and Reducing Noisefor more details.
    작업대 위에 타공판과 가죽을 놓고 치즐을 사용하는 구성

    Rotate the Workpiece When Punching Curves

    Constantly changing the direction of the wrist and mallet while punching a curve makes it difficult to keep the pricking iron vertical. A more stable method is to keep the mallet moving in the same direction while gradually rotating the workpiece to follow the punching line.

    On a tight curve, make one set of holes with a two-tooth pricking iron and then rotate the workpiece slightly along the punching line. Turning the curve too sharply in a single movement may make the spacing appear correct on the front while creating irregular holes on the back. Check both the vertical position of the iron and the placement of the next hole before every strike.

    Check the Mallet Face and Handle for Wear

    The striking face gradually wears with use. If deep grooves develop or one side becomes unevenly worn, the face may no longer meet the pricking iron head correctly. Check the face by hand to make sure it remains flat, and consider replacing it if it is cracked or pieces have broken away.

    The connection between the handle and mallet head should also be inspected. If it is loose, the head can move at the moment of impact and change the direction of the force. When not in use, store the mallet away from moisture and separately from pricking irons so that the tools do not strike each other.

    A Mallet Is a Tool for Transferring Force Accurately

    For a leathercraft mallet, transferring the required force in a consistent direction is more important than producing maximum impact. A flat striking face, appropriate weight, and accurate contact with the center of the pricking iron head are all required to create holes with consistent depth and direction.

    If the punched holes are irregular, check the mallet face and weight as well as the condition of the punching board and workbench before replacing the pricking iron. Stable hand stitching begins by treating the mallet, pricking iron, supporting surface, and working posture as one complete set of working conditions.
  • 가죽공예 타공판 사용법: 치즐 날 보호와 소음을 줄이는 받침 구성

    How to Use a Leathercraft Punching Board: Protecting Pricking-Iron Teeth and Reducing Noise

    A leathercraft punching board is placed beneath the workpiece when punching leather with a pricking iron or leather punch. It does more than protect the workbench. It prevents the tool’s cutting edges from striking a hard surface directly and helps reduce rebound and noise during punching.

    Even when the same pricking iron is used, the material and condition of the punching board, the levelness of the workbench, and the support beneath the board can affect the depth and position of the holes on the back of the leather. If the board is too soft or tilted to one side, the tool may move during punching even when it is initially held at 90 degrees.

    Creating accurate hand-stitching holes requires more than checking the pricking iron. The entire setup, from the workbench to the punching board, must absorb impact steadily, and the depth at which the teeth enter the board must remain consistent.

    Why a Leathercraft Punching Board Is Necessary

    가죽을 통과해 타공판에 살짝 닿은 치즐 날

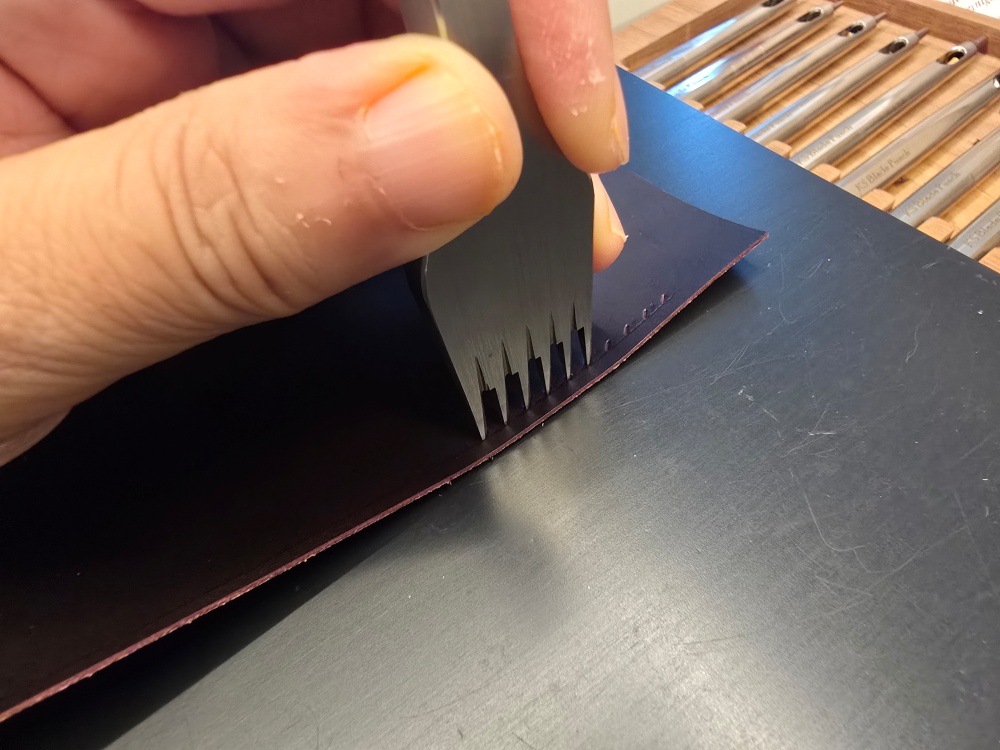
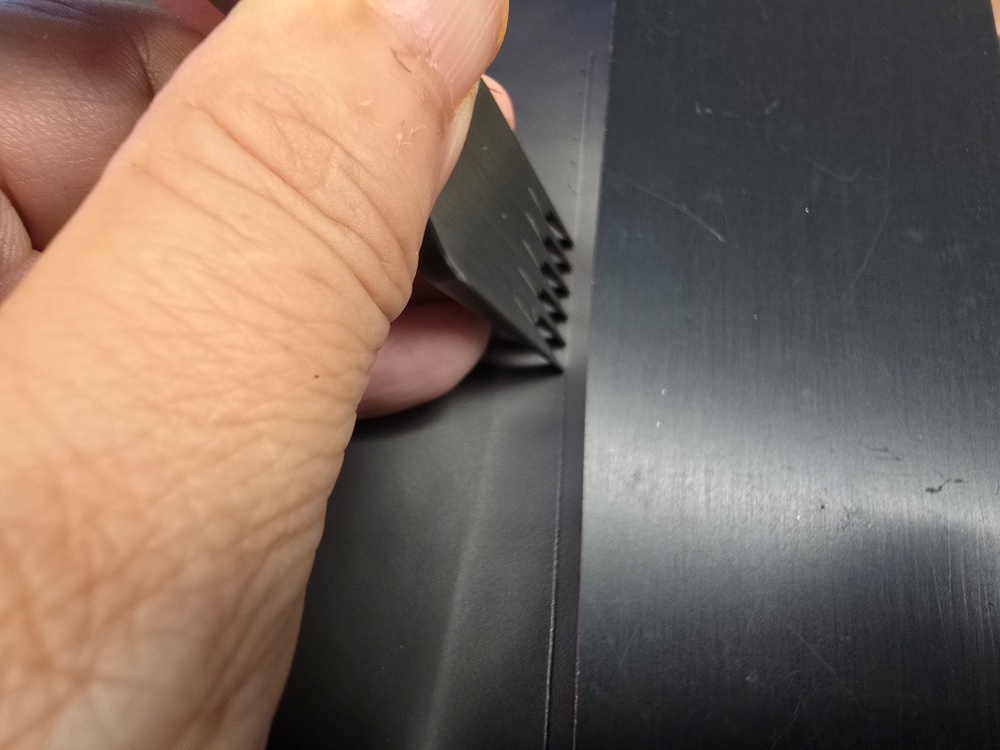
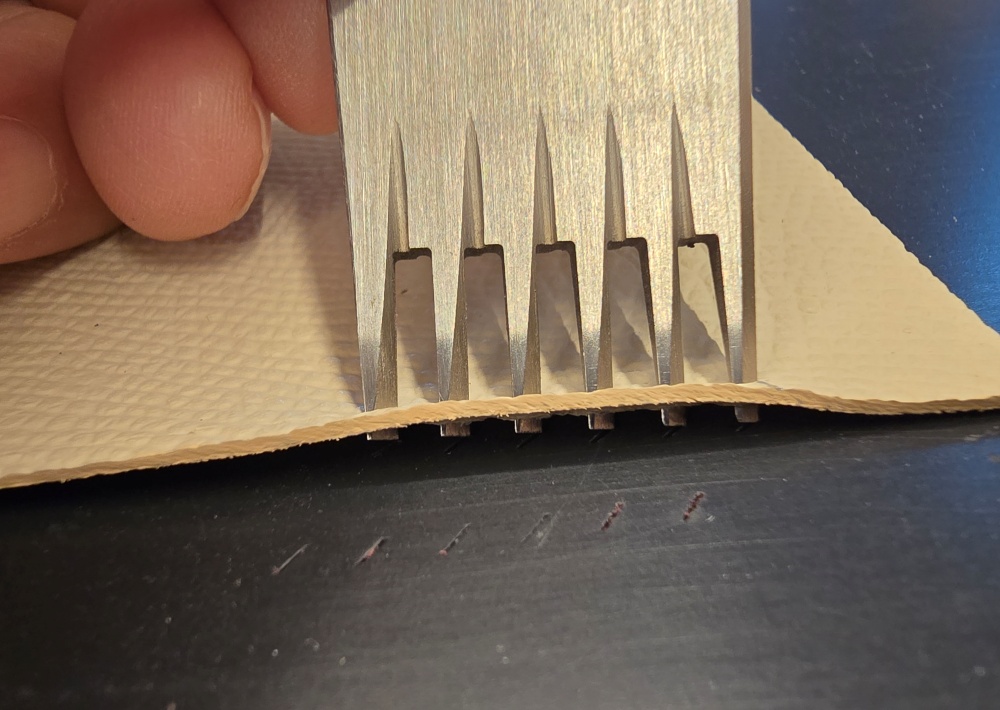
    After the teeth of a pricking iron pass through the leather, they reach the supporting surface beneath the workpiece. Punching directly on a wooden workbench, metal plate, stone slab, or another hard surface can dull or damage the tips of the teeth.

    A punching board absorbs the impact while allowing the tips of the teeth to enter its surface slightly. This protects both the pricking iron and the workbench while reducing rebound during striking.

    However, driving the pricking iron unnecessarily deep into the board is not recommended. If the teeth become deeply embedded, the tool can be difficult to remove. Rocking it from side to side may enlarge the holes in the leather or bend the teeth.

    The strike should stop once the leather has been completely pierced and the tips of the teeth have entered the punching board only slightly.

    Cutting Mats and Punching Boards Serve Different Purposes

    용도와 표면이 다른 가죽공예 재단판과 타공판

    A cutting mat provides a surface for cutting leather with a knife, while a punching board absorbs the impact of a pricking iron or leather punch. Even when the two products look similar, they may require different thicknesses and impact-absorbing properties.

    If a thin cutting mat is used as a punching board, the teeth may pass through it and strike the hard surface underneath. On the other hand, an excessively soft mat may compress and rebound during striking, causing the pricking iron to move away from its vertical position.

    Before using a cutting mat for punching, check whether the product is also designed for impact work. If its intended use is unclear, it is safer to use separate surfaces for cutting and punching.

    The Support Beneath the Punching Board Must Be Firm and Level

    진동을 줄이고 수평을 유지하는 타공 받침 구성

    A punching board requires a firm, flat, and stable base. If the workbench is weak or the center of the tabletop vibrates, the striking force may disperse and require several blows in the same position.

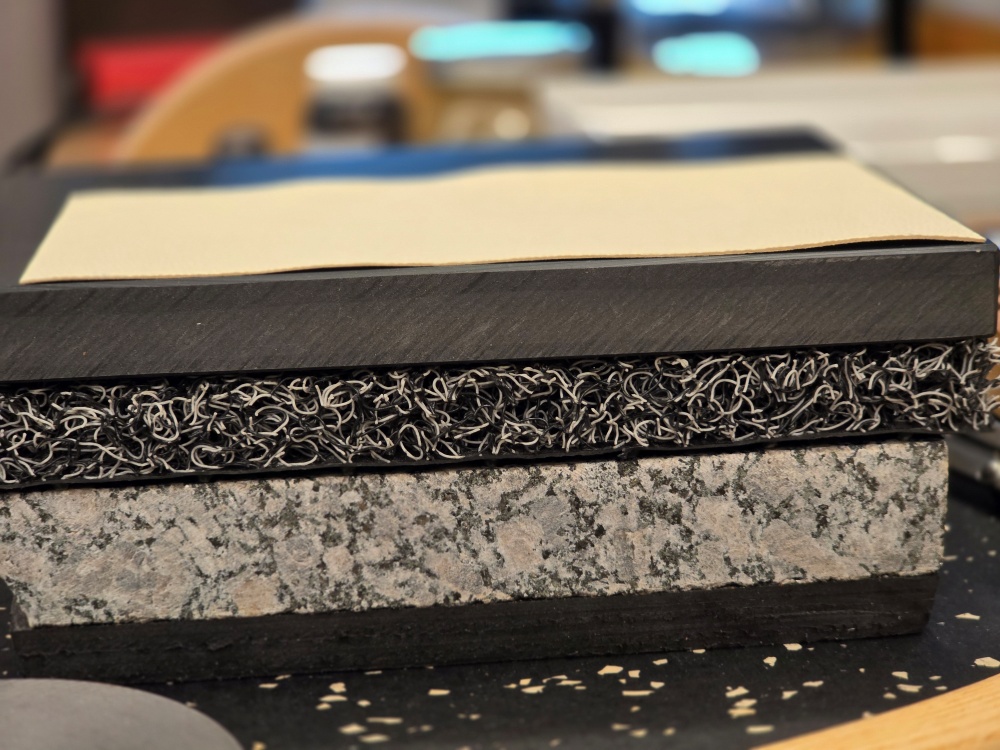
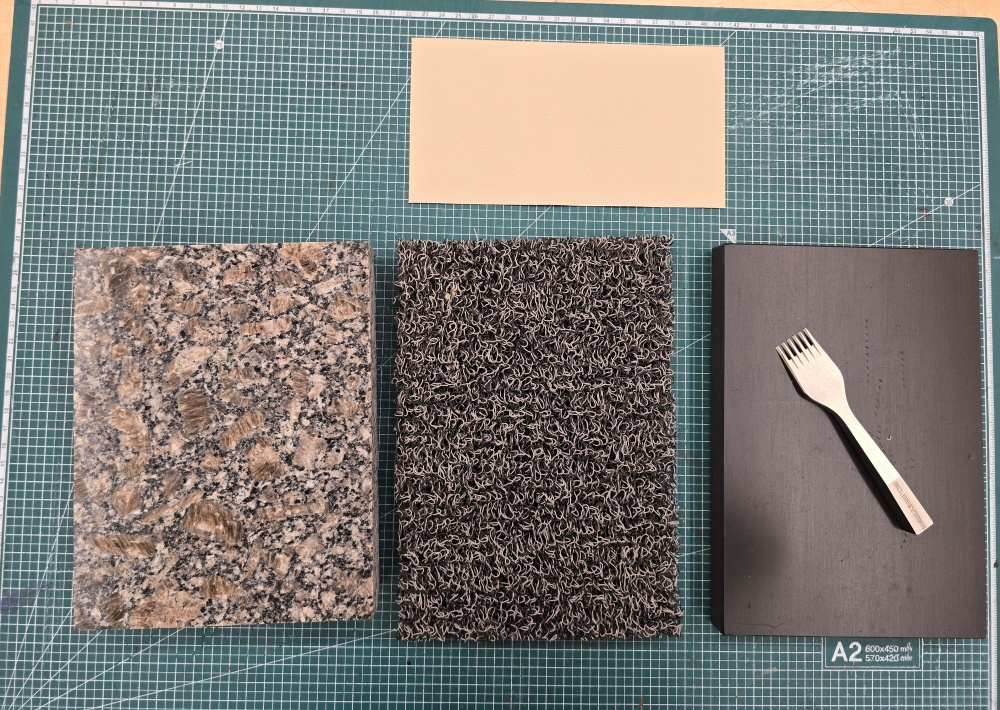
    Even when using a heavy stone slab or rigid base, never place the leather directly on that hard surface for punching. Place the punching board on the rigid base and then position the leather on top of the punching board.

    A rubber pad or vibration-control mat may be used to reduce noise and vibration from the workbench. The soft layer should be placed beneath the rigid base rather than directly beneath the leather.

    The basic layering order is as follows.

    1. A stable workbench
    2. A rubber pad or vibration-control mat
    3. A firm, level supporting base
    4. A punching board that receives the tips of the pricking iron
    5. The leather to be punched

    Not every working environment requires exactly the same arrangement. The important points are that the punching board remains level and stable and that the entire workbench does not resonate excessively when struck.

    The Punching Board Must Fully Support the Workpiece

    When a large workpiece is placed on a small punching board, part of the leather may hang over the edge. Even if the section being punched is on the board, sloping leather around it can make it difficult to check the position and angle of the pricking iron accurately.

    Use a punching board large enough to keep the punching area and the surrounding leather flat. When working on a large bag panel, move the workpiece as necessary while keeping the section being punched on a flat part of the board.

    Working near the edge of the punching board may cause it to lift or move when struck. Whenever possible, position the punching area near the center of the board.

    Check How Deeply the Teeth Enter the Board

    The appropriate thickness of a punching board depends on the pricking iron and the thickness of the leather. Instead of treating one specific thickness as correct for every situation, confirm that the teeth do not reach the hard supporting surface beneath the board after passing through the leather.

    Before using a new punching board on a finished piece, test it on a scrap of the same leather. Hold the pricking iron at 90 degrees, strike it with appropriate force, and check the following points.

    • Check whether the holes on the front and back of the leather are aligned.
    • Check whether the tips of the teeth struck the hard surface beneath the punching board.
    • Check whether the board compressed excessively or rebounded during punching.
    • Check whether the pricking iron can be removed without rocking it significantly from side to side.
    • Check whether the punched holes opened wider than necessary.

    Rather than using excessive force in a single blow, apply force vertically while checking the thickness of the leather and the progress of the holes. Remove the pricking iron by lifting it vertically instead of twisting it sideways.

    For more information about tooth spacing and the correct 90-degree punching position, see How to Use European-Style Pricking Irons: No. 7 and No. 9 Spacing and Correct Punching Positionfor detailed guidance.

    Keep the Pricking Iron Vertical on Both Straight Lines and Curves

    치즐은 수직으로 유지하고 작업물을 돌리는 곡선 타공

    For a straight section, place the workpiece flat on the punching board and hold the pricking iron at 90 degrees to the leather surface. Check the actual position of the teeth where they touch the leather instead of looking only at the handle, and then strike vertically.

    Each time the tool is moved to the next position, check that the leather remains on a flat area of the board. Even when one tooth is placed in an existing hole, make sure that grooves or depressions in the board do not cause the tool to tilt.

    When following a curve, rotate the workpiece instead of tilting the pricking iron in the direction of the curve. Keep the tool vertical and turn the leather gradually to follow the divider line.

    For a tight curve, punch one step at a time with a two-tooth pricking iron and rotate the workpiece slightly after each strike. Adjust the positions of both the workpiece and the punching board so that the punching area remains near the center of the board.

    Do Not Repeatedly Use Only One Area of the Board

    Repeatedly striking the same area creates concentrated holes and deep grooves in the surface. Leather will no longer lie flat over a deeply worn section, and the teeth may slip into existing marks.

    Move the working position gradually so that the entire board wears evenly. If the product is designed for double-sided use, it may be turned over after both surfaces have been inspected.

    However, if the board is warped or deep grooves on one side affect the opposite surface, it is safer to replace the board rather than continue using it after turning it over.

    When to Replace a Punching Board

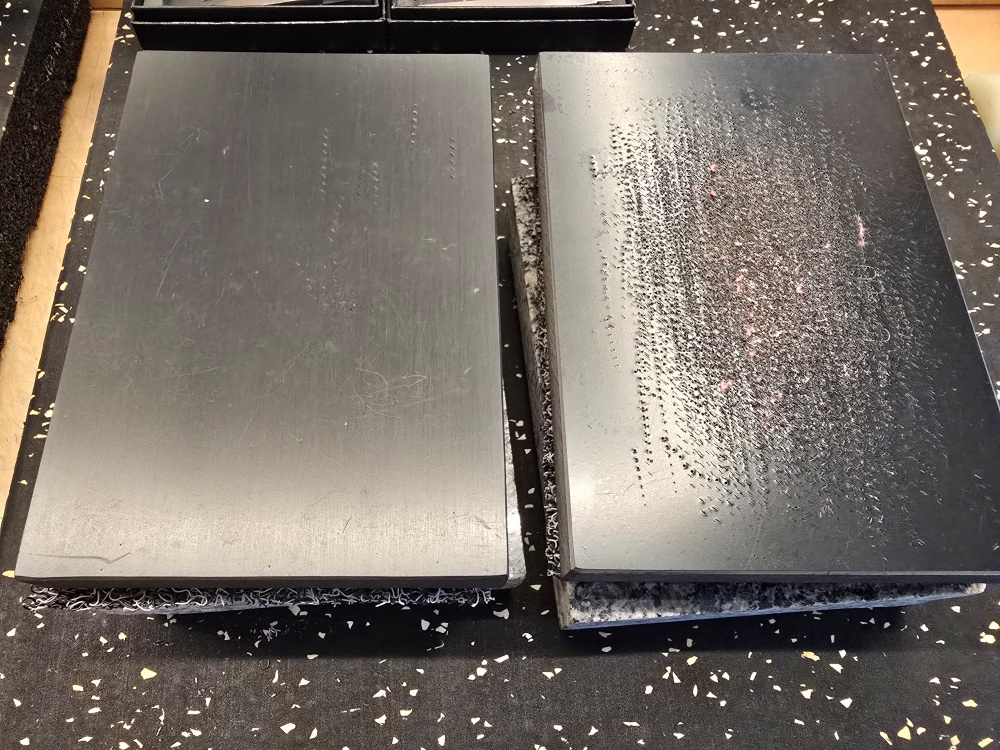
    새 타공판과 깊은 홈이 생긴 타공판 비교

    A punching board is a consumable work surface that receives the tips of punching tools. Visible marks alone do not mean that it must be replaced immediately, but an uneven surface can affect punching accuracy.

    Consider replacing the punching board if any of the following conditions appear.

    • Deep grooves prevent the leather from lying flat.
    • The center of the board has sunk or the entire board has warped.
    • The teeth repeatedly slip into existing holes or grooves.
    • Parts of the surface have hardened or cracked.
    • The board has become thin enough for the teeth to reach the supporting surface underneath.
    • Rebound and impact noise have increased compared with previous use.

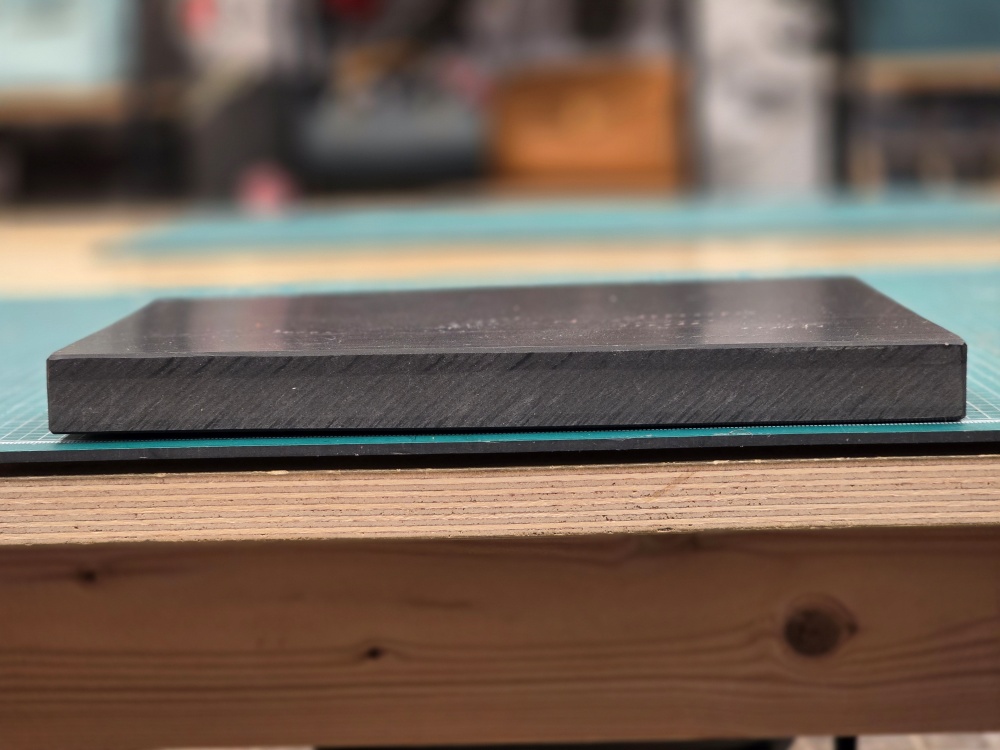
    Placing a new punching board beside the used one makes it easier to compare their surface condition and thickness from the side.

    How to Reduce Punching Noise and Vibration

    Leathercraft punching noise is not determined by the punching board alone. If the workbench moves or has a hollow tabletop, impact noise and vibration may travel more easily through the structure.

    A heavy and stable base helps prevent the striking force from dispersing. Placing a vibration-control mat beneath that base can help reduce the vibration transmitted to the workbench or floor.

    Stacking several soft mats directly beneath the leather may appear to reduce noise, but it can cause the tool to rebound or tilt. To maintain punching accuracy, place a suitable punching board directly beneath the leather and position vibration-control material beneath the rigid base.

    It is difficult to eliminate punching noise completely. Instead of striking excessively hard simply to reduce the number of blows, transfer the necessary force accurately through a stable supporting setup.

    How to Choose a Leathercraft Punching Board

    When selecting a punching board, consider the tools and the size of the workpieces you use rather than looking only at the price or dimensions.

    First, confirm that the material is intended for punching and will not break easily when struck by a pricking iron.

    Second, the board must be thick enough to prevent the tips of the teeth from reaching the hard base underneath.

    Third, choose a size that allows the leather parts you make most often to lie flat.

    Fourth, the surface must be flat, and the board should not slide easily on the workbench.

    Fifth, a product that can be replaced easily with the same size is more convenient to maintain over time.

    A board that is too hard may damage the tips of the teeth, while one that is too soft may allow both the leather and the tool to move. If the product description is insufficient, judge its suitability by testing it on scrap leather.

    How to Maintain and Store a Punching Board

    After punching, remove leather dust and debris from the board. Fragments trapped in deep grooves may prevent the next workpiece from lying flat.

    Store the punching board flat and away from strong heat and direct sunlight. Leaning it against a wall or placing uneven weight on part of it may cause it to warp.

    Using separate boards for cutting and punching prevents knife cuts and punching marks from accumulating on the same surface. Follow the product’s care instructions instead of heating the board or cleaning it with strong solvents.

    Common Mistakes Made by Beginners

    The first mistake is punching leather directly on a wooden workbench or stone slab. The tips of the teeth may strike the hard surface and become damaged.

    The second mistake is using a thin cutting mat as a punching board. The teeth may pass through the mat and strike the supporting surface underneath.

    The third mistake is stacking several excessively soft mats directly beneath the leather to reduce noise. Rebound may cause the pricking iron to move and shift the positions of the holes on the back.

    The fourth mistake is repeatedly using the same part of the punching board. When punching over a deep groove, the leather can sink and the teeth may slip sideways.

    The fifth mistake is driving the pricking iron too deeply into the board. Once the leather has been pierced, the tips should enter the board only slightly, and the tool should be removed vertically.

    Punching Accuracy Depends on Both the Tool and the Board

    Creating accurate hand-stitching holes requires checking not only the spacing and angle of the pricking iron but also the condition of the punching board beneath the leather.

    A punching board protects the tool and the workbench while absorbing impact. Place it on a firm and stable base, and add a vibration-control mat beneath the rigid base when necessary.

    Keep the workpiece flat on the punching board and hold the pricking iron at 90 degrees throughout the process. On curves, rotate the workpiece instead of tilting the tool.

    Replace the punching board when deep grooves or warping prevent it from supporting the leather evenly. Consistent hand-stitching lines depend on checking the levelness and wear of the punching board as carefully as the pricking iron and the leather.

  • 가죽공예 디바이더 사용법: 사선치즐 2mm·마름치즐 2.5mm 간격과 곡선 긋기

    How to Use a Leathercraft Divider: 2 mm for European Pricking Irons and 2.5 mm for Japanese Diamond Chisels

    In leathercraft, a divider is used to mark a hand-stitching guideline at a consistent distance from the leather edge. A consistent divider line helps position the chisel accurately and keeps the finished hand-stitching line parallel to the edge.

    A divider is not simply a tool for drawing a line on leather. Its spacing must be set according to the type of chisel being used, while the position of the guide leg, direction of movement, and applied pressure must remain consistent.

    At Leather Studio YEGAK, we generally set the divider spacing to 2 mm when using a European-style slanted pricking iron and 2.5 mm when using a Japanese-style diamond chisel.

    Divider Spacing Varies According to the Chisel Type

    Set the divider spacing to 2 mm when using a European-style slanted pricking iron. Set it to 2.5 mm when using a Japanese-style diamond chisel.

    This spacing is the distance between the leather edge and the hand-stitching guideline. If the same divider spacing is used for every chisel type, the proportion between the punched holes and the leather edge may change.

    사선치즐 2mm와 마름치즐 2.5mm 디바이더 간격

    Before using the divider, first decide which type of chisel will be used. After identifying whether it is a European-style slanted pricking iron or a Japanese-style diamond chisel, set the spacing to 2 mm or 2.5 mm accordingly.

    The chisel type and divider spacing must be selected together to create a balanced proportion between the leather edge, punched holes, and hand-stitching line.

    Place One Divider Leg Outside the Leather Edge

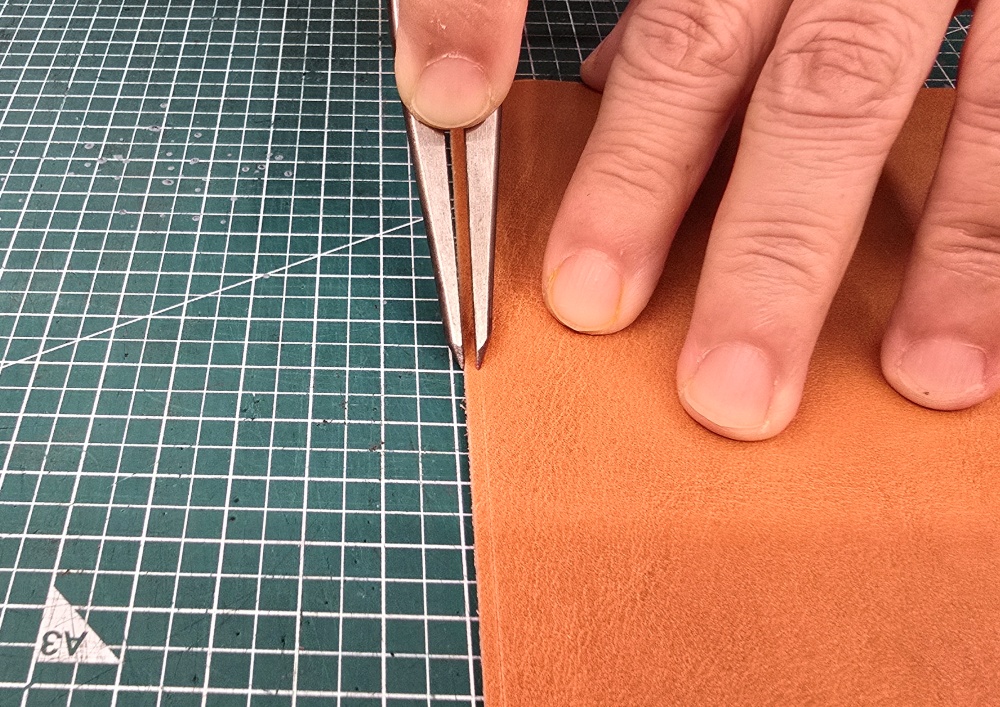
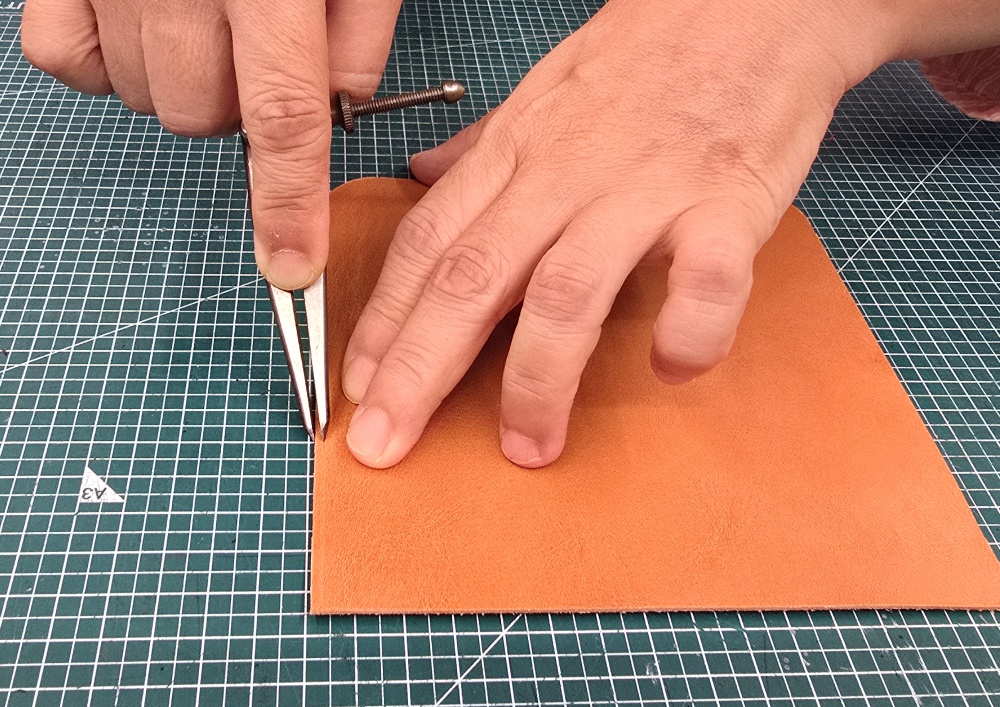
    When marking a line with a divider, do not place both legs on the leather. Position one leg outside the leather edge and allow only the other leg to touch the leather surface.

    The leg outside the leather acts as a guide that follows the shape of the edge. The inner leg resting on the leather marks the hand-stitching guideline while maintaining the set distance from the guide leg.

    가죽 가장자리 바깥에 기준 발을 댄 디바이더

    With the outer leg resting against the leather edge, move the divider straight downward. The inner leg on the leather will then create a line parallel to the edge.

    If the outer leg moves away from the edge or slips onto the leather, the spacing may change. Pressing the outer leg too firmly against the edge can also shift the leather or make the divider spacing narrower.

    Apply Moderate Pressure When Using the Divider

    Applying heavy pressure to create a darker line is not the correct way to use a divider. If the divider is pressed too firmly, the actual distance of the marked line may become narrower than the set spacing.

    The marking leg can dig into the surface and scratch or gouge the leather. A deep mark of this kind may remain visible even after punching and hand stitching are completed.

    The divider only needs to create a shallow, consistent line that remains visible on the leather surface. Apply just enough pressure to identify the punching position without cutting deeply into the leather.

    적당한 힘으로 표시한 일정한 디바이더 선

    On unfamiliar leather or leather with a soft surface, the depth of the mark can vary significantly depending on the pressure. Test the divider on a scrap of the same leather before marking the actual piece.

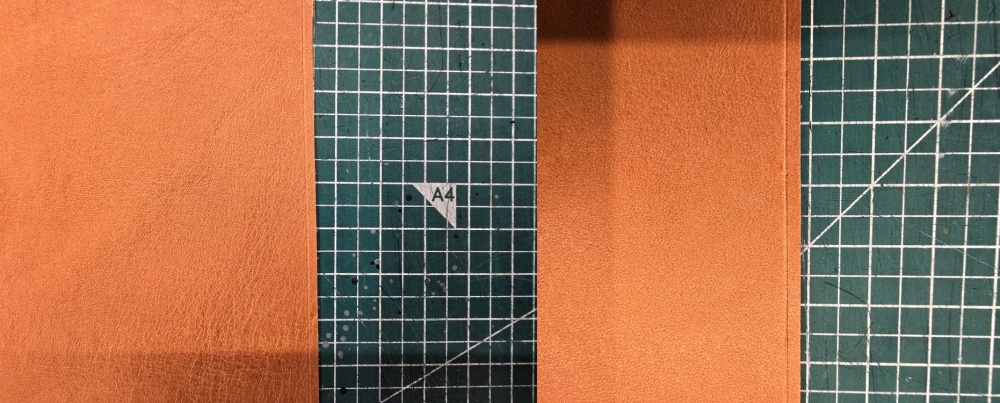
    정상적인 디바이더 선과 깊게 긁힌 선 비교 (왼쪽정상, 오른쪽 깊게 패인선)

    Move the Divider Straight Along Straight Sections

    Along a straight section, place one leg outside the leather edge and move the divider straight downward.

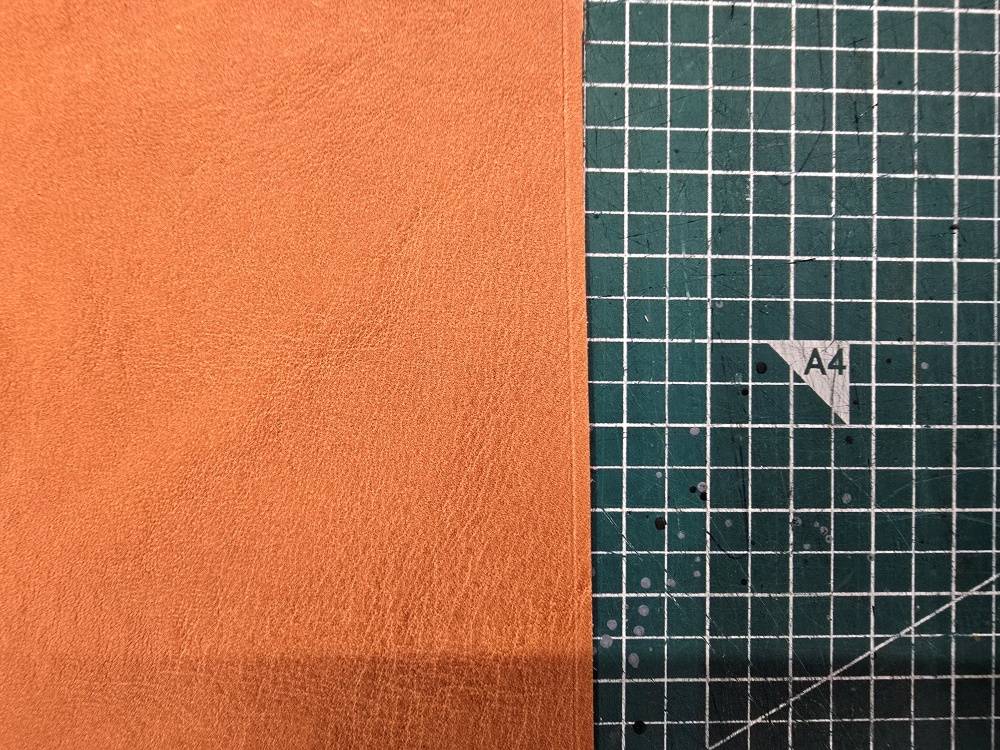
    가죽의 직선 가장자리를 따라 긋는 디바이더 선

    Twisting or rotating the divider while marking can cause the position of the marking leg to shift. Keep the outer leg following the leather edge steadily so the inner leg creates a line at a consistent distance.

    Work at a steady speed while checking that the outer leg remains in contact with the leather edge. If the divider moves away from the edge, reposition it accurately before continuing instead of forcing it back onto the existing line.

    Rotate the Workpiece, Not the Divider, Along Curves

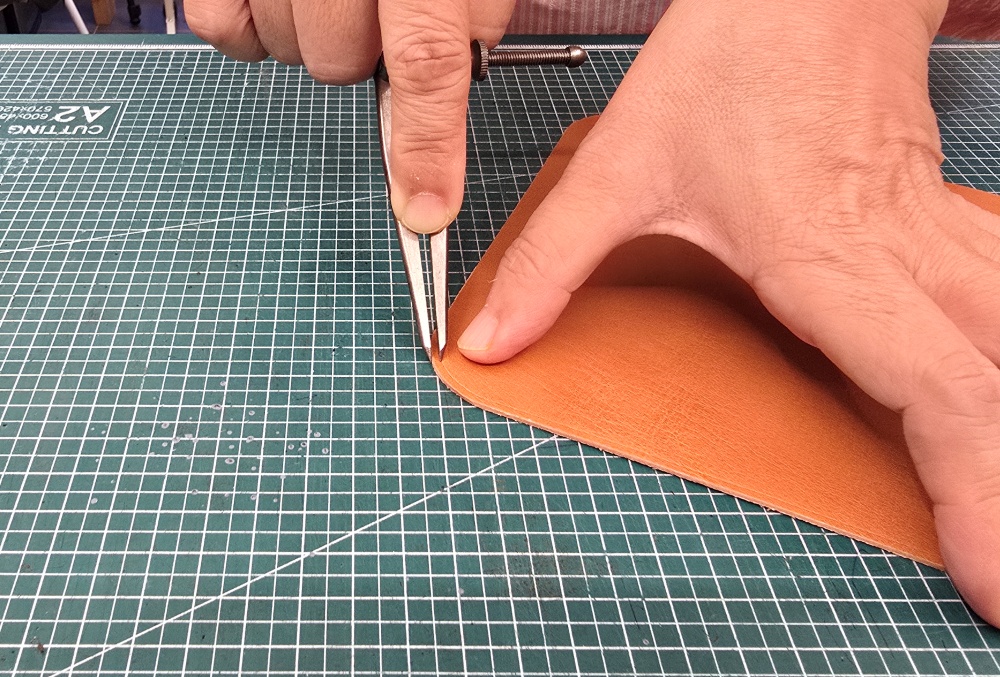
    Do not rotate the divider itself to follow a curved section. Rotating the tool by hand can shift the positions of the outer and inner legs, causing the line spacing to become narrower or wider.

    Even along a curve, move the divider straight in the same way as on a straight section. Rotate the workpiece gradually to follow the direction of the curve.

    Keep one leg outside the leather edge and move the divider straight. Rotate the workpiece slightly, then move the divider again in the same direction. The inner leg will naturally create a divider line that follows the curve of the workpiece.

    작업물을 돌리며 곡선에 디바이더 선을 긋는 과정

    The tighter the curve, the less the workpiece should be rotated at one time. Use short divider movements and rotate the workpiece gradually to produce a smooth curved line without sudden changes in spacing.

    The key is not to turn your wrist in an attempt to draw the curve with the divider. Keep the divider moving straight and rotate the workpiece to follow the curved direction.

    Check the Spacing and Depth After Marking

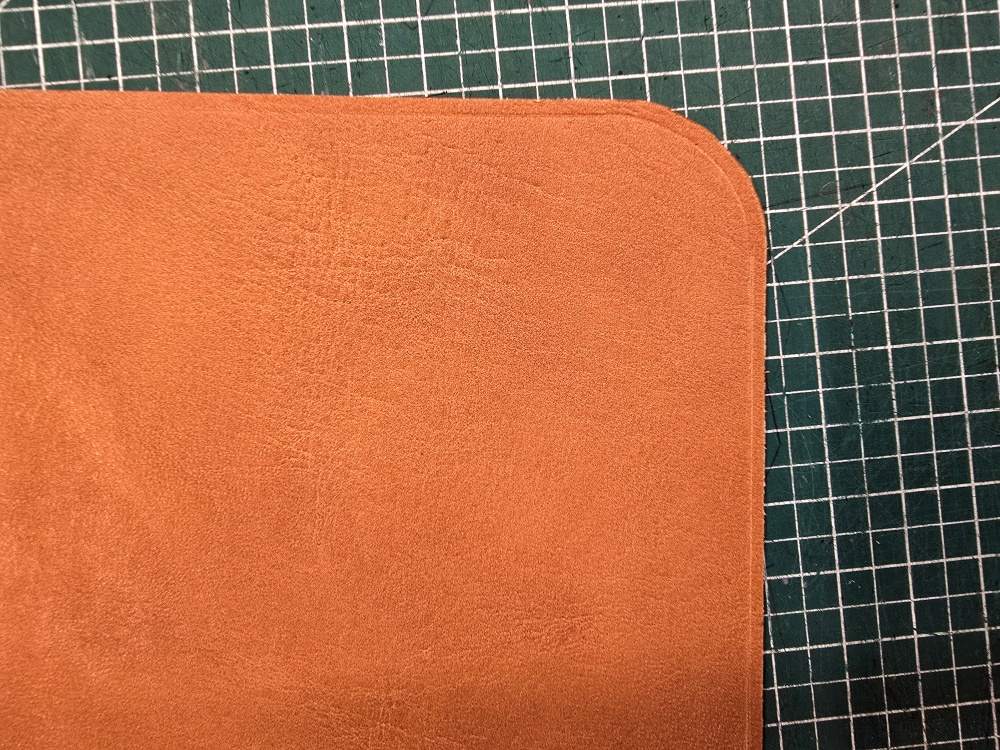
    After marking the complete divider line, inspect its condition before punching.

    Check whether the distance between the leather edge and the line remains consistent from beginning to end. Inspect curved sections for inward or outward shifts, and confirm that the line has not cut or scratched too deeply into the leather surface.

    직선에서 곡선까지 일정하게 이어진 완성된 디바이더 선

    Confirm that the spacing remains at 2 mm for sections punched with a European-style slanted pricking iron and 2.5 mm for sections punched with a Japanese-style diamond chisel.

    After marking the divider line, learn how to position the chisel against the line and maintain the correct punching angle in How to Use European-Style Pricking Irons: No. 7 and No. 9 Spacing and Correct Punching Positionfor the next step.

    Common Mistakes Made by Beginners

    The first mistake is using the same divider spacing without checking the chisel type. As a general guideline, use 2 mm for a European-style slanted pricking iron and 2.5 mm for a Japanese-style diamond chisel.

    The second mistake is placing both divider legs on the leather. One leg should rest outside the leather edge while the other leg marks the guideline on the surface.

    The third mistake is applying excessive pressure to make the line more visible. Too much pressure can narrow the spacing and deeply scratch the leather surface.

    The fourth mistake is rotating the divider to follow a curve. Keep the divider moving straight and rotate the workpiece in the direction of the curve.

    The fifth mistake is punching immediately without checking the spacing and depth of the marked line. Once holes are punched along an incorrect line, correcting their position becomes difficult.

    An Accurate Divider Line Determines the Hand-Stitching Position

    An accurate hand-stitching line is not determined only during punching. It begins with setting the divider spacing and creating a guideline parallel to the leather edge before using the chisel.

    Set the spacing to 2 mm for a European-style slanted pricking iron and 2.5 mm for a Japanese-style diamond chisel. Place one divider leg outside the leather edge and allow the other leg to mark the line on the leather.

    Move the divider straight without applying excessive pressure, and rotate the workpiece rather than the divider along curves. Following these principles creates a hand-stitching guideline that remains consistently spaced from the leather edge across both straight and curved sections.
  • 가죽공예 유럽형 치즐 사용법: 7호·9호 날 간격과 정확한 타공 자세

    How to Use European-Style Pricking Irons: No. 7 and No. 9 Spacing and Correct Punching Position

    In leathercraft, a pricking iron is used to create hand-stitching holes with consistent spacing and direction. Even when the same pricking iron is used, the position of the holes and the appearance of the finished hand-stitching line can vary depending on how the tool is aligned with the divider line and the angle at which it is held.

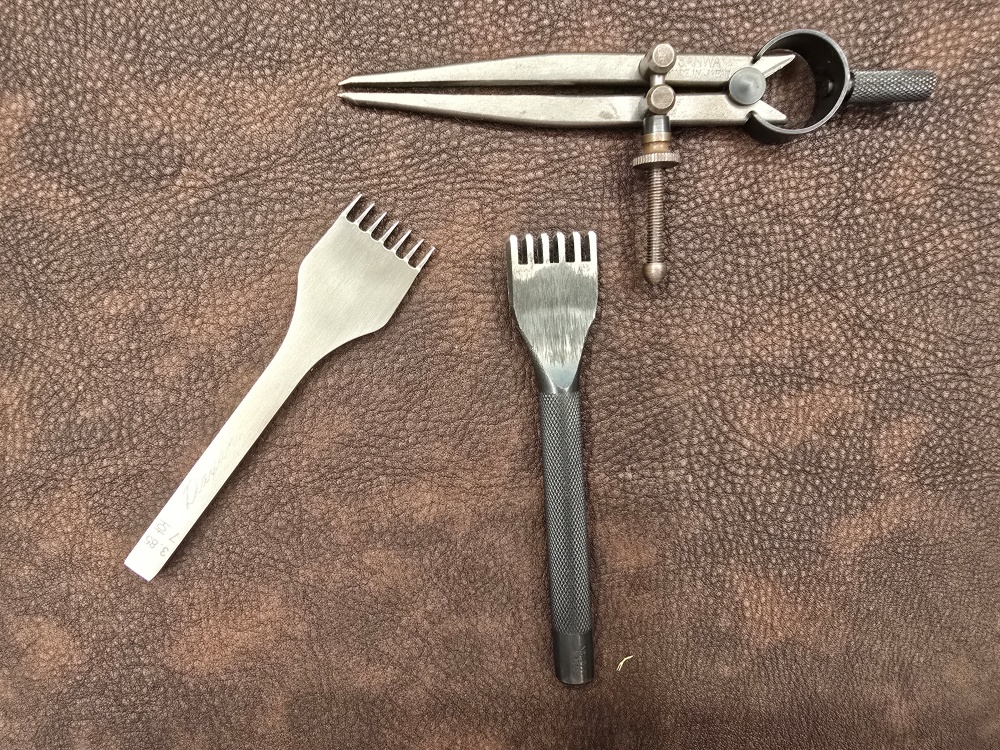
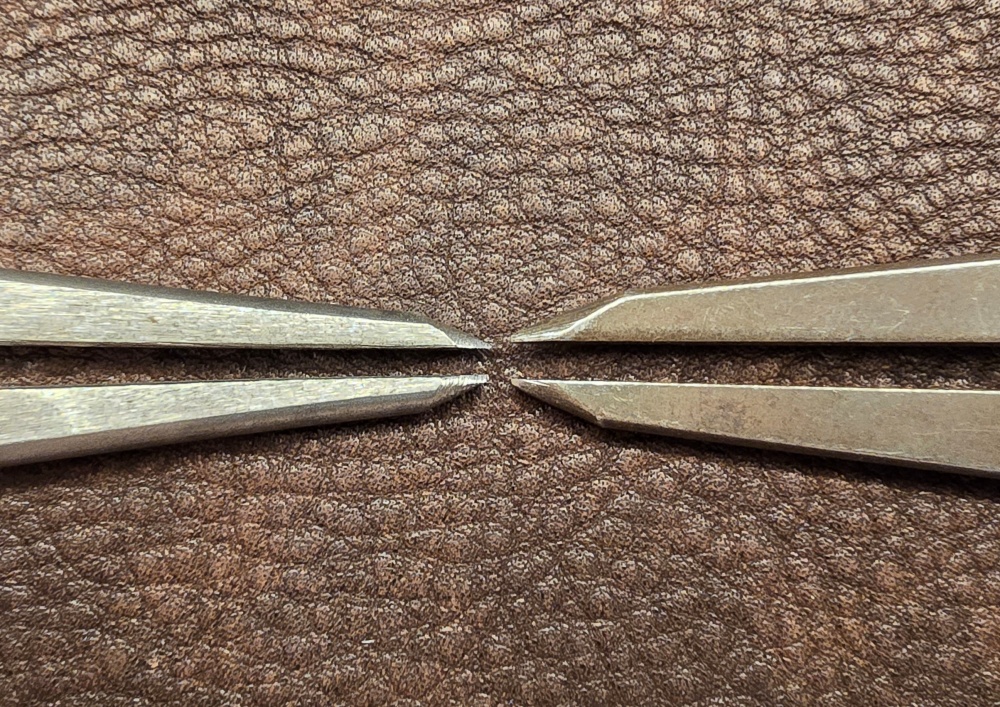
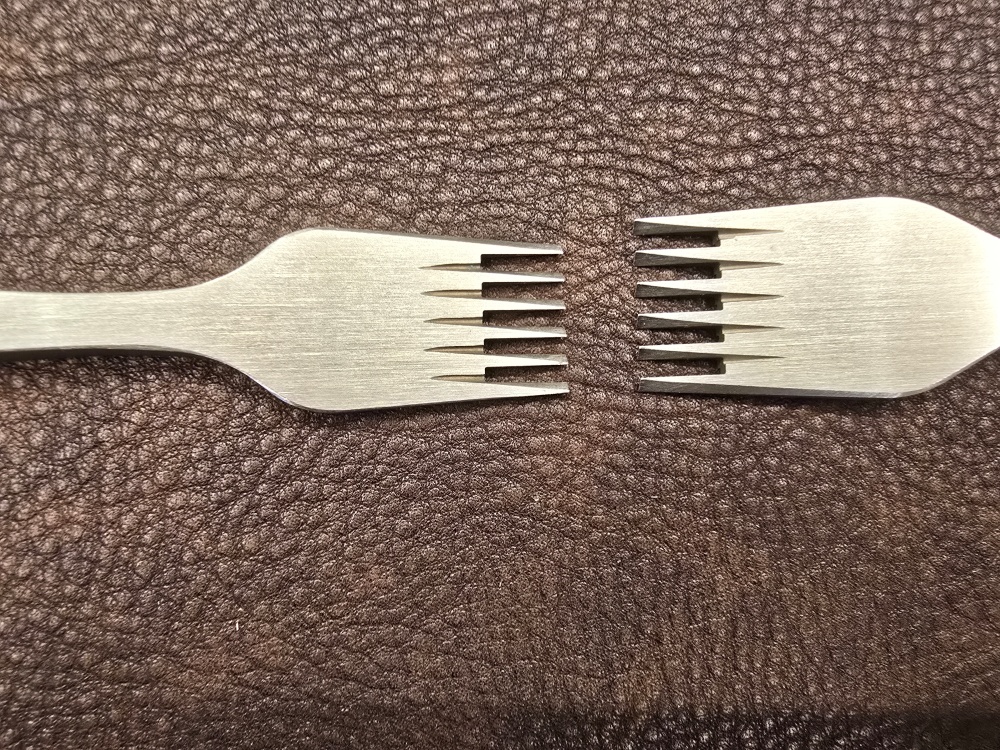
    At Leather Studio YEGAK, we use No. 7 and No. 9 European-style pricking irons. The No. 7 has 3.8 mm tooth spacing, while the No. 9 has 3.0 mm tooth spacing. We mainly use two-tooth and seven-tooth versions.
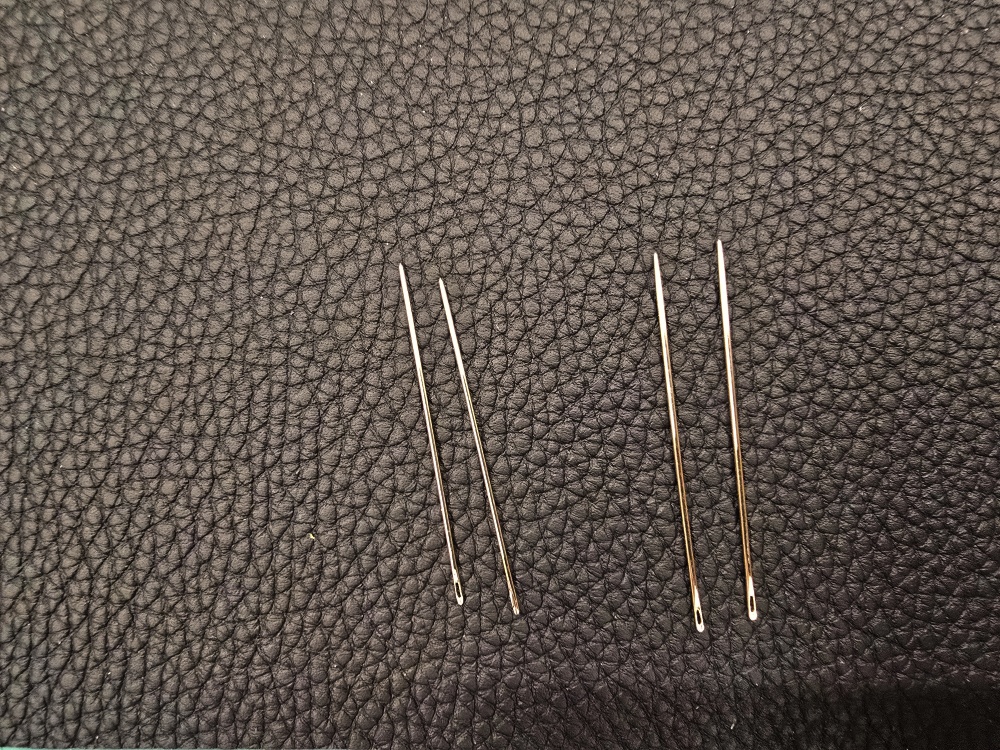
    Rather than choosing a pricking iron based only on its number, check its actual tooth spacing, tooth shape, the size of the project, and the thickness of the leather. When punching, it is especially important to hold the pricking iron at a 90-degree angle from the beginning and align its teeth precisely with the left side of the divider line.

    The Exact Purpose of a European-Style Pricking Iron

    A European-style pricking iron is used to create evenly spaced hand-stitching holes along a line marked with a divider. Its purpose is not simply to make holes in leather, but also to maintain consistent spacing, slant, and direction throughout the hand-stitching line.

    If the pricking iron moves away from the divider line, the hand-stitching line will not remain parallel to the leather edge. If the punched holes shift from side to side, the finished line can look uneven even when the hand stitching is completed with consistent tension.

    When using a pricking iron, accurately setting its position and angle is more important than applying excessive striking force.

    No. 7 and No. 9 Pricking Irons Used in Our Workshop

    날 간격이 다른 유럽형 치즐 7호와 9호

    The No. 7 European-style pricking iron used at Leather Studio YEGAK has 3.8 mm tooth spacing. The No. 9 pricking iron has 3.0 mm tooth spacing.

    Do not determine the spacing from the No. 7 or No. 9 designation alone. Numbering and actual tooth spacing can vary between manufacturers and products, so always check the stated spacing before purchasing a pricking iron.

    In our workshop, we mainly use two-tooth and seven-tooth pricking irons. A seven-tooth iron is used to punch relatively long straight sections at consistent intervals, while a two-tooth iron is used for curves and sections where the direction changes.
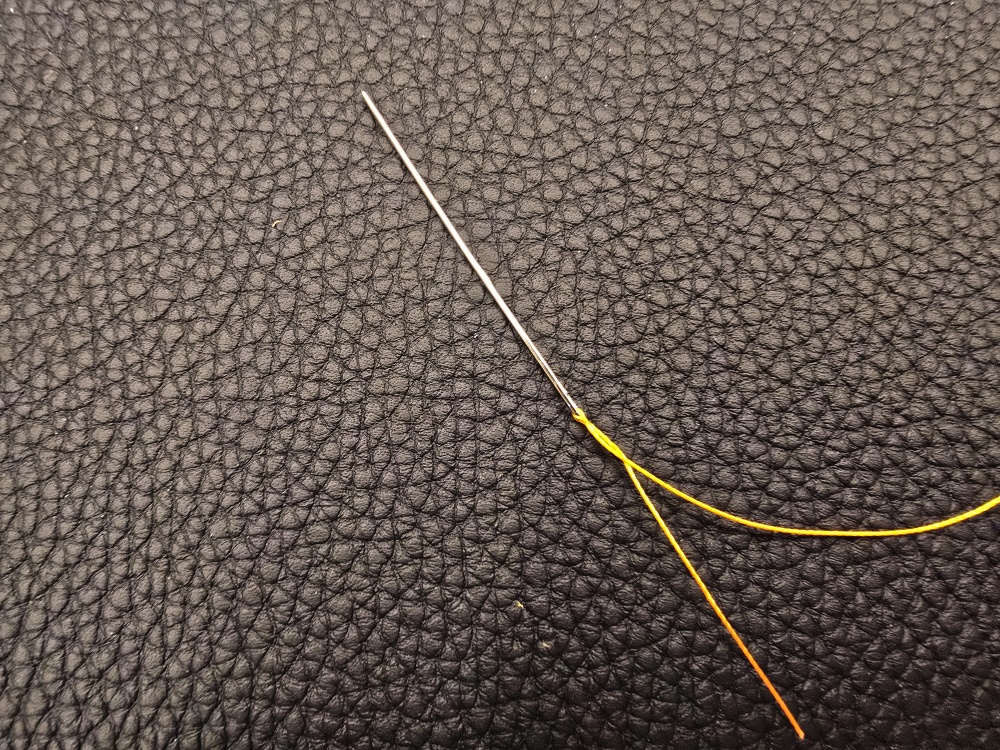
    For guidance on choosing thread thickness and punching spacing together, read [The Relationship Between Thread Thickness and Pricking-Iron Spacing: How Stitch Proportion Affects Quality]for more details.

    Align the Pricking Iron with the Left Side of the Divider Line

    디바이더 선의 왼쪽에 맞춘 치즐 날

    First, use a divider to mark the guideline for hand stitching. Before punching, position the teeth of the pricking iron along the left side of the divider line and check their placement.

    If the pricking iron is placed roughly in the center of the line or covers the line while punching, the hole positions may become inconsistent. The relationship between the teeth and the divider line must remain consistent from the first set of holes.

    When positioning the pricking iron, do not look only at the upper part of the handle. Check the actual position of the teeth where they touch the leather. Even if the handle appears to be aligned with the line, the hand-stitching holes will fall outside the line if the teeth extend beyond the divider mark.

    Hold the Pricking Iron at 90 Degrees from the Beginning

    가죽 표면에 90도로 세운 유럽형 치즐

    The pricking iron must always be held at a 90-degree angle to the leather surface. It should remain vertical from front to back and from side to side so that the hole positions remain consistent on both the front and back of the leather.

    If the pricking iron is tilted inward or outward while punching, the hole positions on the front and back of the leather may not match. On thick leather or sections made from several glued layers, even a slight tilt can create a larger positional difference on the back.

    A common beginner mistake is to tilt the pricking iron outward to align it with the divider line and then straighten it to 90 degrees immediately before punching.

    At first, the teeth may appear to be aligned with the line. However, as the tilted pricking iron is straightened, the teeth move outward. As a result, they cross the divider line and create the hand-stitching holes farther outward than intended.

    The pricking iron should therefore be held at 90 degrees first. While maintaining that angle, align its teeth with the left side of the divider line. Do not align the position first and then change the angle.

    Use a Seven-Tooth Pricking Iron for Consistent Straight Sections

    7날 유럽형 치즐로 직선을 타공하는 과정

    On relatively long straight sections, a seven-tooth pricking iron creates several evenly spaced holes at once.

    When punching, hold the pricking iron at 90 degrees and align it with the left side of the divider line before striking. After punching and moving to the next position, maintain the same angle and alignment standard.

    Even on a long straight section, do not rush through the punching. Check that the pricking iron remains vertical each time. If your hand or body position becomes uncomfortable, do not continue with the tool tilted. Reposition the workpiece and restore the 90-degree angle before continuing.

    Follow Curves with a Two-Tooth Pricking Iron and Rotate the Workpiece

    2날 치즐과 작업물의 회전으로 곡선을 타공하는 과정

    For a curve, punch once at a time with a two-tooth pricking iron and rotate the workpiece gradually to follow the direction of the divider line.

    Do not tilt the pricking iron sideways or twist your wrist to follow the curve. Keep the tool at 90 degrees and rotate the workpiece to maintain the correct relationship between the teeth and the divider line.

    The tighter the curve, the less you should try to change direction in a single movement. Punch once with the two-tooth iron, rotate the workpiece slightly, and then punch again.

    The teeth must remain aligned with the left side of the divider line throughout this process. Even as the workpiece rotates, the vertical angle and alignment position must remain consistent so that the holes follow the curve naturally.

    Overly Sharp Teeth Can Tear the Ends of the Holes

    정상적인 타공 구멍과 양 끝이 찢어진 구멍 비교

    A pricking iron should pass cleanly through the leather, but excessively sharp teeth are not always better.

    If the teeth are too sharp, the beginning and end of each punched hole can split and tear sharply. If the hole extends farther than necessary or develops small tears at both ends, the marks may remain clearly visible even after hand stitching.

    Thin or soft leather can be especially vulnerable to overly sharp teeth. Before using a new or recently sharpened pricking iron on a finished piece, test it on a scrap of the same leather.

    During the test, check whether the pricking iron passes through the leather without excessive force, whether the beginning and end of each hole remain clean, and whether the holes spread more than necessary when the thread is tightened.

    The teeth should not simply be sharpened as much as possible. They should be maintained so that they pass cleanly through the leather without tearing either end of the holes.

    What to Check When Choosing a European-Style Pricking Iron

    When choosing a European-style pricking iron, check the actual tooth spacing rather than relying only on the tool number. The tools used in our workshop have 3.8 mm spacing for No. 7 and 3.0 mm spacing for No. 9, but products from other manufacturers may use different spacing for the same numbers.

    For punching both straight lines and curves, it is best to prepare matching two-tooth and seven-tooth pricking irons with the same spacing and tooth shape. If their spacing or tooth shapes differ, the holes may change in appearance where straight and curved sections meet.

    Check that the teeth are arranged evenly in a straight line and that each tooth has a consistent length and shape. When the handle is held upright, the teeth should also stand securely perpendicular to the leather surface.

    Dull teeth require greater force and may compress or deform the leather. On the other hand, overly sharp teeth may tear the beginning and end of the holes. Judge the condition of the tool by testing it on scrap leather.

    Common Mistakes Made by Beginners

    치즐을 기울려 맞추는 잘못된 모습
    기울어진 치즐을 세울 때 타공 위치가 이동하는 모습

    The first mistake is aligning the pricking iron with the divider line while the tool is tilted. When the tilted tool is later straightened to 90 degrees, its teeth can move across the divider line.

    The second mistake is positioning the tool by looking only at its handle. The true reference is the relationship between the teeth touching the leather and the divider line.

    The third mistake is using the same number of teeth for both straight lines and curves. Curves should be punched one step at a time with a two-tooth pricking iron while the workpiece is rotated to follow the line steadily.

    The fourth mistake is tilting the pricking iron sideways to follow a curve. Keep the tool at 90 degrees and rotate the workpiece instead.

    The fifth mistake is using a new pricking iron directly on the finished piece without testing it. Because excessively sharp teeth can tear the beginning and end of the holes, test the tool first on a scrap of the same leather.

    How to Maintain and Store Pricking Irons

    청소 후 안전하게 보관한 유럽형 치즐

    After use, remove leather dust and debris from between the teeth. Leather fragments trapped between the teeth can affect the shape and depth of the next set of holes.

    Store pricking irons in a dry place to prevent rust. When they are not in use, protect the teeth with a cover so they do not strike other tools.

    Dropping a pricking iron can bend the tips or damage individual teeth. Misaligned teeth are difficult to position accurately against a divider line, so check that all the teeth remain evenly aligned before use.

    Do not sharpen the teeth excessively simply because the tool does not cut easily. After any maintenance, test the pricking iron on scrap leather and confirm that the beginning and end of the holes do not tear.

    Accurate Punching Requires Both Correct Position and Angle

    Using a European-style pricking iron accurately requires more than selecting the tooth spacing and number of teeth. Hold the tool at 90 degrees from the beginning, then align its teeth with the left side of the divider line while maintaining that angle.

    Use a seven-tooth pricking iron to maintain consistent spacing along straight sections. For curves, punch one step at a time with a two-tooth iron while rotating the workpiece to follow the line. Keep the pricking iron vertical instead of tilting it along the curve.
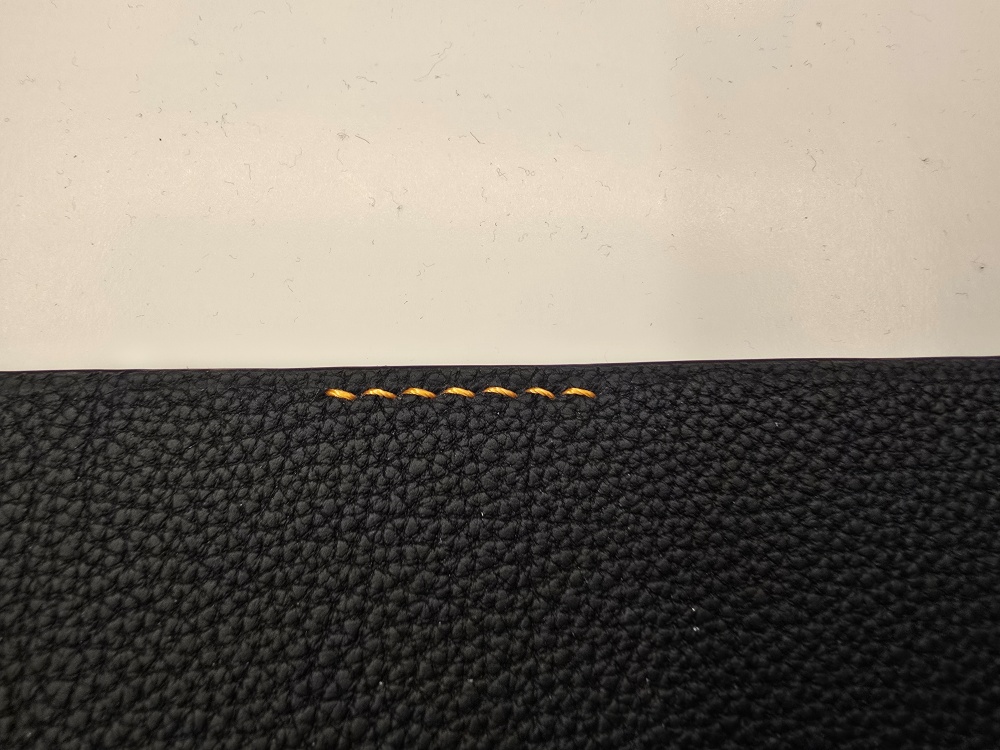
    The condition of the teeth must also be checked. Teeth that are too dull can compress and deform the leather, while teeth that are too sharp can tear the beginning and end of the punched holes.

    An accurate hand-stitching line is not created only after hand stitching begins. It is already determined when the pricking iron is aligned precisely with the divider line and used at a 90-degree angle.

  • 가죽공예 재단칼 사용법: 올바른 자세와 칼날 각도, 선택과 관리 기준

    How to Use a Leathercraft Cutting Knife: Proper Posture, Blade Angle, Selection, and Care

    Accurate cutting in leathercraft directly affects the shape and cut edges of the finished piece. Even when the same pattern is used, the result can vary depending on how the cutting knife is held, the angle of the blade, and how the pattern is secured.

    A cutting knife is more than a tool for simply cutting leather. It transfers the shape of a completed paper pattern accurately onto the leather, so you must learn both how to keep the blade against the pattern edge and how to move the workpiece.

    Before using a cutting knife, first review [How to Make a Leathercraft Pattern: From Blank Pattern Paper to a Finished Pattern and Leather Cuttingto understand the pattern-making process.

    The Exact Purpose of a Leathercraft Cutting Knife

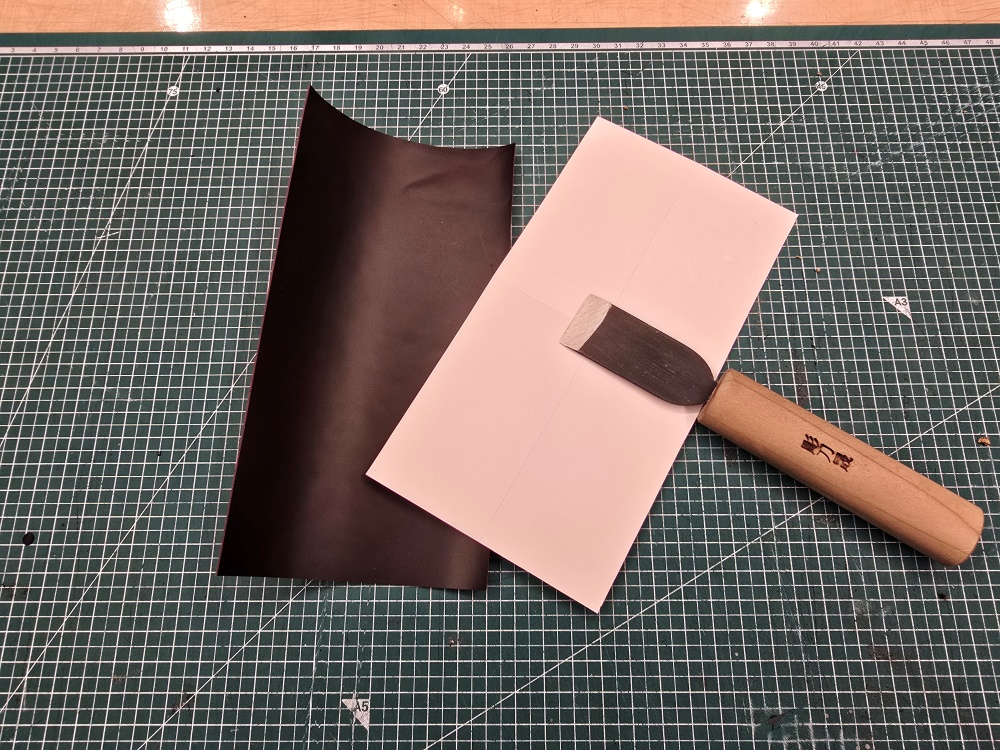
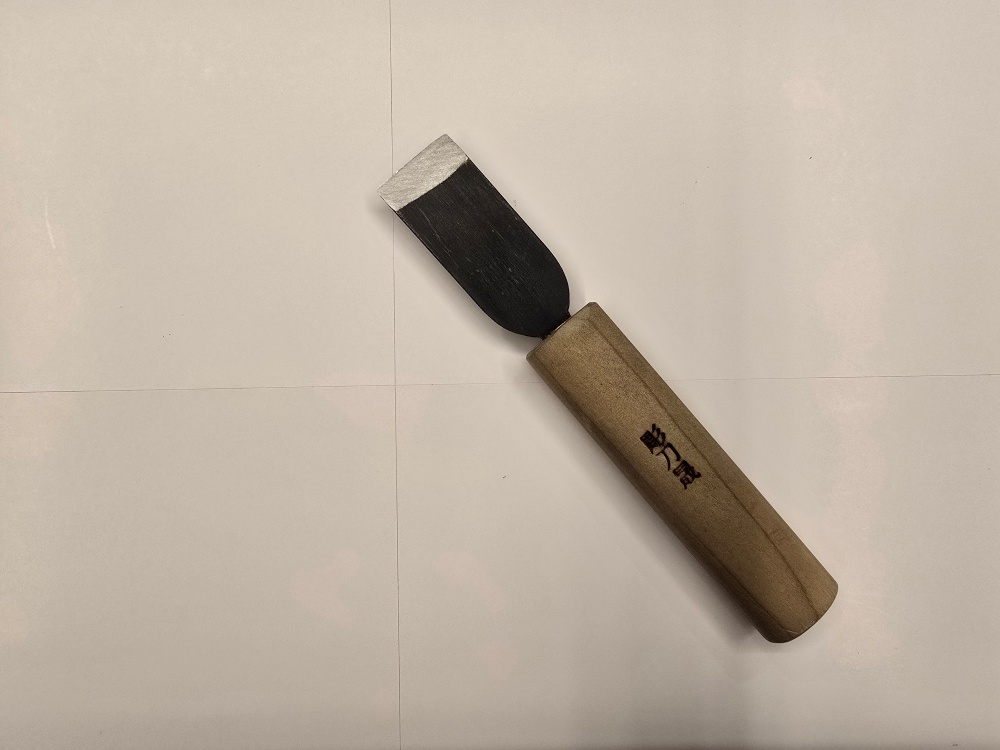
    가죽공예 재단에 사용하는 재단칼

    A leathercraft cutting knife is used to cut leather accurately by following the outline of a completed paper pattern. At Leather Studio YEGAK, we do not use a ruler when cutting leather. We place a firm handmade paper pattern on the leather and cut along its edge.

    The purpose of a cutting knife is not limited to separating a piece of leather. It helps the cut leather match the pattern, keeps the cut edge close to a vertical angle, and preserves the intended shapes of straight lines and curves.

    If the leather is not cut accurately, its edges may not align after gluing, or excessive edge correction may be required. Cutting should therefore be approached as a stage that already determines the final shape of the piece.

    How to Use a Cutting Knife in Actual Leatherwork

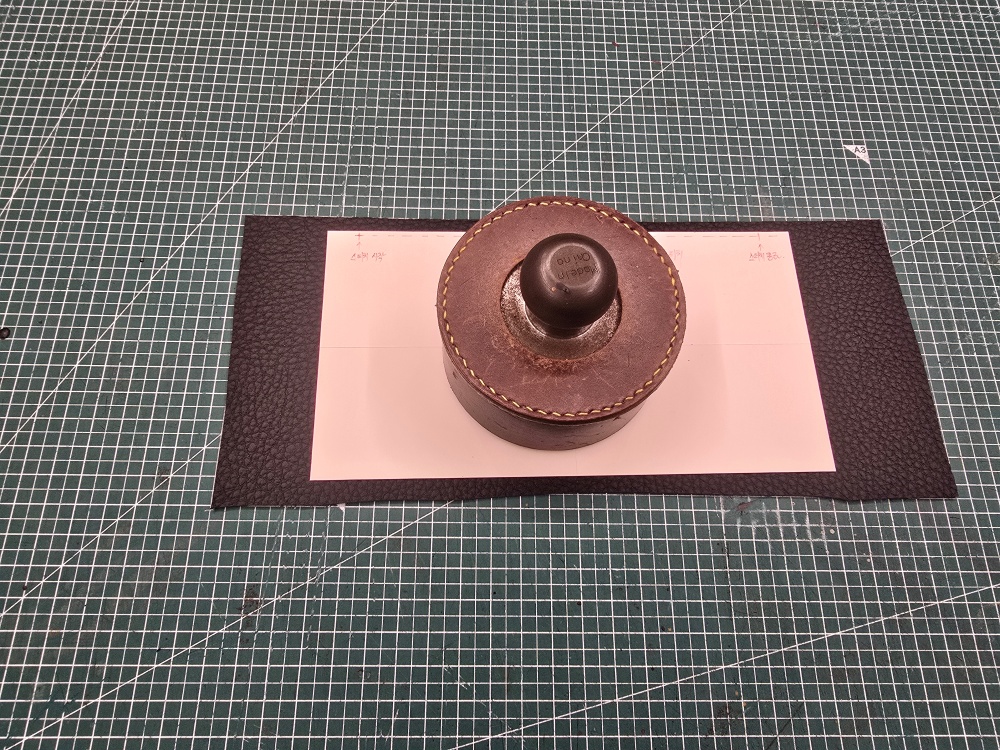
    First, place the completed paper pattern on the section of leather to be cut. Position a pattern weight in the center to prevent the pattern from moving, and use your other hand to press down near the area where the knife will pass.

    Because a pattern can move easily on chrome-tanned leather, apply a small amount of leather adhesive to the edge of the paper pattern and place it on the leather as if lightly attaching it. Placing a pattern weight on top helps prevent the pattern from shifting during cutting.

    크롬 가죽 위에 고정한 종이 패턴

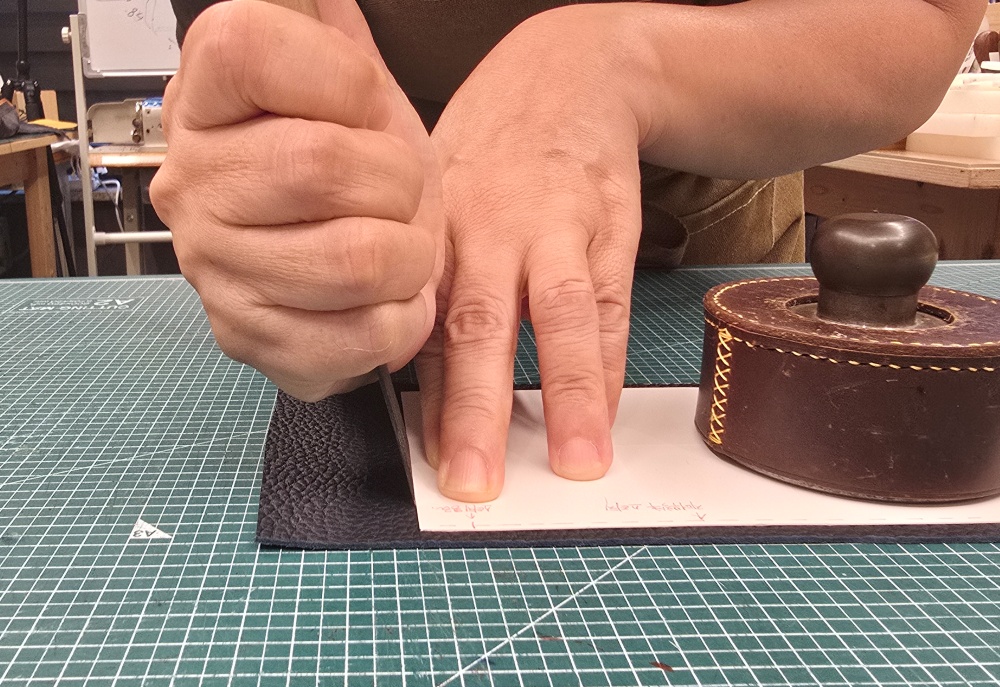
    Keep the blade firmly against the edge of the paper pattern. If there is a gap between the blade and the pattern, the leather will be cut larger than the pattern. If the blade moves underneath the pattern edge, the leather may be cut smaller than intended.

    Press down near the cutting area, but never place your fingers in the path of the blade. Do not try to hold down the entire pattern at once. Reposition your hand and the pattern weight securely as you move to each cutting section.

    Correct Hand Position and Blade Angle

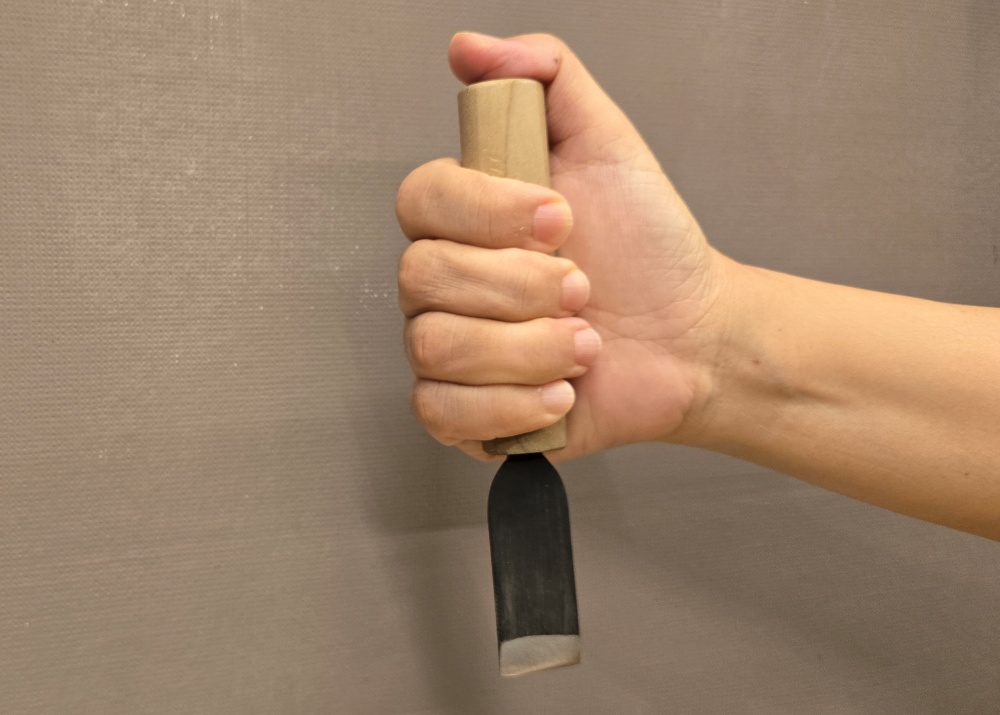
    재단칼을 잡은 정석
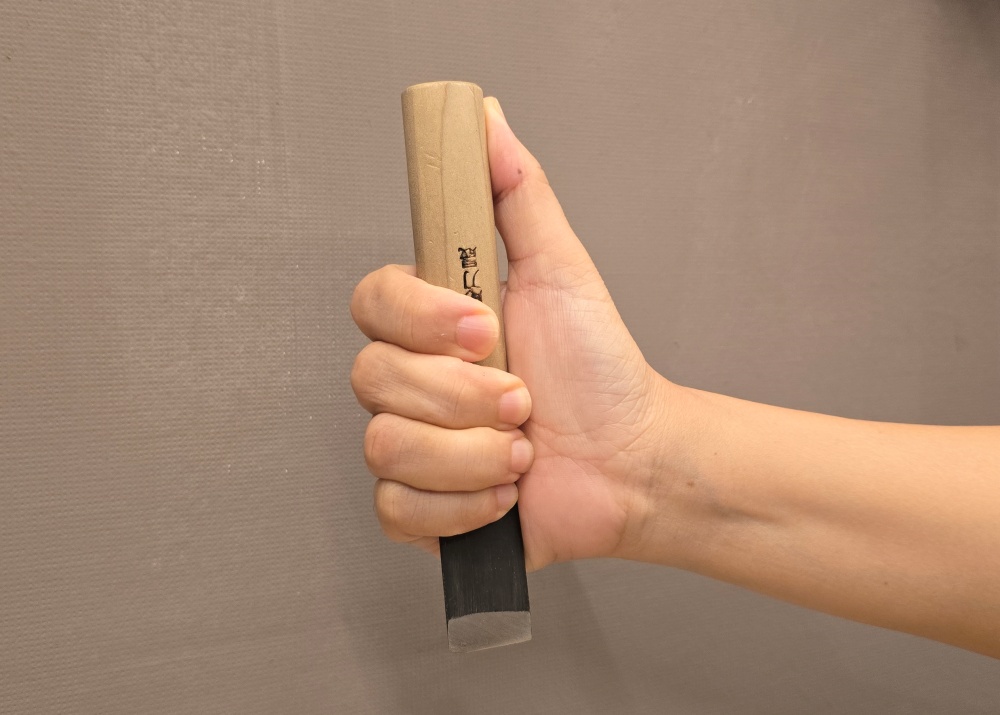
    힘을 더 들일수있는 모습

    Hold the cutting knife so that your arm follows the cutting direction naturally without bending your wrist excessively. Gripping the handle too tightly can stiffen your wrist and cause the blade to move away from the pattern edge.

    패턴 바깥쪽으로 10도 기울인 재단칼의 각

    Do not hold the blade completely upright. Because the tip of the cutting knife is formed at an angle, holding the knife vertically can produce a slanted cut edge.

    Tilt the knife approximately 10 degrees outward from the pattern. This compensates for the angled shape of the blade tip and helps create a leather edge that is close to a precise 90-degree angle.

    The approximate 10-degree angle is not an absolute rule that applies identically to every knife. It is based on the shape of the blade tip used in our workshop. If your blade has a different shape, make a test cut on a scrap of leather and inspect the resulting cut edge.

    Cut Curves by Connecting Short Straight Cuts

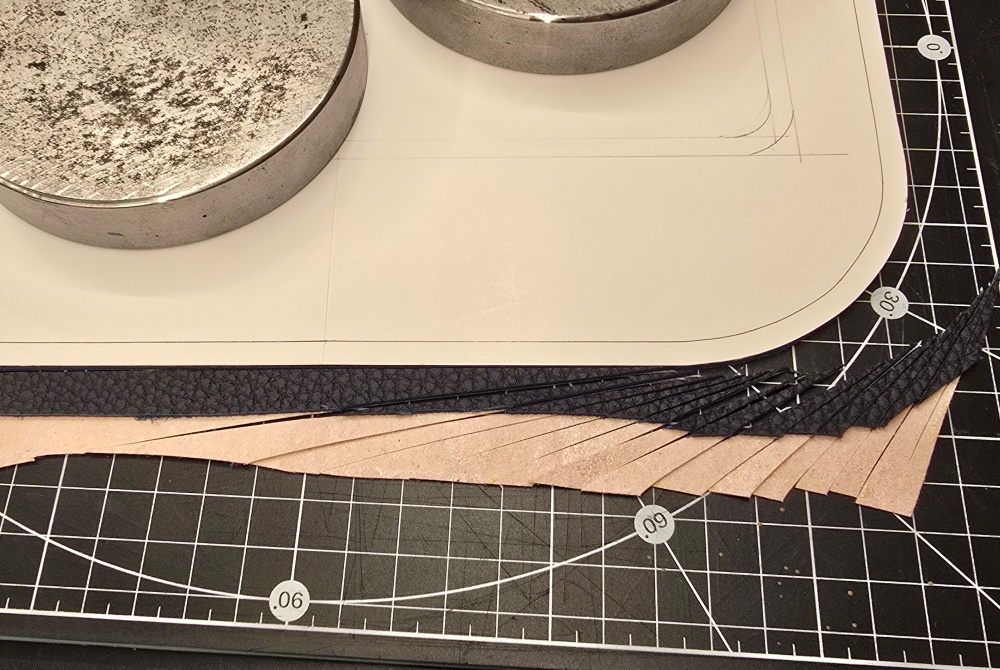
    짧은 직선을 연결해 곡선을 재단하는 과정

    When cutting a curve, forcing the knife around the curve or twisting your wrist in an attempt to complete it in one motion can cause the blade to move away from the pattern edge.

    Think of circles and curves as shapes made from a continuous series of short straight lines. Make one short straight cut, rotate the workpiece approximately 5 degrees, and make another short straight cut. Repeating this process allows you to cut a curve accurately without forcing the blade to turn.

    Rather than forcing the knife to change direction, rotate the workpiece and pattern a little at a time. After each short cut, check that the blade remains firmly against the pattern edge.

    How to Check Cutting Accuracy

    After cutting, keep the pattern and leather aligned and inspect them from both the front and back.

    When viewed from the front, no leather should be visible beyond the edge of the paper pattern. When the piece is turned over, no part of the paper pattern should be visible beyond the edge of the leather.

    If leather is visible from the front, the leather has been cut larger than the pattern. If the paper pattern is visible from the back, the leather has been cut smaller than the pattern. The pattern and leather match accurately only when neither one extends beyond the other from either side.

    Common Mistakes Made by Beginners

    The first mistake is cutting without securing the pattern sufficiently. If you only place a weight in the center and do not press down near the cutting area, the pattern edge may move under the pressure of the knife.

    The second mistake is cutting with the blade positioned away from the pattern edge. Even a small gap between the blade and the pattern can change the final dimensions of the leather.

    The third mistake is holding the knife completely upright. If the cutting knife has an angled blade tip, holding it vertically may prevent the cut edge from forming an accurate 90-degree angle.

    The fourth mistake is twisting both the wrist and the knife in an attempt to cut a smooth curve in one motion. Curves should be cut by rotating the workpiece little by little and connecting a series of short straight cuts.

    The fifth mistake is continuing to use a dull blade. A dull blade requires more force, which can cause it to move away from the pattern edge or leave a rough cut surface.

    What to Check When Choosing a Leathercraft Cutting Knife

    When choosing a cutting knife, first check whether the blade is held securely rather than focusing on its price or appearance. If the blade moves inside the handle, it will be difficult to maintain a consistent cutting line even when the knife is held against the pattern edge.

    The handle should not feel excessively light or slippery in your hand. Choose a shape that reduces strain on your fingers and wrist during extended use and allows you to control the cutting direction steadily.

    If the knife allows you to adjust how far the blade extends, check that its locking mechanism works securely and prevents the blade from sliding back into the handle during use.

    For a knife with replaceable blades, it is also important to check whether replacement blades are readily available. Accurate and safe cutting requires replacing a dull blade when necessary rather than continuing to use it for too long.

    You should also examine the shape of the blade tip. The angle at which you hold the knife may need to change depending on how the tip of the blade is formed.

    How to Maintain and Store a Cutting Knife

    사용 후 안전하게 보관한 재단칼

    After finishing your work, remove any leather dust and adhesive remaining on the blade. Hardened adhesive can create resistance during cutting and prevent the leather edge from being cut cleanly.

    Store the knife in a dry place to prevent rust from forming on the blade. Retract a replaceable blade completely into its handle when it is not in use, and always place a protective cover over a fixed blade.

    Check whether the blade needs to be replaced if it no longer passes smoothly through the leather or requires more force than before. You should also inspect the blade when the cut edge becomes rough or the knife feels as though it is pushing the leather rather than cutting through it.

    Store new and used blades separately. Wrap discarded blades in paper or tape so that the sharp edges are not exposed. When possible, use separate knives for cutting pattern paper and cutting leather.

    Accurate Cutting Begins with Proper Tool Use

    Purchasing a good cutting knife alone does not guarantee accurate cutting. The pattern must be secured against movement, the blade must remain firmly against the pattern edge, and the knife must be held at an angle suited to the shape of its blade tip.

    Learning to rotate the workpiece gradually and connect short straight cuts instead of attempting to cut a curve in one motion makes it possible to cut complex patterns more steadily.

    After cutting, confirm that no leather is visible beyond the pattern from the front and that no paper pattern is visible beyond the leather from the back. Cutting is complete only after this check confirms that the pattern and leather match accurately.

  • 가죽공예 바늘 선택법: 실 굵기·타공 크기·바늘 끝의 관계

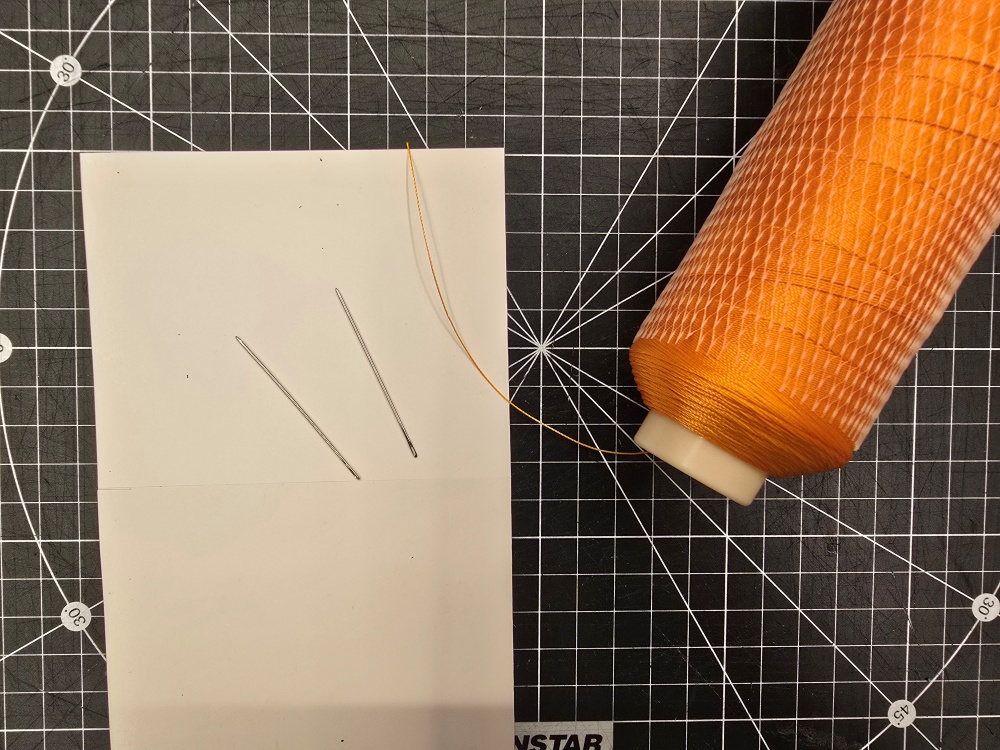
    [How to Choose Leathercraft Needles: The Relationship Between Thread Thickness, Hole Size and Needle Tips]

    A leathercraft needle is not simply a tool for carrying thread through leather. If the needle thickness, eye size, and tip shape do not match the thread and stitching holes, unnecessary resistance occurs with every stitch. This can wear the thread or enlarge the holes in the leather.

    Even with the same leather and thread, the choice of needle affects the resistance felt by the hands, stitching speed, and stitch alignment on both the front and back. Choosing a good needle is not about buying the most expensive product. It is about finding the right combination for the thread and stitching holes being used.

    the reason saddle stitching lasts longer than machine stitching—the answer lies in its structure, where two needles attached to opposite ends of a single thread cross through the same hole. Both needles must therefore pass steadily through the same hole without piercing the thread already inside it.

    Leathercraft Needles Are Not Designed to Create New Holes

    Ordinary fabric-sewing needles have sharp points that pass directly between woven fibers. In contrast, leathercraft needles used for saddle stitching carry the thread through holes that have already been made with a pricking iron or awl.

    If the needle tip is too sharp, it may leave the existing hole and create a new path through the leather. It may also pierce the thread that has already passed through from the opposite side. When the thread is pierced, moving to the next stitch becomes difficult, and pulling it by force can damage its surface.

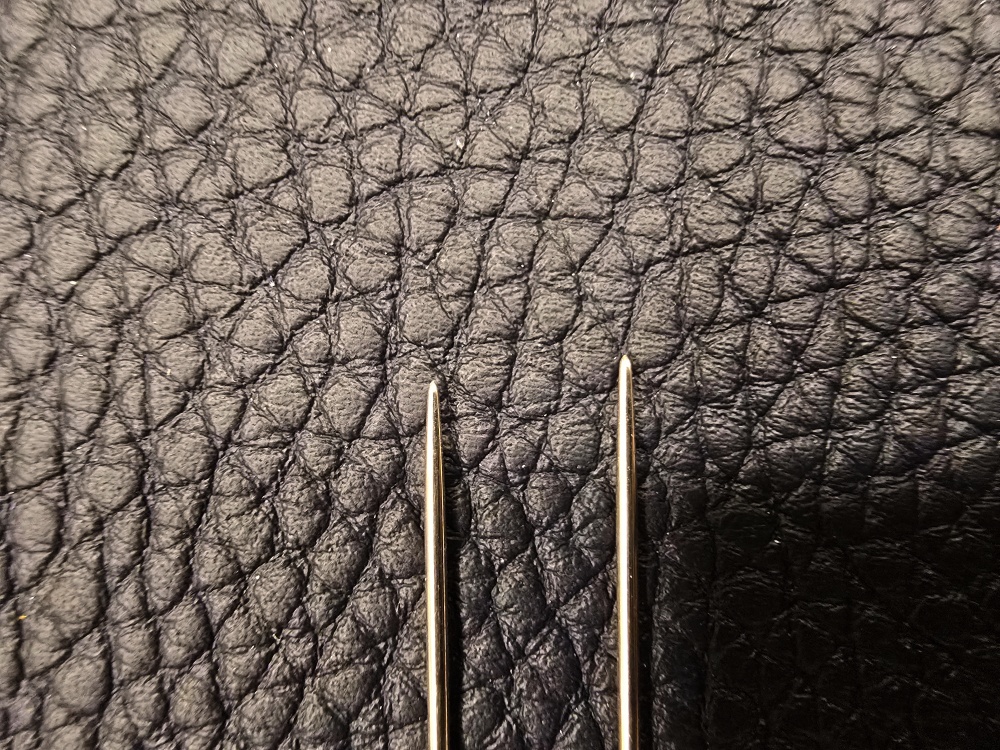
    For leather hand-stitching, a needle with a rounded and smoothly finished tip is generally suitable. The rounded tip follows the direction of the existing stitching hole while reducing damage to the leather fibers and thread.

    A Rounded Needle Tip Must Still Have a Smooth Surface

    Not all round-tipped needles have the same quality. Fine scratches or rough areas on the tip or shaft can scrape the thread and leather as the needle passes through the hole.

    Slowly run your fingers along the needle tip and shaft to check for rough spots. If the needle catches fibers when lightly passed through a soft cloth, its surface may contain a small scratch or burr.

    Continuing to use a needle with a bent or flattened tip repeatedly presses against one side of the stitching hole. If the needle keeps moving in an unintended direction inside the leather or the thread frays without an obvious reason, inspect the needle surface and tip first.

    끝이 둥근 가죽공에바늘

    The Needle Eye Must Match the Thread Thickness

    When Considering Leathercraft Thread Thickness and Pricking-Iron Spacing—once this has been determined, check whether the thread passes through the needle eye without excessive force.

    If the needle eye is too small, threading becomes difficult and the thread rubs against the edge of the eye every time it passes through. When the thread is pierced to lock it onto the needle, the secured section becomes two or more layers thick and takes up more space during actual stitching.

    If the needle eye is excessively large, the needle shaft is often thicker as well. Repeatedly passing a thick needle through small stitching holes can enlarge them and place unnecessary pressure along the stitch line.

    After attaching the thread to the needle, check that the secured section does not protrude far beyond the thickness of the needle shaft. A smooth transition from the needle to the thread reduces resistance as it passes through the stitching hole.

    The Needle Must Not Be Thicker Than the Stitching Hole

    Why awl holes determine stitch quality—the size and direction of the passage followed by the needle and thread determine where each stitch is positioned.

    A properly selected needle should pass through with reasonable hand pressure without enlarging the stitching hole. A tool may occasionally be needed around an especially thick section, but if pliers are required for every hole, recheck the relationship between the needle and hole size.

    If the leather surface lifts or the hole expands into a round shape every time the needle passes through, the needle may be too thick. If the needle is too thin and flexible, it may bend while passing through several layers and make it difficult to emerge accurately through the hole on the back.

    Needle thickness should not be determined in isolation. Consider the total assembled leather thickness, the size and shape of the stitching holes, the thread thickness, and the stability of the needle when it is held and pushed through the leather.

    가죽공에 바늘 굵기 비교

    Thick Leather Does Not Always Require a Thick Needle

    Where several leather layers are joined, the needle must travel through a longer passage and encounters greater internal friction. Replacing it with a thicker needle simply because it does not pass easily may enlarge the stitching holes even further.

    First confirm that the holes on the front and back are connected in the same direction. If the components shifted during gluing or the awl was tilted, even a thin needle will not pass through naturally.

    In a thick joint, it is safer to realign the existing passage with an awl before inserting the needle than to force the hole wider with the needle itself. The goal is not to create a new hole, but to ensure that the existing holes on the front and back form one continuous passage.

    Thicker leather does not automatically require a thicker needle. What is needed is a needle with enough rigidity to resist bending while remaining thin enough not to enlarge the existing holes.

    Problems Caused by Needles That Are Too Thick or Too Thin

    A needle that is too thick can cause the following problems:

    • Excessive force is required to pass through the hole.
    • The stitching hole becomes larger than its original size.
    • The leather surface lifts as the needle passes through.
    • The stitch line becomes distorted around curves or corners.
    • The hole remains visibly large even after the thread has been tightened.
    • Finger and wrist fatigue increases during long stitching sessions.

    A needle that is too thin can cause the following problems:

    • The needle bends easily while passing through several leather layers.
    • It becomes difficult to maintain a stable direction while locating the hole on the back.
    • A small needle eye creates friction against thick thread.
    • The needle shaft may deform when the needle is pulled forcefully.
    • The narrow gripping area may make the needle more difficult to control.

    Needle thickness cannot be judged by the product number alone. Numbering systems and actual dimensions vary between manufacturers, so the needle must be tested with the thread and stitching holes that will be used.

    The Inside of the Needle Eye Must Also Be Inspected

    Even if the outside of the needle eye appears smooth, a rough inner edge can scrape the same section of thread with every stitch. The problem may not be visible at first, but along a long stitch line the thread surface can gradually fray and its twist may loosen.

    Before using a new needle, insert a short piece of thread through the eye and move it back and forth several times. If a particular section of thread begins to fray or lose color, inspect the finish inside the needle eye.

    A needle with a deformed eye or visible rust should not remain in use. It may leave metal marks on the leather surface or stain light-colored thread.

    The Thread Attachment Must Be Compact and Smooth

    For saddle stitching, the thread is often pierced and locked onto the needle so that it does not slip out of the eye. Overlapping the thread too many times or creating a large knot makes the section behind the needle excessively thick.

    A bulky attachment rubs against the leather every time it passes through a hole and may disturb the thread’s twist. On light-colored leather, wax and thread residue may also collect around the stitching holes.

    The thread should be secured firmly enough not to slip from the needle, while the transition from the needle shaft to the thread remains as flat as possible. Even a stable bonded thread such as Vinymo MBT can create excessive resistance if the attachment around the needle is too bulky.

    When using wax, do not concentrate a large amount in one area. Apply only the necessary amount in a thin, even layer to prevent buildup on the thread surface and around the needle eye.

    비니모 MBT 실을 가죽공예 바늘에 고정한 모습

    Saddle Stitching Requires Two Needles in the Same Condition

    Saddle stitching uses a needle on each end of a single thread, with both needles crossing through the same hole. The two needles should therefore have the same thickness, length, and tip condition so that hand movement and passing resistance remain consistent on both sides.

    If one needle is new while the other is bent or worn, they may follow different paths even when the same force is applied. When replacing needles, inspect both together and replace them as a pair when their conditions differ significantly.

    If a needle bends during work, repeatedly forcing it back in the opposite direction can cause metal fatigue and sudden breakage. Replace the needle if the tip is damaged or the shaft shows visible deformation.

    Choose the Needle After Test-Stitching the Actual Materials

    Do not make the final needle choice based only on the number printed on the package. Prepare a test piece using the leather, reinforcement, and lining in the same order and combined thickness as the actual project.

    Check the combination in the following order:

    1. Determine the thread thickness and pricking-iron spacing for the project.
    2. Choose a needle whose eye accepts the thread without excessive force.
    3. Attach the thread to the needle using the same method that will be used during stitching.
    4. Make stitching holes of the same size as those planned for the project.
    5. Check whether the needle passes through without enlarging the holes.
    6. Inspect both the front and back to confirm that the stitches sit consistently.
    7. Sew at least ten stitches and check for thread wear and hand fatigue.
    8. Bend the test piece and check whether the holes stretch or the thread rises above the surface.

    A needle may appear to pass smoothly during a short test, while hand fatigue and thread wear accumulate along a longer stitch line. When stitching a long perimeter such as that of a bag, consider not only how easily the needle passes but also whether it maintains the same performance throughout the work.

    가죽공예 바늘 선택을 위한 시험 바느질

    A Good Needle Works Invisibly Between the Thread and Hole

    A properly selected needle does not force the stitching holes wider or damage the thread. It follows the intended passage and connects the front and back consistently.

    If stitching requires excessive force, the thread repeatedly frays, or the needle continues to bend, do not assume that hand technique is the only cause. Recheck the needle thickness, eye size, tip shape, and relationship between the thread and stitching holes.

    The key to choosing leathercraft needles is not memorizing a particular size number or brand. It is finding a combination in which the thread is secured properly in the eye, the needle does not distort the stitching holes, and both needles move with the same resistance.

    The needle is not visible in the finished piece, yet it passes through every stitch. When the needle, thread, and stitching holes are properly balanced, the rhythm of hand-stitching becomes stable and only the intended stitch line remains on the leather surface.