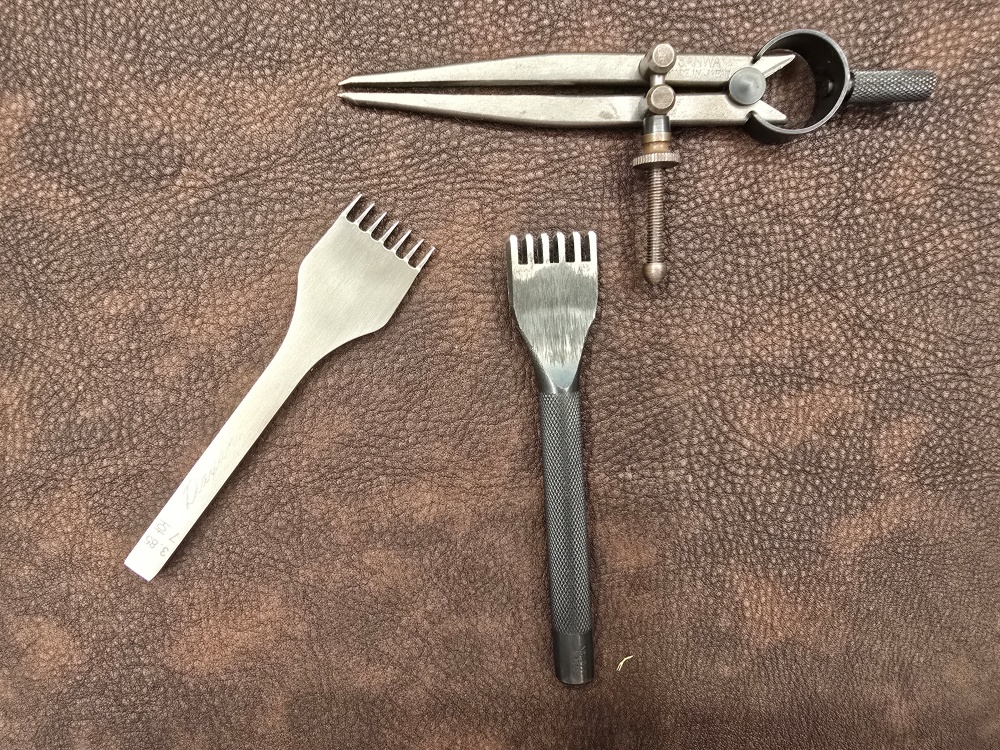
In leathercraft, a divider is used to mark a hand-stitching guideline at a consistent distance from the leather edge. A consistent divider line helps position the chisel accurately and keeps the finished hand-stitching line parallel to the edge.
A divider is not simply a tool for drawing a line on leather. Its spacing must be set according to the type of chisel being used, while the position of the guide leg, direction of movement, and applied pressure must remain consistent.
At Leather Studio YEGAK, we generally set the divider spacing to 2 mm when using a European-style slanted pricking iron and 2.5 mm when using a Japanese-style diamond chisel.
Divider Spacing Varies According to the Chisel Type
Set the divider spacing to 2 mm when using a European-style slanted pricking iron. Set it to 2.5 mm when using a Japanese-style diamond chisel.
This spacing is the distance between the leather edge and the hand-stitching guideline. If the same divider spacing is used for every chisel type, the proportion between the punched holes and the leather edge may change.
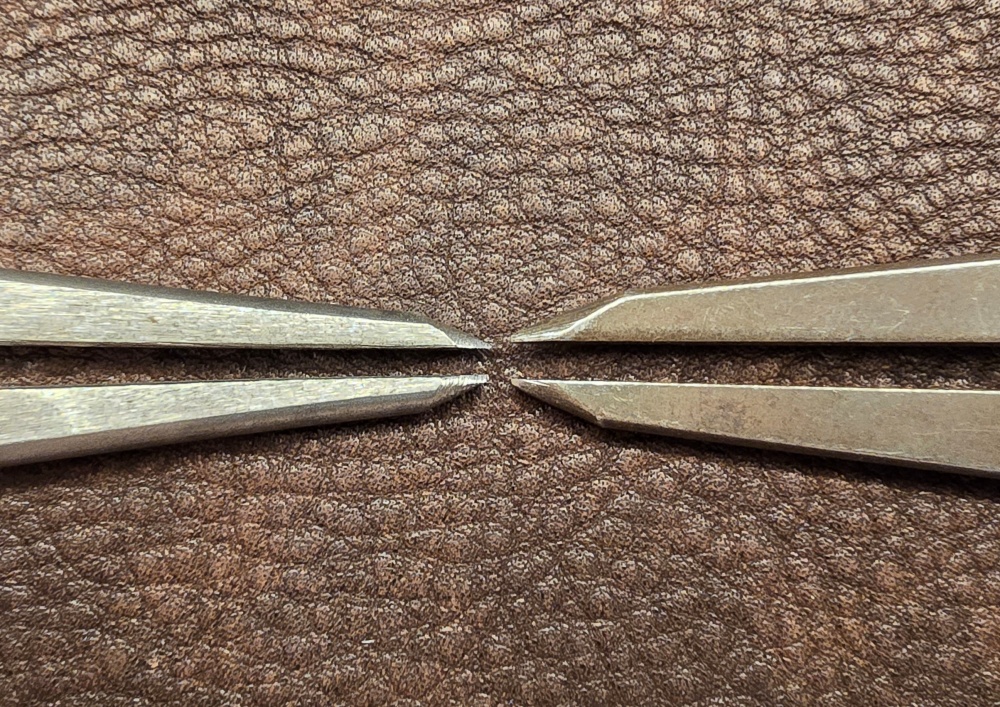
Before using the divider, first decide which type of chisel will be used. After identifying whether it is a European-style slanted pricking iron or a Japanese-style diamond chisel, set the spacing to 2 mm or 2.5 mm accordingly.
The chisel type and divider spacing must be selected together to create a balanced proportion between the leather edge, punched holes, and hand-stitching line.
Place One Divider Leg Outside the Leather Edge
When marking a line with a divider, do not place both legs on the leather. Position one leg outside the leather edge and allow only the other leg to touch the leather surface.
The leg outside the leather acts as a guide that follows the shape of the edge. The inner leg resting on the leather marks the hand-stitching guideline while maintaining the set distance from the guide leg.
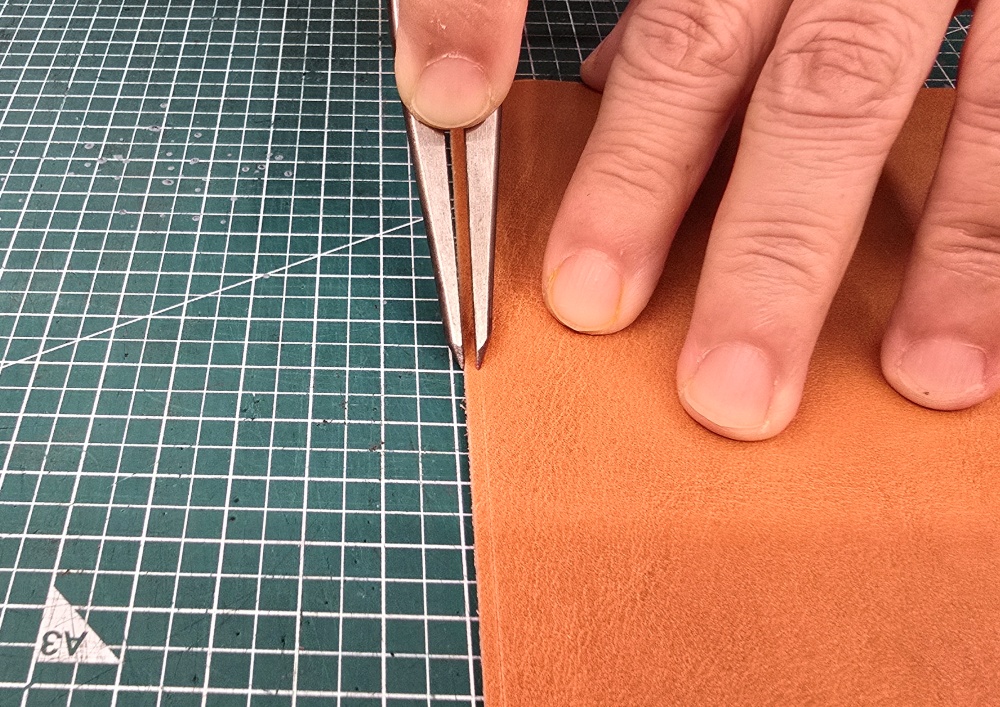
With the outer leg resting against the leather edge, move the divider straight downward. The inner leg on the leather will then create a line parallel to the edge.
If the outer leg moves away from the edge or slips onto the leather, the spacing may change. Pressing the outer leg too firmly against the edge can also shift the leather or make the divider spacing narrower.
Apply Moderate Pressure When Using the Divider
Applying heavy pressure to create a darker line is not the correct way to use a divider. If the divider is pressed too firmly, the actual distance of the marked line may become narrower than the set spacing.
The marking leg can dig into the surface and scratch or gouge the leather. A deep mark of this kind may remain visible even after punching and hand stitching are completed.
The divider only needs to create a shallow, consistent line that remains visible on the leather surface. Apply just enough pressure to identify the punching position without cutting deeply into the leather.
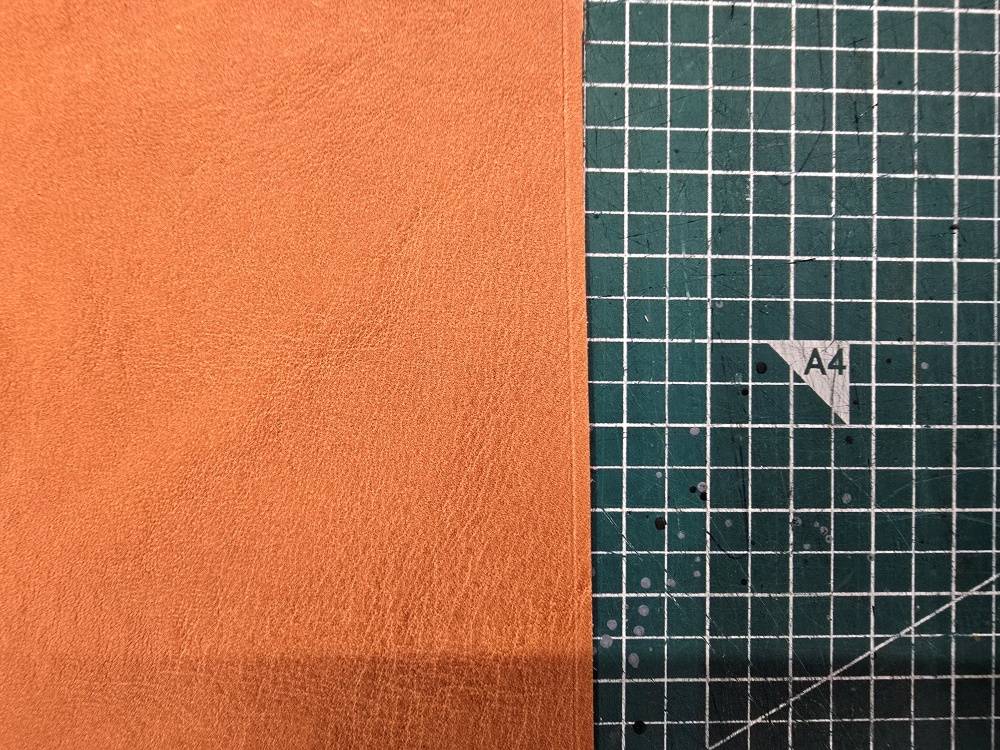
On unfamiliar leather or leather with a soft surface, the depth of the mark can vary significantly depending on the pressure. Test the divider on a scrap of the same leather before marking the actual piece.
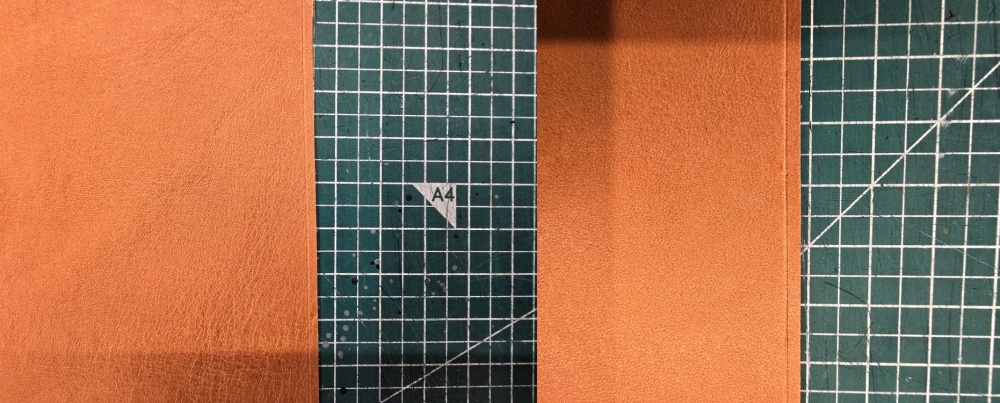
Move the Divider Straight Along Straight Sections
Along a straight section, place one leg outside the leather edge and move the divider straight downward.
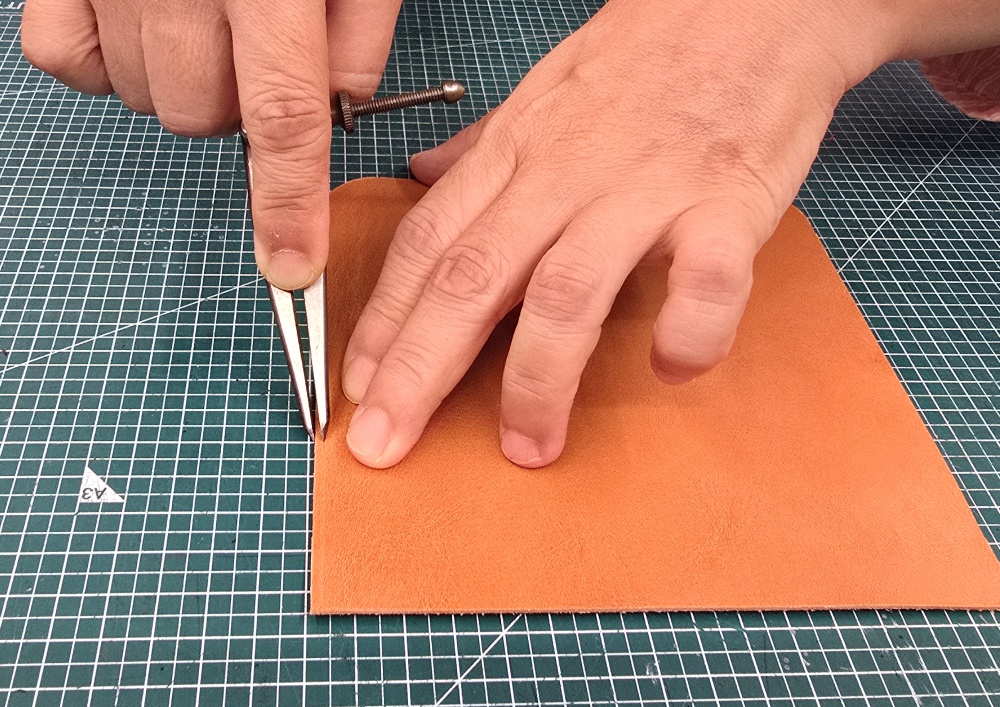
Twisting or rotating the divider while marking can cause the position of the marking leg to shift. Keep the outer leg following the leather edge steadily so the inner leg creates a line at a consistent distance.
Work at a steady speed while checking that the outer leg remains in contact with the leather edge. If the divider moves away from the edge, reposition it accurately before continuing instead of forcing it back onto the existing line.
Rotate the Workpiece, Not the Divider, Along Curves
Do not rotate the divider itself to follow a curved section. Rotating the tool by hand can shift the positions of the outer and inner legs, causing the line spacing to become narrower or wider.
Even along a curve, move the divider straight in the same way as on a straight section. Rotate the workpiece gradually to follow the direction of the curve.
Keep one leg outside the leather edge and move the divider straight. Rotate the workpiece slightly, then move the divider again in the same direction. The inner leg will naturally create a divider line that follows the curve of the workpiece.
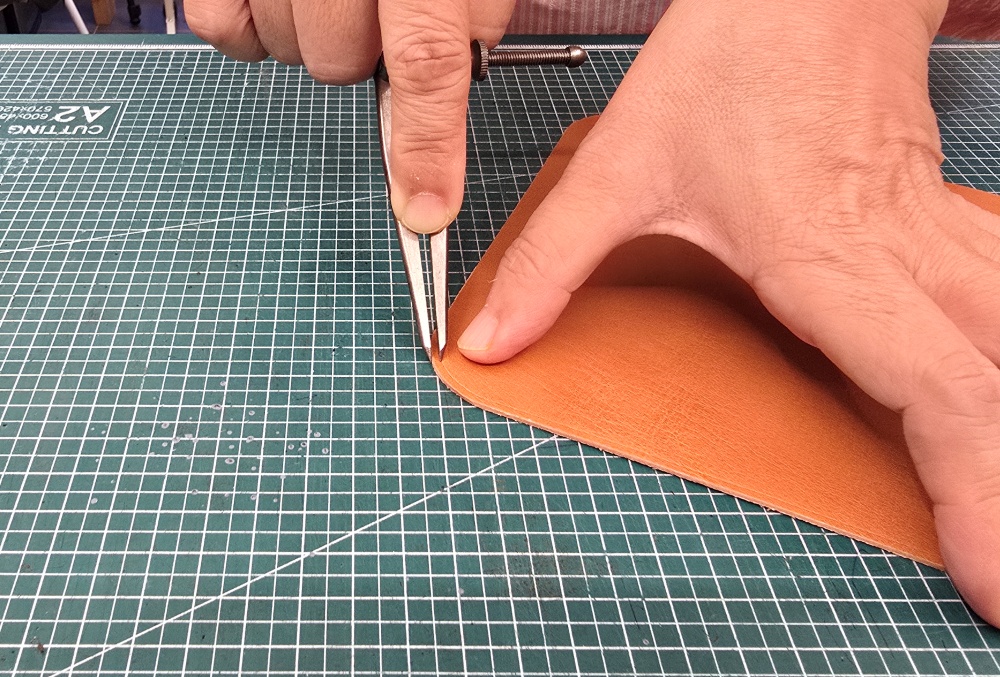
The tighter the curve, the less the workpiece should be rotated at one time. Use short divider movements and rotate the workpiece gradually to produce a smooth curved line without sudden changes in spacing.
The key is not to turn your wrist in an attempt to draw the curve with the divider. Keep the divider moving straight and rotate the workpiece to follow the curved direction.
Check the Spacing and Depth After Marking
After marking the complete divider line, inspect its condition before punching.
Check whether the distance between the leather edge and the line remains consistent from beginning to end. Inspect curved sections for inward or outward shifts, and confirm that the line has not cut or scratched too deeply into the leather surface.
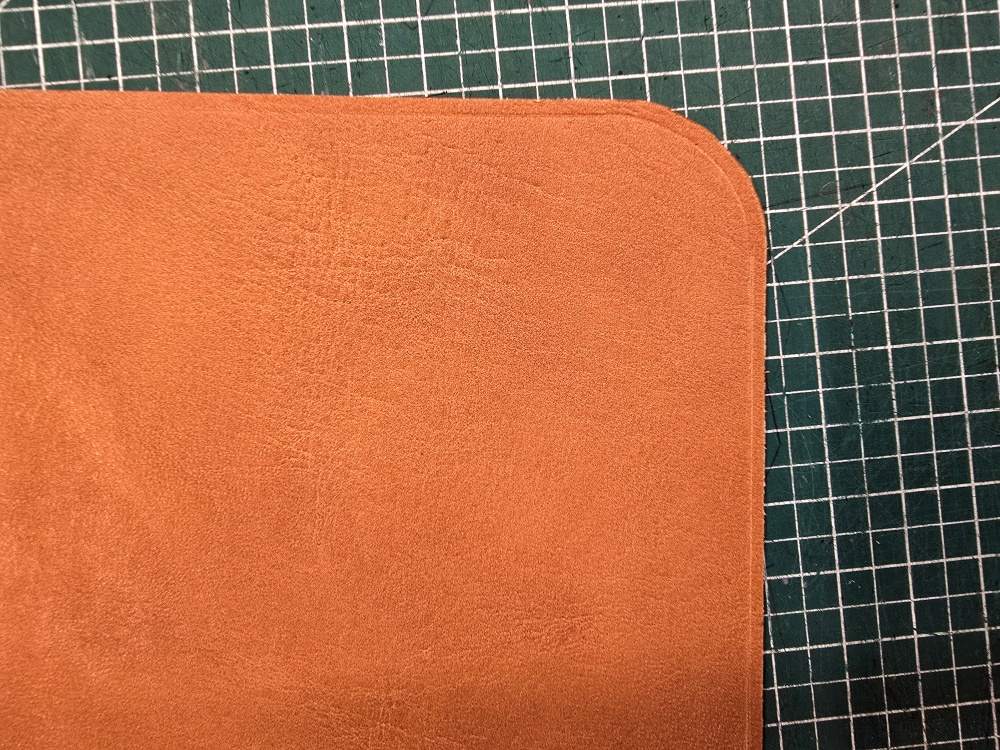
Confirm that the spacing remains at 2 mm for sections punched with a European-style slanted pricking iron and 2.5 mm for sections punched with a Japanese-style diamond chisel.
After marking the divider line, learn how to position the chisel against the line and maintain the correct punching angle in How to Use European-Style Pricking Irons: No. 7 and No. 9 Spacing and Correct Punching Positionfor the next step.
Common Mistakes Made by Beginners
The first mistake is using the same divider spacing without checking the chisel type. As a general guideline, use 2 mm for a European-style slanted pricking iron and 2.5 mm for a Japanese-style diamond chisel.
The second mistake is placing both divider legs on the leather. One leg should rest outside the leather edge while the other leg marks the guideline on the surface.
The third mistake is applying excessive pressure to make the line more visible. Too much pressure can narrow the spacing and deeply scratch the leather surface.
The fourth mistake is rotating the divider to follow a curve. Keep the divider moving straight and rotate the workpiece in the direction of the curve.
The fifth mistake is punching immediately without checking the spacing and depth of the marked line. Once holes are punched along an incorrect line, correcting their position becomes difficult.
An Accurate Divider Line Determines the Hand-Stitching Position
An accurate hand-stitching line is not determined only during punching. It begins with setting the divider spacing and creating a guideline parallel to the leather edge before using the chisel.
Set the spacing to 2 mm for a European-style slanted pricking iron and 2.5 mm for a Japanese-style diamond chisel. Place one divider leg outside the leather edge and allow the other leg to mark the line on the leather.
Move the divider straight without applying excessive pressure, and rotate the workpiece rather than the divider along curves. Following these principles creates a hand-stitching guideline that remains consistently spaced from the leather edge across both straight and curved sections.