Tag: Handmade Leather Bag

  • 가죽가방 안감 설계가 중요한 이유: 내부 수납과 겉형태를 함께 지키는 구조

    Why Leather Bag Lining Design Matters: Protecting Interior Organization and Exterior Form

    When making a leather bag, it is easy to think of the lining as a finishing material added after the outer leather has been completed. However, leather bag lining designis not simply about covering the inside neatly.

    The lining protects seam allowances and reinforcement materials inside the bag, divides the storage space, and supports the stable operation of interior pockets and zippers. If its dimensions or assembly method are incorrect, the shape of the bag may become distorted even when the outer leather has been cut accurately.

    Within the complete leather bag-making process—, the lining is not a component added at the end. It is an internal structure that must be considered together with the outer leather pattern, reinforcement materials, and pockets.

    A well-designed lining may not attract attention, but every time the bag is opened and used, it reveals the difference in structure and usability.

    1. Define the Function of the Interior Before Choosing the Lining Material

    Before choosing a lining material, you must first decide how the interior of the bag will be used.

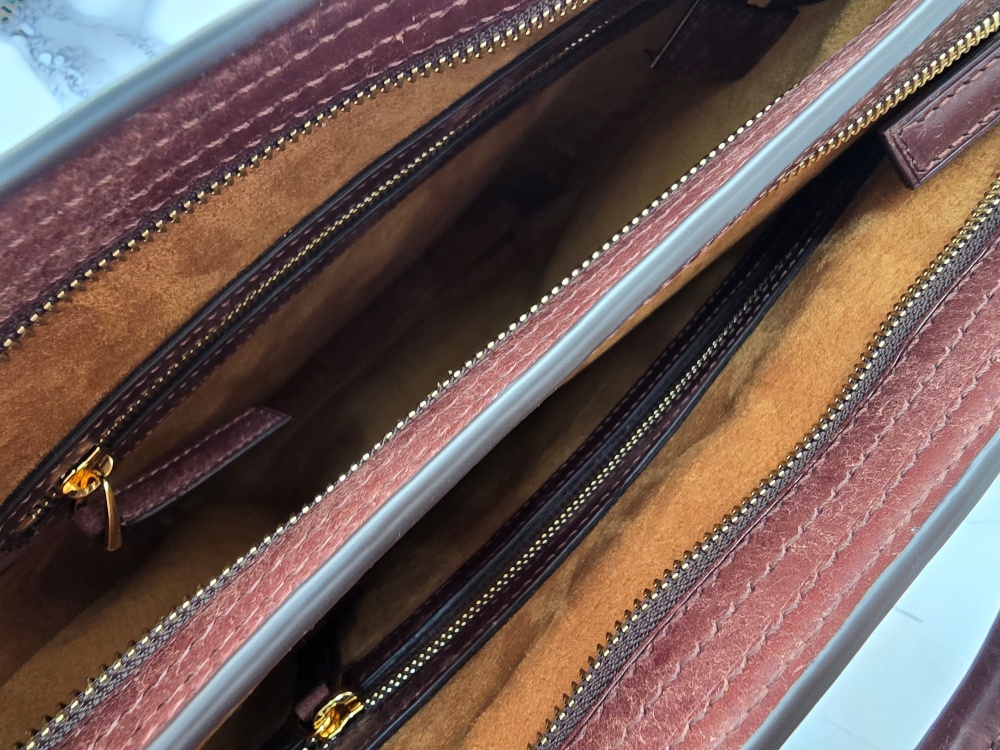
    The lining pattern will differ depending on whether the bag has one large compartment or is divided into two or more sections by a central divider. If zipper pockets, phone pockets, or card slots are required, their positions and dimensions must also be determined in advance.

    Even when two bags have the same exterior shape, different interior configurations require different numbers of lining pieces and different assembly sequences. It is therefore more accurate to design the exterior and interior patterns together than to measure the inside of a completed outer shell and fit a lining into it afterward.

    Interior Features to Determine First

    • Will the bag have a single compartment?
    • Will the interior be divided by a central partition?
    • Is a zipper pocket required?
    • Is an open pocket needed for frequently used items?
    • Will a full-length zipper be installed across the bag opening?
    • Where will the weight of the contents be concentrated?

    브라운 가죽 토트백의 전체 실루엣과 외부 형태

    2. Lining Materials Should Not Be Chosen by Thickness Alone

    Lining materials are often thinner than the outer leather, but a thin material is not necessarily suitable for every bag.

    A soft-surfaced material feels pleasant when items are inserted or removed, but excessive stretch can cause interior pockets to sag. A firmer material can maintain its shape more effectively, but it may become bulky at folded corners or restrict the movement of the outer leather.

    When selecting a lining material, consider not only its thickness and texture but also its direction of stretch, resistance to friction, bonding properties, tendency to fray at cut edges, and susceptibility to staining.

    Dark-colored linings may conceal marks from use more effectively, but the possibility of color transfer onto light-colored items must be checked. Light-colored linings make items easier to find, but signs of wear may become visible sooner.

    A lining material should be judged first by whether it suits the bag’s purpose and interior structure, rather than by whether it matches the color of the outer leather.

    3. Interior Pockets Must Be Completed Before the Lining Is Assembled

    Interior zipper pockets and open pockets are difficult to add after the lining has been installed inside the bag. Their positions and dimensions should therefore be determined and the pockets completed before the lining pieces are assembled.

    If a pocket is positioned too low, its contents will be difficult to reach. If it is too high, it may interfere with the top zipper or upper reinforcement. You must also check that the pocket opening does not overlap the internal reinforcement behind the handle attachments.

    The size of a zipper pocket should not be determined by zipper length alone. The opening must provide enough room for a hand, while the travel of the zipper slider and the depth of the pocket bag must also be considered.

    Points to Check for Interior Pockets

    • The size of the items the pocket will hold
    • The distance between the pocket opening and the top of the bag
    • Whether the zipper slider interferes with other components
    • Whether the pocket bag reaches the bottom of the bag
    • Whether the lining alone can support the weight carried in the pocket
    • Whether the pocket attachment line is visible from the outside
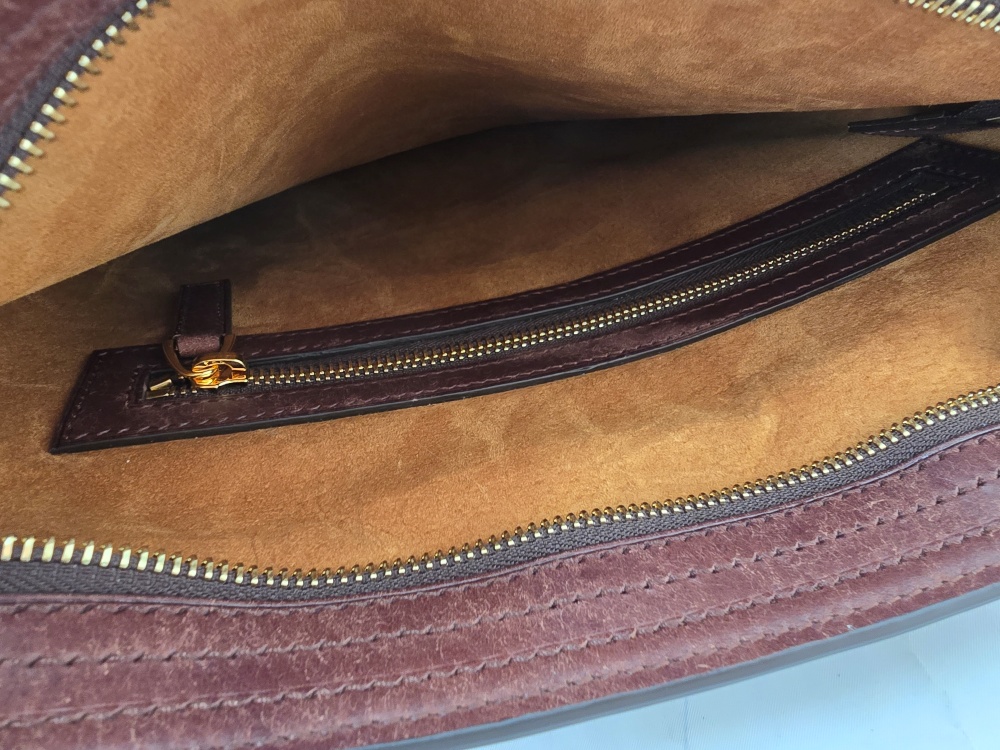
    부드러운 안감에 설치한 가죽 테두리 지퍼 포켓과 내부 수납공간

    4. A Divider Affects Both Storage and the Shape of the Bag

    A divider that separates the interior into two or more compartments is more than a simple storage component.

    When a central divider is securely connected to both sides of the bag, it can reduce the movement of contents to one side and help prevent the opening from spreading excessively. However, if the divider is too rigid or incorrectly sized, it may pull the outer leather inward and alter the bag’s width and silhouette.

    When a zipper pocket is incorporated into the divider, the weight of both the zipper and the pocket bag must be considered. If only the upper edge is reinforced while the lower section remains too loose, the divider may lean to one side during use.

    The divider should be sized according to the width and depth of the bag, and the amount of movement allowed at the sides and bottom should be determined during the design stage.

    5. The Lining Cannot Be Made to the Same Dimensions as the Outer Shell

    If the outer pattern is copied directly and used as the lining pattern, excess material may remain inside the bag or bunch up at the corners.

    The actual space inside the bag is smaller than its exterior dimensions, and reinforcement materials and folded seam allowances also occupy space. The lining dimensions must be adjusted according to the thickness of the lining material and the chosen assembly method.

    The actual space inside the bag is smaller than its exterior dimensions, and reinforcement materials and folded seam allowances also occupy space. The lining dimensions must be adjusted according to the thickness of the lining material and the chosen assembly method.

    The lining pattern should therefore be test-fitted to the actual interior rather than reduced solely by applying a numerical allowance.

    6. The Bottom and Corners Reveal Lining Problems Most Clearly

    When a lining does not fit correctly, the first problems usually appear at the bottom and corners.

    If the lining bottom is larger than the bottom of the outer bag, wrinkles will form inside. If it is too small, the bottom will lift upward. If the lining corners do not align with the points where the sides meet the bottom, the lining may appear twisted to one side when the bag is opened.

    A lining can help keep the interior neat, but it cannot replace structural reinforcement. A collapsing bottom or a distorted body panel should not be corrected by pulling the lining tight.

    The structure of the bag must first be supported by the outer leather and reinforcement materials, while the lining should sit naturally within that structure.
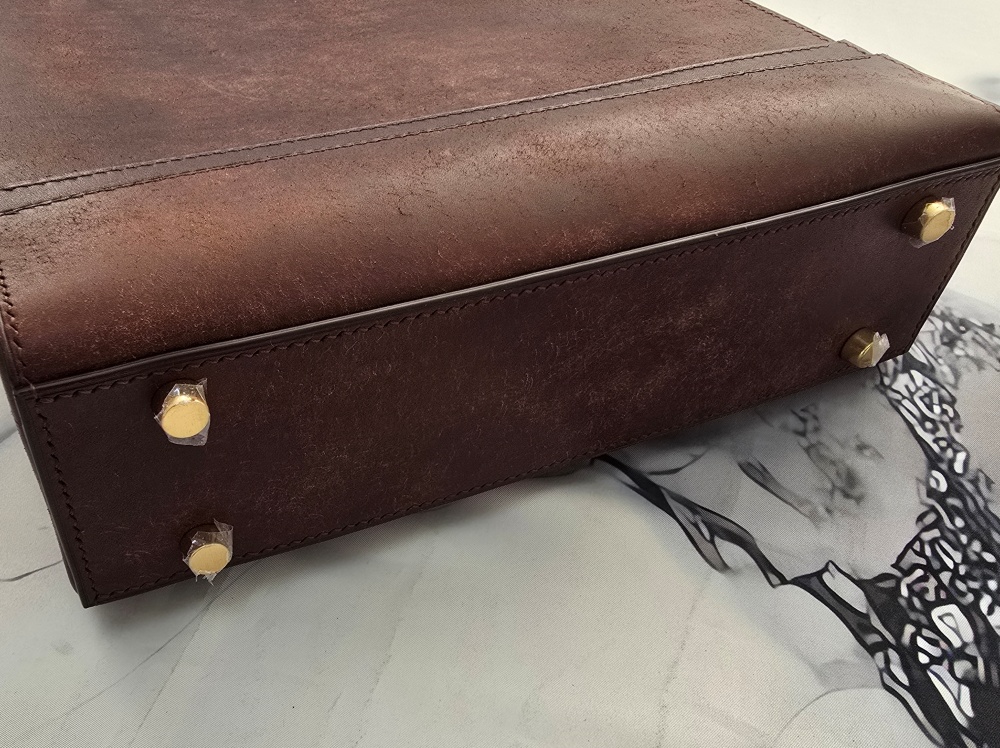
    바닥과 모서리 형태가 안정적으로 유지된 브라운 가죽가방 하부

    7. The Construction Sequence Depends on How the Lining Is Installed

    The method used to secure the lining to the outer bag depends on the structure of the bag.

    In some constructions, the outer leather and lining are stitched together along the top of the bag. In others, the lining is completed separately, placed inside, and then secured. Certain structures connect the lining and outer shell through zipper tape or an upper edge component.

    Whichever method is chosen, the lining pockets and dividers should be completed first, test-fitted inside the outer bag, and only then secured permanently.

    the leather bag construction sequence, treating the lining as only a final finishing step can cause it to interfere with interior pockets or reinforcement materials. The lining construction stage and the lining installation stage should be planned separately to reduce the need to take components apart during assembly.

    8. Inspect Both Interior Function and Exterior Form After Completion

    After installing the lining, inspect not only the interior but also the exterior shape of the bag.

    Open and close the bag to confirm that the lining does not become caught in the zipper. Place items in the interior pockets and check that the lining does not sag or turn inside out.

    Compare the bag when empty and when filled to see whether the bottom or side panels change shape. If new wrinkles or tension appear on the outer leather after the lining is installed, the lining dimensions or attachment positions must be reviewed.

    Final Inspection Checklist

    • Is the lining free from twisting or shifting to one side?
    • Are the bottom and corners free from unnecessary wrinkles?
    • Does the interior zipper open and close smoothly?
    • Does the lining remain stable when items are placed in the pockets?
    • Does the lining stay inside when the bag is opened?
    • Does the interior divider remain upright without leaning to one side?
    • Does the lining preserve the shape of the outer leather without distortion?
    • Are adhesive residue and cut edges fully concealed inside the bag?

    Lining Design Determines the Quality of the Interior

    The lining of a leather bag is not easily visible from the outside, but it is one of the parts users interact with most frequently.

    A luxurious lining material alone does not create a well-finished interior. The storage layout, pocket positions, divider dimensions, dimensional relationship with the outer shell, and assembly sequence must all work together.

    A well-designed lining does more than keep the interior neat. It stores items securely without interfering with the shape of the outer bag and helps the interior structure remain stable throughout long-term use.

    This is why the outer shell and lining should be considered as one integrated structure, rather than treated as separate tasks when designing a bag pattern.
  • 가죽가방 제작의 전체 과정: 디자인부터 패턴, 조립과 마감까지

    The Complete Leather Bag-Making Process: From Design and Pattern Making to Assembly and Finishing

    Leather bag making does not begin when the leather is cut and stitched. The process begins much earlier—by defining the bag’s purpose, designing the required shape and dimensions, and selecting leather and reinforcement materials suited to its structure.

    Even bags that look similar on the outside can differ greatly in structural stability, usability, durability, and finishing quality, depending on the order in which the maker made each design decision.

    To make a leather bag properly, it is more important to understand the entire workflow—from design to final inspection—than to learn each technique in isolation. To understand this premise, it is helpful to also examine why leathercraft should be learned through principles, not just techniques.

    Leather bag making is not simply a process of performing multiple techniques in sequence. It is a continuous design process in which every decision establishes the conditions for the next stage.

    1. Defining the Bag’s Purpose and Conditions of Use

    The first thing to determine is not the bag’s appearance, but its intended purpose.

    Even two tote bags require different structures if one is intended for lightweight personal belongings and the other for carrying a laptop or documents. The size and weight of the contents, carrying method, frequency of use, and opening and closing system must be defined before the appropriate dimensions and structure can be designed.

    Before beginning construction, the following questions should be considered.

    • What items will the bag carry?
    • Will it be carried by hand or worn over the shoulder?
    • Should the bag maintain its shape when placed upright?
    • Does the opening need to close completely?
    • How many compartments should the interior contain?
    • Where will stress be concentrated during use?

    Without clear answers to these questions, it may be possible to create an attractive design, but difficult to make a bag that performs well in actual use.

    2. Designing the Silhouette and Basic Dimensions

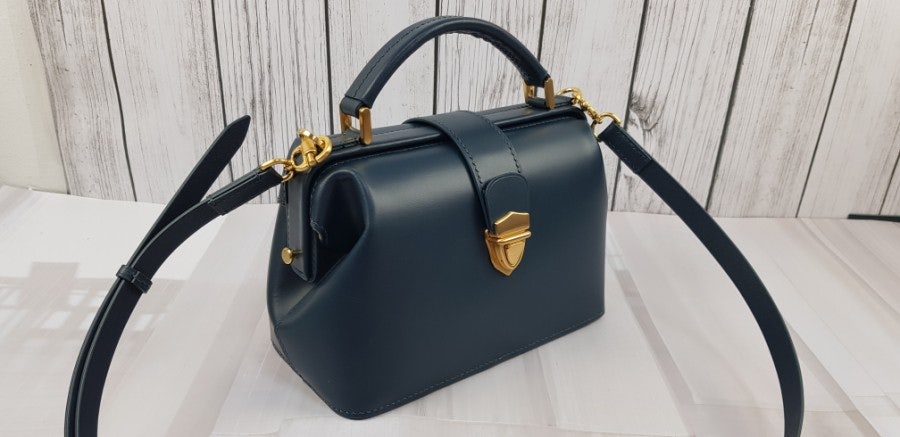
    가로 세로 폭의 비율과 전체 실루엣을 확인할 수 있는 가죽가방

    Once the purpose has been established, the bag’s overall silhouette and dimensions can be designed.

    Width, height, and depth are more than simple measurements. Their proportions affect not only the bag’s visual impression, but also its capacity, center of gravity, and the opening range of its top.

    If the bag is excessively wide, its center may sag. If it is tall but too narrow in depth, it may tip over easily. Conversely, excessive depth increases capacity but can make the bag appear bulky and allow the contents to shift to one side.

    At this stage, the side profile and bottom shape should be examined together with the front view.

    Basic Elements to Check

    • The width-to-height ratio of the front
    • The side depth and expansion angle
    • The side depth and expansion angle
    • The length and position of the handles
    • The length and opening range of the top
    • The length and opening range of the top

    A good silhouette is not defined by attractive lines alone. The bag must maintain visual and structural balance both when empty and when filled.

    3. Selecting Leather and Hardware

    Leather should not be selected by color and grain alone. Its thickness, flexibility, stretch, surface strength, and recovery must all be evaluated in relation to the bag’s structure and size.

    Soft leather creates natural folds and movement, but may lose its shape when used without sufficient support in a large bag. Firm leather maintains structure well, but may behave too rigidly at folds and openings.

    For this reason, the following properties should be examined when selecting leather.

    • The leather’s thickness and density
    • The folds and wrinkles that appear when it is bent
    • The direction in which it stretches when pulled
    • Its resistance to friction and scratching
    • How it changes when adhesive and reinforcement are applied
    • The expected total weight of the finished bag

    Metal components such as zippers, closures, handle fittings, and bag feet are both design elements and structural parts that transfer load. If their size, weight, or attachment method is unsuitable for the leather thickness, the surrounding leather may stretch or deform.

    4. Determining the Internal Structure and Reinforcement Areas

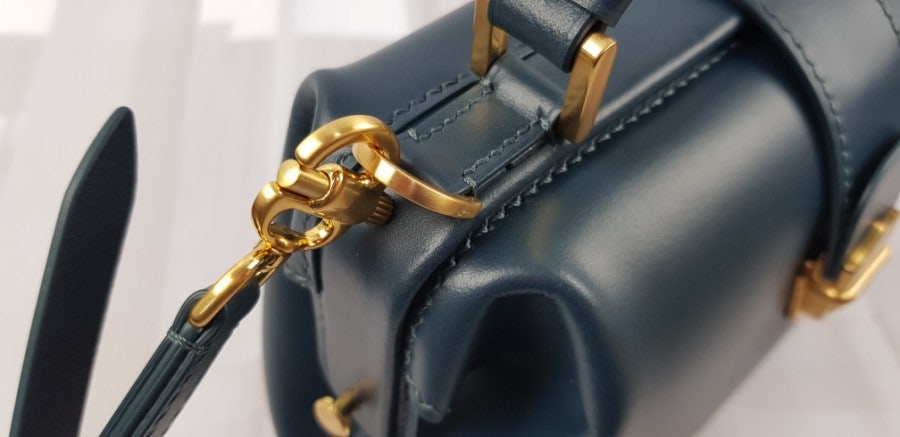
    가죽가방의 하중을 견디도록 보강한 손잡이와 본체 연결 부분

    Once the exterior form has been established, it is necessary to examine how forces travel through the bag’s internal structure.

    When the bag is carried, the weight of its contents does not remain at the bottom. Force travels from the bottom to the side panels, and from the sides to the opening and handle attachments. In a shoulder bag, repeated pulling also occurs at the strap attachment points.

    Making every part rigid is not proper reinforcement. Areas that must retain their shape require suitable stiffness, while parts that open, close, or fold need enough flexibility to move naturally.

    Key Areas to Review for Reinforcement

    • The bag bottom
    • The large surfaces of the front and back panels
    • The opening and areas around the zipper
    • The handle bases and hardware attachment areas
    • The shoulder strap attachment points
    • The corners and side-panel joints
    • The openings of interior pockets

    The purpose of reinforcement is not to make the entire bag rigid. It is to preserve the shape where support is needed while retaining flexibility in the areas that must move.

    5. Creating the Pattern and Establishing Assembly References

    A pattern is not simply a flat drawing of the finished bag’s exterior. It is a construction reference that includes stitching lines, bonding surfaces, fold positions, leather thickness, and assembly allowances.

    If a pattern is based only on the visible finished dimensions, errors may appear during assembly. Where multiple layers overlap, lengths and curves change according to the combined thickness. In turned or folded constructions, the inner and outer surfaces of the leather also travel different distances.

    At a minimum, the following information should be marked on the pattern.

    • The finished line and cutting line
    • The stitching line and starting point
    • The centerline and assembly reference points
    • The fold lines
    • The locations and areas to be skived
    • The size and placement of reinforcement materials
    • The attachment positions of hardware and handles
    • Identification of left and right, or front and back
    • The required seam and assembly allowances

    Clear references on the pattern make it possible to check the same positions consistently during cutting and assembly.

    6. Cutting and Preparing the Components

    Once the pattern is complete, the leather is cut after examining its grain, direction of stretch, and surface condition.

    Even within the same hide, density and flexibility vary by area. Relatively stable sections should be used for large front and back panels, while areas with suitable flexibility are better for smaller components that must fold or wrap around other parts.

    After cutting, the necessary preparation work is completed before assembly.

    • Adjusting the leather thickness
    • Attaching reinforcement materials and lining
    • Skiving the areas that will be folded
    • Marking hardware holes and stitching holes
    • Finishing the edges that must be completed before assembly
    • Constructing interior pockets and zipper components
    • Comparing the sizes and positions of left and right components

    Small errors made at this stage become more noticeable after assembly. In particular, handles and hardware arranged symmetrically should be checked again for matching left and right positions before they are attached to the body.

    7. Assembling the Bag in the Correct Construction Sequence

    A leather bag is not made by simply joining finished components together. It is necessary to distinguish between parts that must be attached first and areas that will no longer be accessible after the body is assembled.

    Components that require access from inside the body—such as interior pockets, zippers, reinforcement patches behind hardware, and handle attachments—must be completed before the bag is closed. In contrast, edges and hardware that should be finished after checking the final form may be damaged during assembly if completed too early.

    Understanding how these stages connect makes it clear that the leather bag construction sequenceis not merely a list of tasks, but a design framework that preserves the bag’s structure.

    A general assembly sequence is as follows.

    1. Constructing interior pockets and zipper components
    2. Reinforce the handle and hardware attachment areas.
    3. Partially assemble the front and back panels.
    4. Combine the lining and internal structure.
    5. Connect the side panels and bottom.
    6. Assemble the bag opening and zipper.
    7. Attach the handles and strap.
    8. Complete the exterior edges and final finishing.

    However, the same sequence cannot be applied to every bag. The order must change according to the bag’s structure, lining method, zipper position, and assembly technique.

    8. Checking the Consistency of Stitching and Edge Finishing

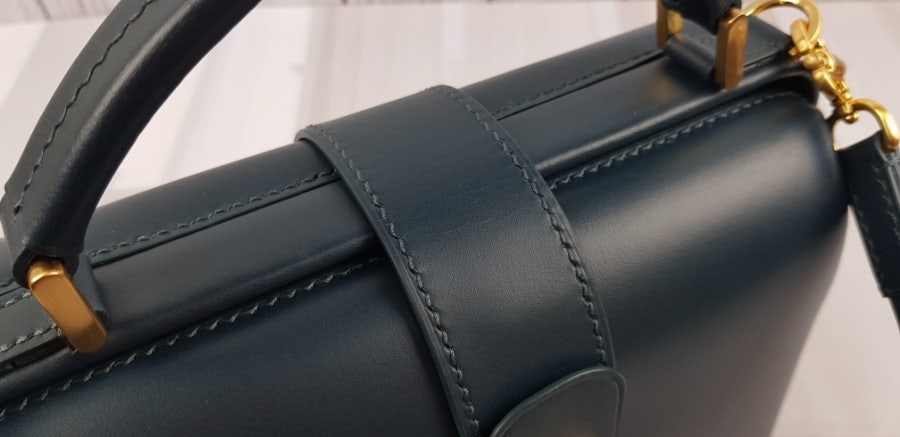
    일정한 바느질 간격과 단면 마감을 보여주는 가죽가방 세부 모습

    Stitching and edge finishing are not merely decorative final steps. They are structural finishing processes that secure bonded components, protect the cut layers of leather, and refine the overall lines of the bag.

    Stitch length should suit the thickness of the leather and the size of the component. Stitches that are too long can make a small component look coarse, while excessively short stitches on a thick joint may weaken the leather by placing the stitching holes too close together.

    Rather than making only one edge perfectly smooth, it is more important to maintain consistent thickness, color, gloss, and curvature throughout the entire bag.

    The following points should be checked.

    • Are the stitching lines parallel to their reference lines?
    • Does the stitch spacing remain consistent around corners?
    • Is the thread thickness proportionate to the leather thickness?
    • Are the edge thickness and color consistent?
    • Are the left and right sides of the handles and strap finished consistently?
    • Do the curved and straight sections connect naturally?

    9. Inspecting the Finished Form and Function

    Construction is not complete simply because the bag has reached its finished form. Its shape and function must be inspected under conditions that reflect actual use.

    The bag should not be evaluated only while empty. Place the expected weight inside and observe how the handles and bottom respond. Zippers and closures should be operated repeatedly, rather than only once, to check for catching, resistance, or twisting.

    Final Inspection Checklist

    • Are the front and side views symmetrical?
    • Does the bottom rest flat?
    • Does the center avoid excessive sagging when the bag is loaded?
    • Do the handles and strap move evenly from their intended positions?
    • Does the zipper move smoothly from beginning to end?
    • Does the zipper move smoothly from beginning to end?
    • Is the leather around the hardware free from excessive pulling or distortion?
    • Have all stitching lines and edges been completely finished?

    Final inspection is not only a process of finding defects. It is also an opportunity to record observations that can improve the pattern and construction sequence of the next project.

    Understanding the Entire Process Changes the Way Patterns Are Designed

    The quality of a leather bag is not determined by one exceptional technique alone.

    Even high-quality leather may lose its shape if the structure is unsuitable. Precise stitching cannot produce a clean interior if the construction sequence is incorrect. Likewise, using excessive reinforcement without understanding where forces are transferred may result in a bag that is unnecessarily heavy and rigid.

    Understanding the entire leather bag-making process does not mean performing every task perfectly from the beginning. It means recognizing how each decision affects the next stage and being able to trace a problem back through earlier stages to identify its cause.

    A high-quality bag is not suddenly created during the final finishing stage. It is achieved only when the intended purpose, dimensions, materials, structure, pattern, and construction sequence all work toward the same objective from beginning to end.

  • why leathercraft should be learned through principles, not just techniques

    When first learning leathercraft, most people begin with visible techniques such as cutting, bonding, and stitching. However, if you simply follow a sequence of steps without understanding the principles of leathercraft, it becomes difficult to apply the same methods when the material or bag structure changes.

    To create consistently well-made leather goods, you must understand not only how a technique is performed, but also why it is necessary.

    Techniques allow you to repeat a defined process, while principles enable you to make sound decisions when working conditions change.

    Why the Same Method Can Produce Different Results

    In leathercraft, using the same tools and techniques does not always produce the same result. This is because leather type, thickness, fiber density, hide section, reinforcement, adhesive, thread thickness, and product structure can all vary.

    For example, some leathers maintain their shape even after being skived thin, while others may stretch easily under load or become weakened around the stitching line when skived to the same thickness.

    The same principle applies when folding leather. If the same folding allowance is used for both soft and firm leather, the finished edges will differ in thickness and curvature.

    Rather than applying one method unchanged to every leather and product, the working conditions should be adjusted to suit the material and structure being used.

    The Limitations of Learning Techniques Without Understanding Principles

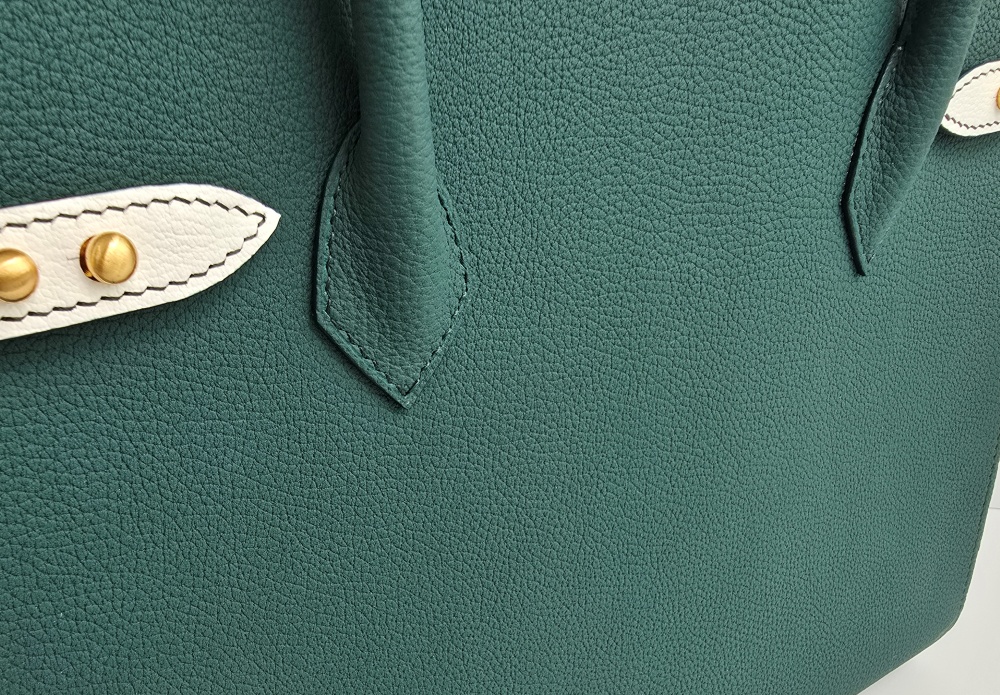
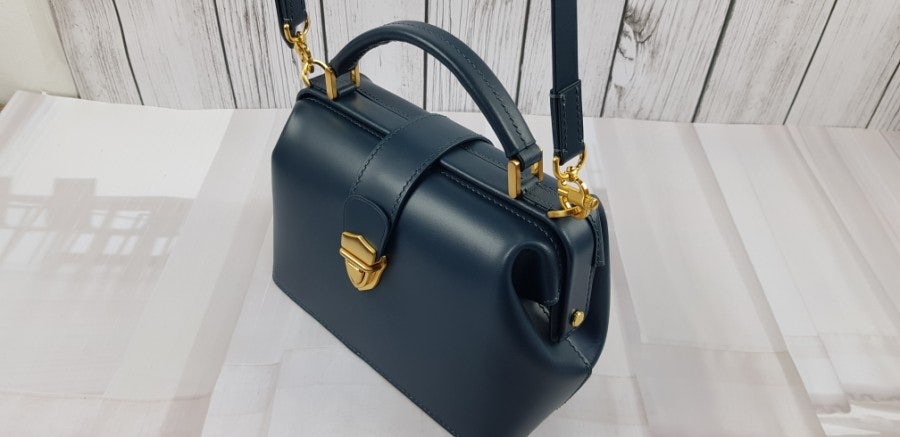
    수제손잡이 둥근형태의  단단함

    Following the exact construction sequence of a finished project can help beginners learn basic procedures. However, this approach makes it difficult to identify the cause when something goes wrong.

    When stitching is uneven, it is easy to blame hand skills alone. When a bag loses its shape, it is also tempting to assume that it needs more reinforcement. In reality, the cause may be uneven leather thickness, an incorrect skiving area, differences in tension between components, the bonding position, or the construction sequence.

    Adding another technique based only on the visible result may temporarily hide the problem, but the same issue is likely to return when making a different product.

    Technique-Based Questions

    • Which tool should be used?
    • To what measurement should the leather be cut?
    • How many stitches are needed?
    • In what order should the components be bonded?

    Principle-Based Questions

    • What kind of force will this component receive?
    • Why does only this area need to be thinned?
    • Does this reinforcement maintain the shape or prevent stretching?
    • How will the area being worked on affect the next construction step?
    • Which area is most likely to deform first after repeated use?

    Both types of questions are necessary. However, principle-based questions are essential when designing a new product independently and correcting structural problems.

    수제 가죽가방 손잡이 연결부와 봉제 마감 상세

    Five Principles to Understand First in Leathercraft

    1. Material Properties

    Even when two leathers have the same thickness, they may differ in firmness, stretch, fiber density, and surface finish. A maker should not judge leather by its name alone, but should evaluate its workability by folding, pulling, and skiving the actual material.

    2. Thickness Distribution

    Not every part of a product needs to have the same thickness. Areas that support the structure, areas that need to fold naturally, and areas where several layers overlap require different thicknesses.

    Thickness is not merely a measurement. It is a design element that determines how the product moves and how its silhouette is formed.

    3. The Path of Force

    When a bag is carried, the load travels from the handles through the body and into the bottom. Repeated tension is also applied to the opening and gussets whenever the zipper is opened and closed.

    Understanding how these forces travel through the bag helps distinguish where reinforcement is needed and where flexibility should remain. Understanding why a bag loses its shapeallows you to design the appropriate stiffness and movement for each area instead of simply adding more reinforcement.

    4. Construction Sequence

    the leather bag construction sequenceis not simply a matter of convenience. The components assembled first determine the working space, reference lines, and bonding surfaces available in the following steps.

    Changing the order of handle reinforcement, zipper attachment, lining assembly, and gusset construction can affect both the difficulty of the work and the quality of the finish, even when the same pattern is used.

    5. Continuity of the Finishing Process

    A refined finish is not suddenly created during the final stage. It is the accumulated result of accurate cutting lines, consistent skiving, aligned bonding surfaces, and precisely positioned stitching holes.

    Applying several layers of edge paint or heavily polishing the surface at the end cannot correct structural errors created during earlier stages.

    Quality is not created by one final finishing step. It is the result of maintaining the original standard throughout the entire construction process.

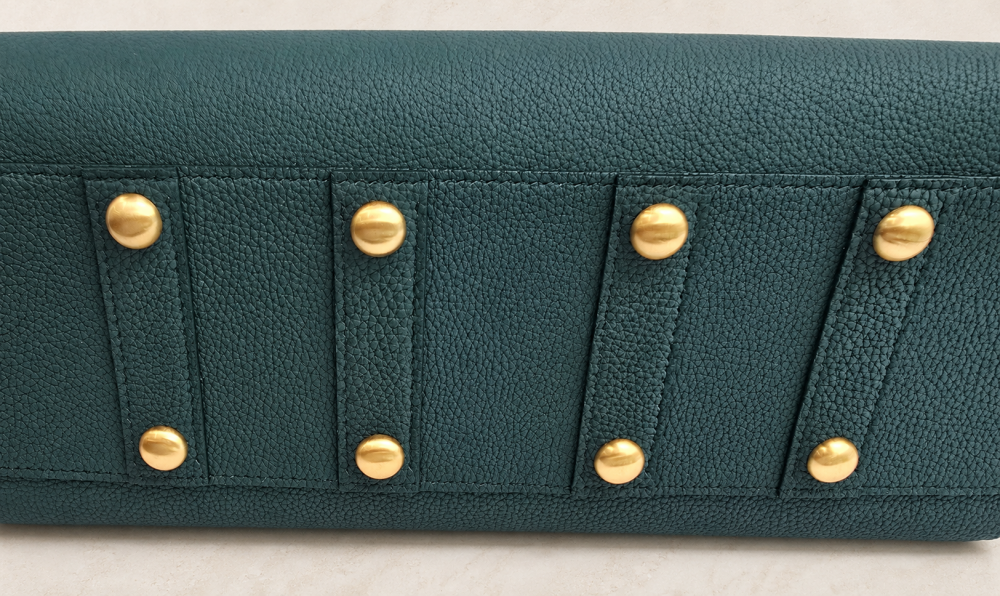
    가죽가방 바닥부분의 단단한 마감상세

    Understanding Principles Changes the Way You Interpret Failure

    Without an understanding of principles, failure may appear to be nothing more than the result of poor hand skills. When you work with a clear understanding of the underlying principles, however, you can narrow down the cause by examining where and when the problem occurred.

    If an edge is thick and uneven, the problem may not lie in the folding technique alone. The skiving range and overlapping structure must also be examined. If a handle attachment stretches, the way the load is transferred to the body and the extent of the internal reinforcement matter more than the number of stitches.

    If the opening becomes twisted, check the symmetry of the left and right pattern pieces, zipper length, gusset tension, and assembly sequence before forcing the parts into alignment during final construction.

    Analyzing a failure is not simply about finding a mistake. It is a process of revising your construction standards so that the same problem is not repeated in the next project.

    What to Check Before Following a Tutorial

    Studying another maker’s construction method can be useful. Before following it exactly, however, the following conditions should be checked.

    • The type and actual thickness of the leather used
    • The size and intended purpose of the finished product
    • The load carried by the handles and straps
    • The position and purpose of the reinforcement
    • The areas that fold or move repeatedly
    • The order in which the components overlap
    • he differences between your materials and those used in the tutorial

    Once these conditions are understood, a tutorial becomes a reference that can be interpreted for your own work rather than a fixed answer that must be copied exactly.

    Learning the Principles Is Ultimately the Fastest Path

    At first, learning the principles may feel slower than simply following a technique. This is because you must consider the relationships between material properties, structure, thickness, and force.

    As your understanding of these principles grows, you no longer need to search for an entirely new method every time you make a different bag. You can apply established decision-making standards to new materials and structures and adjust only what is necessary.

    Techniques develop proficiency, while principles make adaptation possible. When both are combined, a maker can move beyond simply following a pattern and begin evaluating and refining their own designs.

    Rather than presenting isolated construction tips, Leather Craft WARP will continue building a systematic foundation that helps makers evaluate and design leather goods and bags independently.