Tag: Leather punching

  • 가죽공예 디바이더 사용법: 사선치즐 2mm·마름치즐 2.5mm 간격과 곡선 긋기

    How to Use a Leathercraft Divider: 2 mm for European Pricking Irons and 2.5 mm for Japanese Diamond Chisels

    In leathercraft, a divider is used to mark a hand-stitching guideline at a consistent distance from the leather edge. A consistent divider line helps position the chisel accurately and keeps the finished hand-stitching line parallel to the edge.

    A divider is not simply a tool for drawing a line on leather. Its spacing must be set according to the type of chisel being used, while the position of the guide leg, direction of movement, and applied pressure must remain consistent.

    At Leather Studio YEGAK, we generally set the divider spacing to 2 mm when using a European-style slanted pricking iron and 2.5 mm when using a Japanese-style diamond chisel.

    Divider Spacing Varies According to the Chisel Type

    Set the divider spacing to 2 mm when using a European-style slanted pricking iron. Set it to 2.5 mm when using a Japanese-style diamond chisel.

    This spacing is the distance between the leather edge and the hand-stitching guideline. If the same divider spacing is used for every chisel type, the proportion between the punched holes and the leather edge may change.
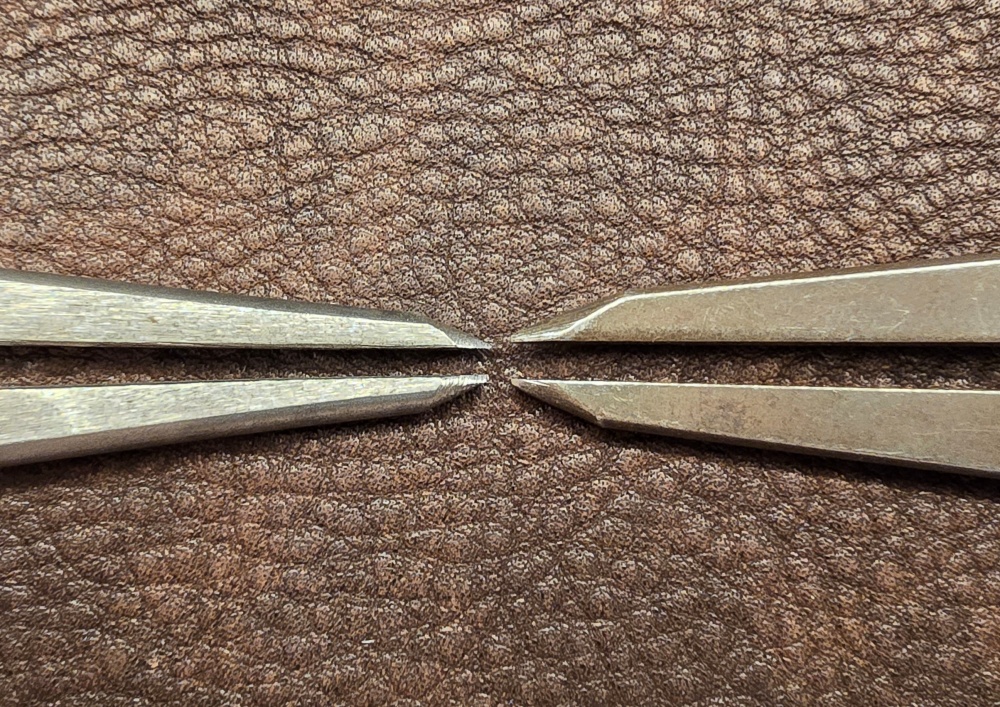
    사선치즐 2mm와 마름치즐 2.5mm 디바이더 간격

    Before using the divider, first decide which type of chisel will be used. After identifying whether it is a European-style slanted pricking iron or a Japanese-style diamond chisel, set the spacing to 2 mm or 2.5 mm accordingly.

    The chisel type and divider spacing must be selected together to create a balanced proportion between the leather edge, punched holes, and hand-stitching line.

    Place One Divider Leg Outside the Leather Edge

    When marking a line with a divider, do not place both legs on the leather. Position one leg outside the leather edge and allow only the other leg to touch the leather surface.

    The leg outside the leather acts as a guide that follows the shape of the edge. The inner leg resting on the leather marks the hand-stitching guideline while maintaining the set distance from the guide leg.
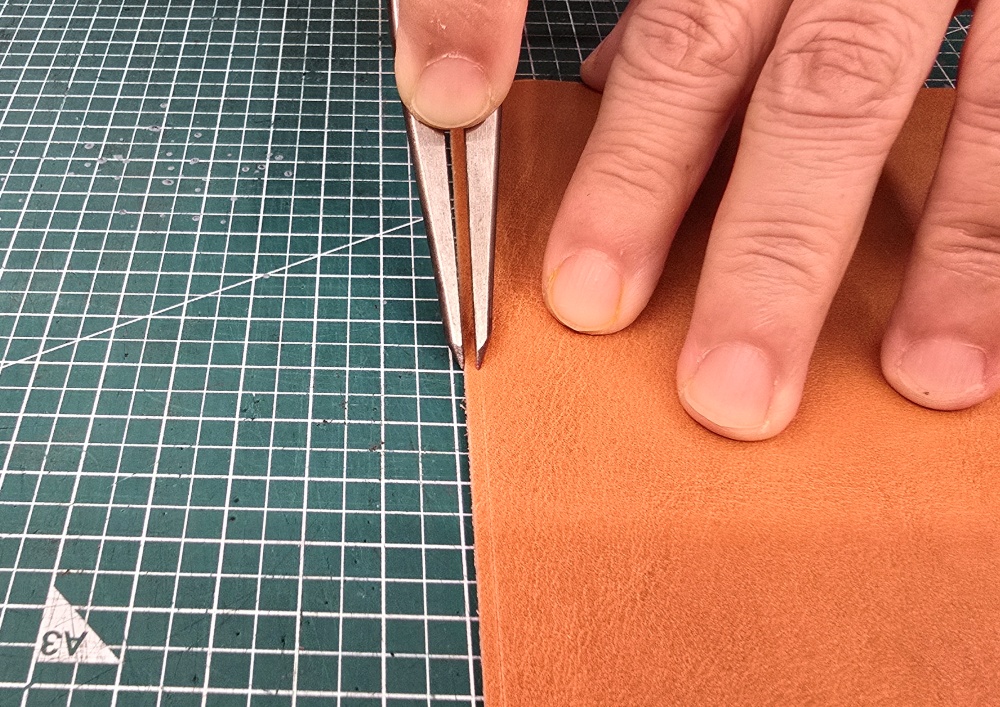
    가죽 가장자리 바깥에 기준 발을 댄 디바이더

    With the outer leg resting against the leather edge, move the divider straight downward. The inner leg on the leather will then create a line parallel to the edge.

    If the outer leg moves away from the edge or slips onto the leather, the spacing may change. Pressing the outer leg too firmly against the edge can also shift the leather or make the divider spacing narrower.

    Apply Moderate Pressure When Using the Divider

    Applying heavy pressure to create a darker line is not the correct way to use a divider. If the divider is pressed too firmly, the actual distance of the marked line may become narrower than the set spacing.

    The marking leg can dig into the surface and scratch or gouge the leather. A deep mark of this kind may remain visible even after punching and hand stitching are completed.

    The divider only needs to create a shallow, consistent line that remains visible on the leather surface. Apply just enough pressure to identify the punching position without cutting deeply into the leather.
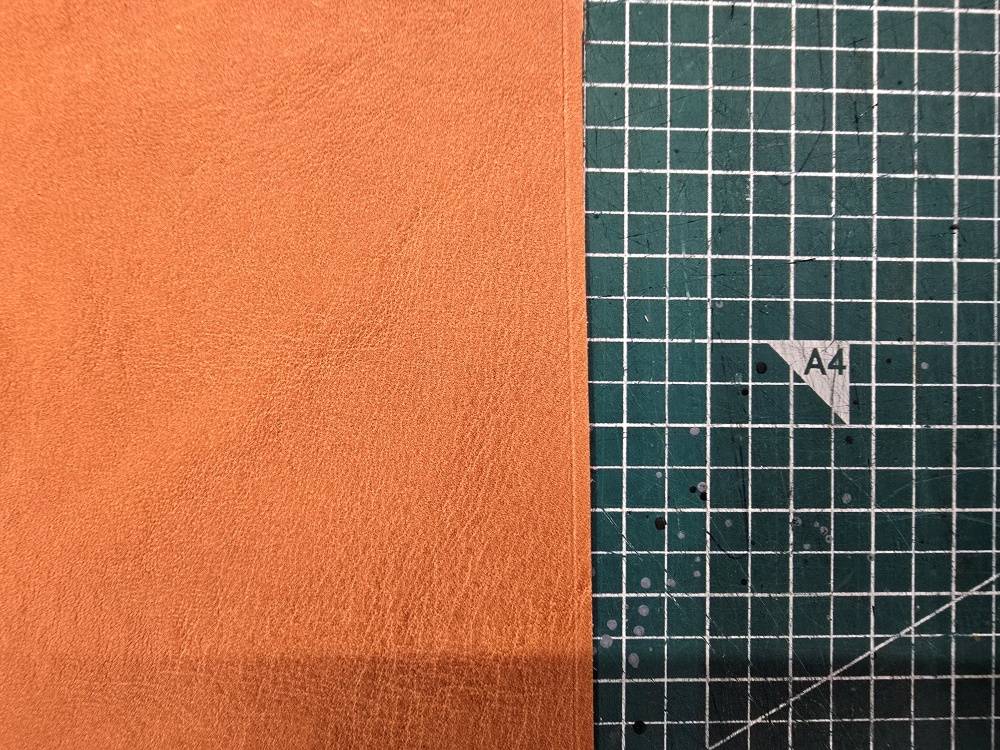
    적당한 힘으로 표시한 일정한 디바이더 선

    On unfamiliar leather or leather with a soft surface, the depth of the mark can vary significantly depending on the pressure. Test the divider on a scrap of the same leather before marking the actual piece.
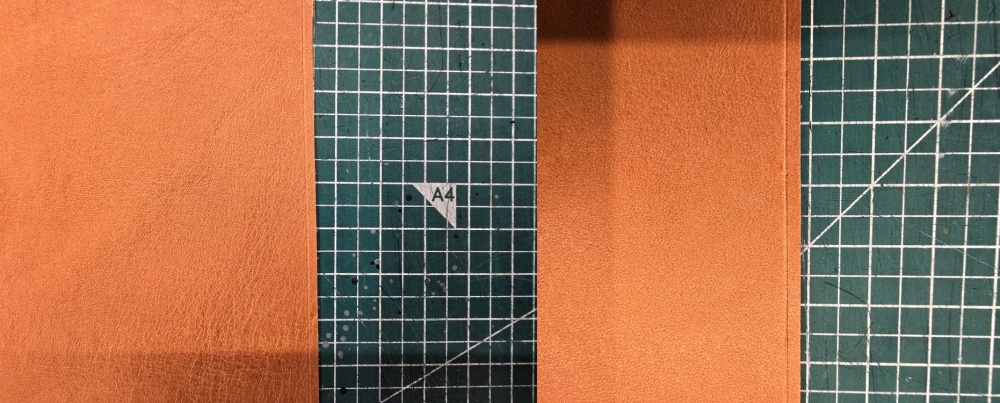
    정상적인 디바이더 선과 깊게 긁힌 선 비교 (왼쪽정상, 오른쪽 깊게 패인선)

    Move the Divider Straight Along Straight Sections

    Along a straight section, place one leg outside the leather edge and move the divider straight downward.
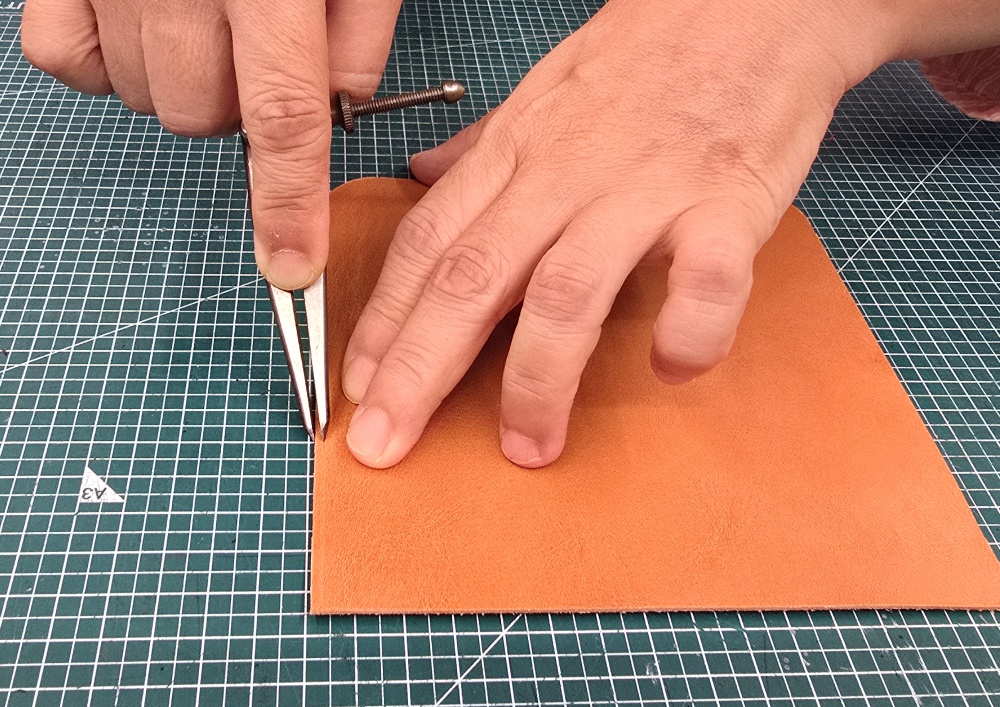
    가죽의 직선 가장자리를 따라 긋는 디바이더 선

    Twisting or rotating the divider while marking can cause the position of the marking leg to shift. Keep the outer leg following the leather edge steadily so the inner leg creates a line at a consistent distance.

    Work at a steady speed while checking that the outer leg remains in contact with the leather edge. If the divider moves away from the edge, reposition it accurately before continuing instead of forcing it back onto the existing line.

    Rotate the Workpiece, Not the Divider, Along Curves

    Do not rotate the divider itself to follow a curved section. Rotating the tool by hand can shift the positions of the outer and inner legs, causing the line spacing to become narrower or wider.

    Even along a curve, move the divider straight in the same way as on a straight section. Rotate the workpiece gradually to follow the direction of the curve.

    Keep one leg outside the leather edge and move the divider straight. Rotate the workpiece slightly, then move the divider again in the same direction. The inner leg will naturally create a divider line that follows the curve of the workpiece.
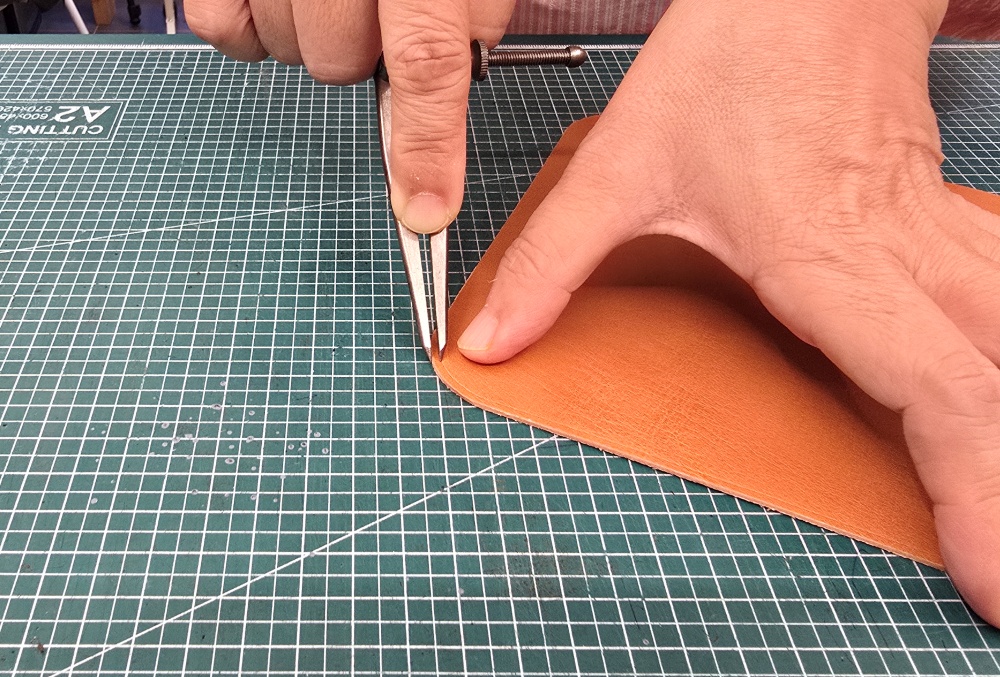
    작업물을 돌리며 곡선에 디바이더 선을 긋는 과정

    The tighter the curve, the less the workpiece should be rotated at one time. Use short divider movements and rotate the workpiece gradually to produce a smooth curved line without sudden changes in spacing.

    The key is not to turn your wrist in an attempt to draw the curve with the divider. Keep the divider moving straight and rotate the workpiece to follow the curved direction.

    Check the Spacing and Depth After Marking

    After marking the complete divider line, inspect its condition before punching.

    Check whether the distance between the leather edge and the line remains consistent from beginning to end. Inspect curved sections for inward or outward shifts, and confirm that the line has not cut or scratched too deeply into the leather surface.
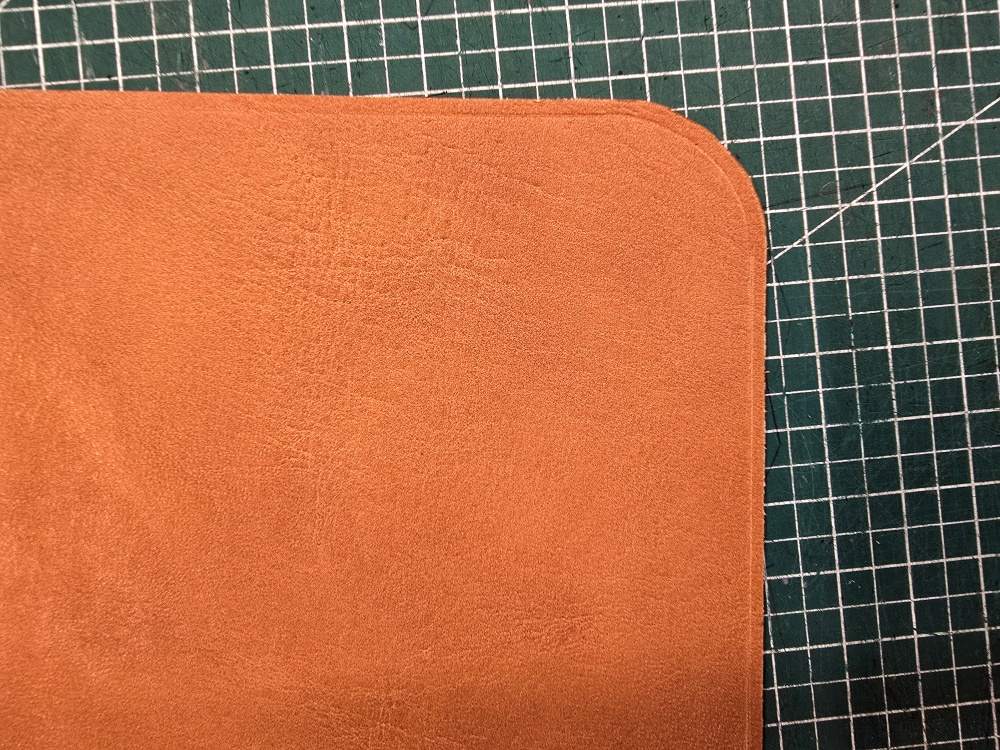
    직선에서 곡선까지 일정하게 이어진 완성된 디바이더 선

    Confirm that the spacing remains at 2 mm for sections punched with a European-style slanted pricking iron and 2.5 mm for sections punched with a Japanese-style diamond chisel.

    After marking the divider line, learn how to position the chisel against the line and maintain the correct punching angle in How to Use European-Style Pricking Irons: No. 7 and No. 9 Spacing and Correct Punching Positionfor the next step.

    Common Mistakes Made by Beginners

    The first mistake is using the same divider spacing without checking the chisel type. As a general guideline, use 2 mm for a European-style slanted pricking iron and 2.5 mm for a Japanese-style diamond chisel.

    The second mistake is placing both divider legs on the leather. One leg should rest outside the leather edge while the other leg marks the guideline on the surface.

    The third mistake is applying excessive pressure to make the line more visible. Too much pressure can narrow the spacing and deeply scratch the leather surface.

    The fourth mistake is rotating the divider to follow a curve. Keep the divider moving straight and rotate the workpiece in the direction of the curve.

    The fifth mistake is punching immediately without checking the spacing and depth of the marked line. Once holes are punched along an incorrect line, correcting their position becomes difficult.

    An Accurate Divider Line Determines the Hand-Stitching Position

    An accurate hand-stitching line is not determined only during punching. It begins with setting the divider spacing and creating a guideline parallel to the leather edge before using the chisel.

    Set the spacing to 2 mm for a European-style slanted pricking iron and 2.5 mm for a Japanese-style diamond chisel. Place one divider leg outside the leather edge and allow the other leg to mark the line on the leather.

    Move the divider straight without applying excessive pressure, and rotate the workpiece rather than the divider along curves. Following these principles creates a hand-stitching guideline that remains consistently spaced from the leather edge across both straight and curved sections.

  • 가죽공예 유럽형 치즐 사용법: 7호·9호 날 간격과 정확한 타공 자세

    How to Use European-Style Pricking Irons: No. 7 and No. 9 Spacing and Correct Punching Position

    In leathercraft, a pricking iron is used to create hand-stitching holes with consistent spacing and direction. Even when the same pricking iron is used, the position of the holes and the appearance of the finished hand-stitching line can vary depending on how the tool is aligned with the divider line and the angle at which it is held.

    At Leather Studio YEGAK, we use No. 7 and No. 9 European-style pricking irons. The No. 7 has 3.8 mm tooth spacing, while the No. 9 has 3.0 mm tooth spacing. We mainly use two-tooth and seven-tooth versions.

    Rather than choosing a pricking iron based only on its number, check its actual tooth spacing, tooth shape, the size of the project, and the thickness of the leather. When punching, it is especially important to hold the pricking iron at a 90-degree angle from the beginning and align its teeth precisely with the left side of the divider line.

    The Exact Purpose of a European-Style Pricking Iron

    A European-style pricking iron is used to create evenly spaced hand-stitching holes along a line marked with a divider. Its purpose is not simply to make holes in leather, but also to maintain consistent spacing, slant, and direction throughout the hand-stitching line.

    If the pricking iron moves away from the divider line, the hand-stitching line will not remain parallel to the leather edge. If the punched holes shift from side to side, the finished line can look uneven even when the hand stitching is completed with consistent tension.

    When using a pricking iron, accurately setting its position and angle is more important than applying excessive striking force.

    No. 7 and No. 9 Pricking Irons Used in Our Workshop

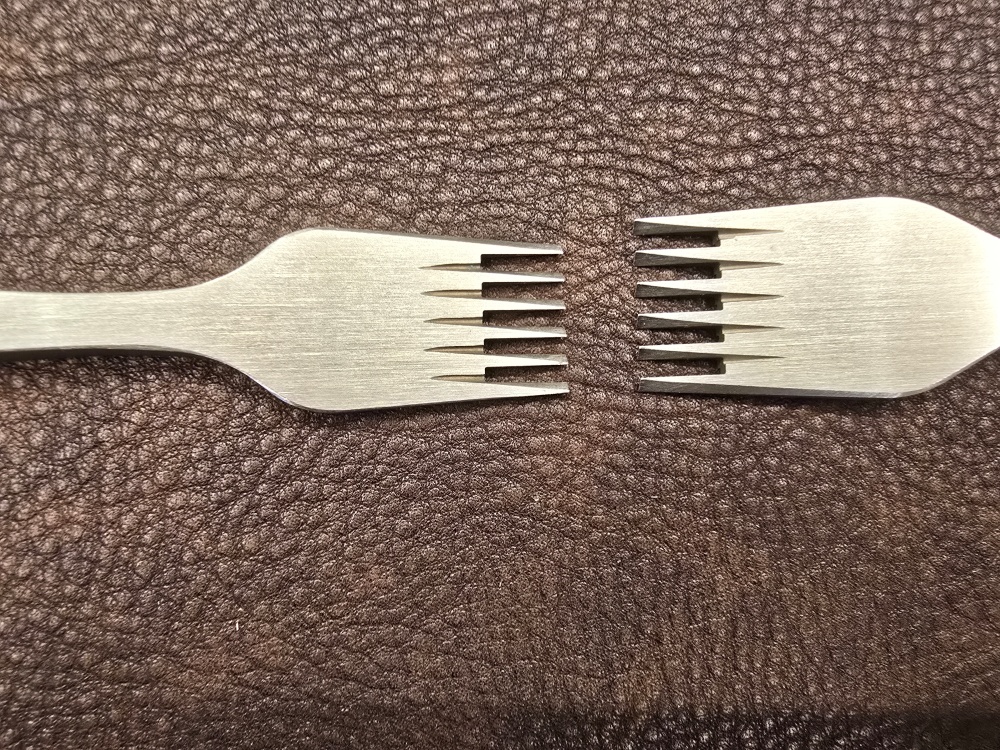
    날 간격이 다른 유럽형 치즐 7호와 9호

    The No. 7 European-style pricking iron used at Leather Studio YEGAK has 3.8 mm tooth spacing. The No. 9 pricking iron has 3.0 mm tooth spacing.

    Do not determine the spacing from the No. 7 or No. 9 designation alone. Numbering and actual tooth spacing can vary between manufacturers and products, so always check the stated spacing before purchasing a pricking iron.

    In our workshop, we mainly use two-tooth and seven-tooth pricking irons. A seven-tooth iron is used to punch relatively long straight sections at consistent intervals, while a two-tooth iron is used for curves and sections where the direction changes.

    For guidance on choosing thread thickness and punching spacing together, read [The Relationship Between Thread Thickness and Pricking-Iron Spacing: How Stitch Proportion Affects Quality]for more details.

    Align the Pricking Iron with the Left Side of the Divider Line

    디바이더 선의 왼쪽에 맞춘 치즐 날

    First, use a divider to mark the guideline for hand stitching. Before punching, position the teeth of the pricking iron along the left side of the divider line and check their placement.

    If the pricking iron is placed roughly in the center of the line or covers the line while punching, the hole positions may become inconsistent. The relationship between the teeth and the divider line must remain consistent from the first set of holes.

    When positioning the pricking iron, do not look only at the upper part of the handle. Check the actual position of the teeth where they touch the leather. Even if the handle appears to be aligned with the line, the hand-stitching holes will fall outside the line if the teeth extend beyond the divider mark.

    Hold the Pricking Iron at 90 Degrees from the Beginning

    가죽 표면에 90도로 세운 유럽형 치즐

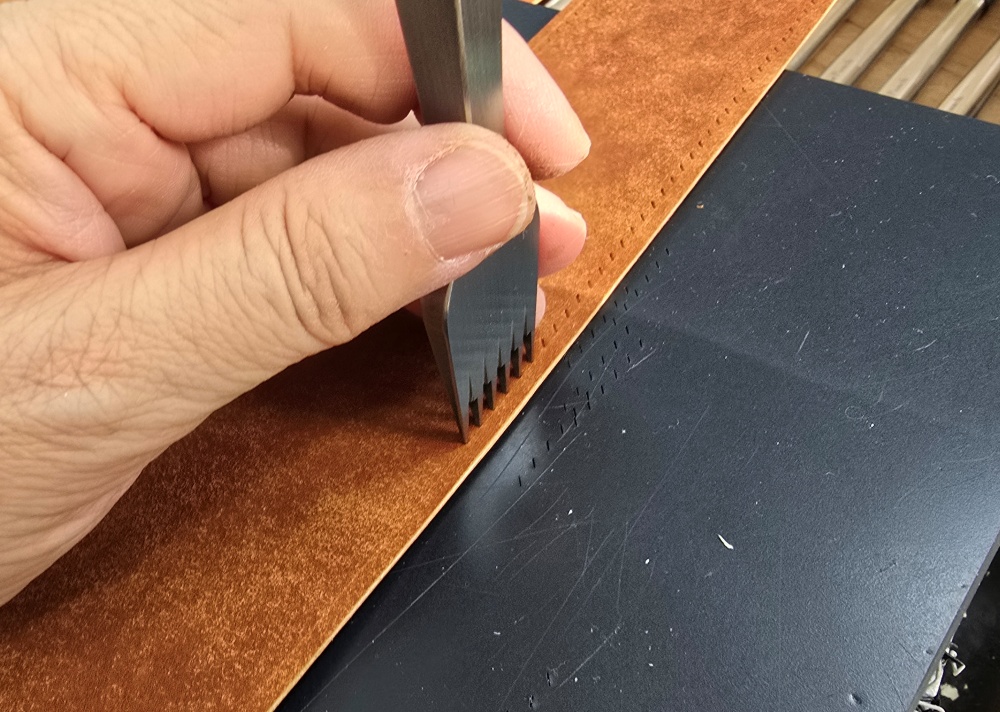
    The pricking iron must always be held at a 90-degree angle to the leather surface. It should remain vertical from front to back and from side to side so that the hole positions remain consistent on both the front and back of the leather.

    If the pricking iron is tilted inward or outward while punching, the hole positions on the front and back of the leather may not match. On thick leather or sections made from several glued layers, even a slight tilt can create a larger positional difference on the back.

    A common beginner mistake is to tilt the pricking iron outward to align it with the divider line and then straighten it to 90 degrees immediately before punching.

    At first, the teeth may appear to be aligned with the line. However, as the tilted pricking iron is straightened, the teeth move outward. As a result, they cross the divider line and create the hand-stitching holes farther outward than intended.

    The pricking iron should therefore be held at 90 degrees first. While maintaining that angle, align its teeth with the left side of the divider line. Do not align the position first and then change the angle.

    Use a Seven-Tooth Pricking Iron for Consistent Straight Sections

    7날 유럽형 치즐로 직선을 타공하는 과정

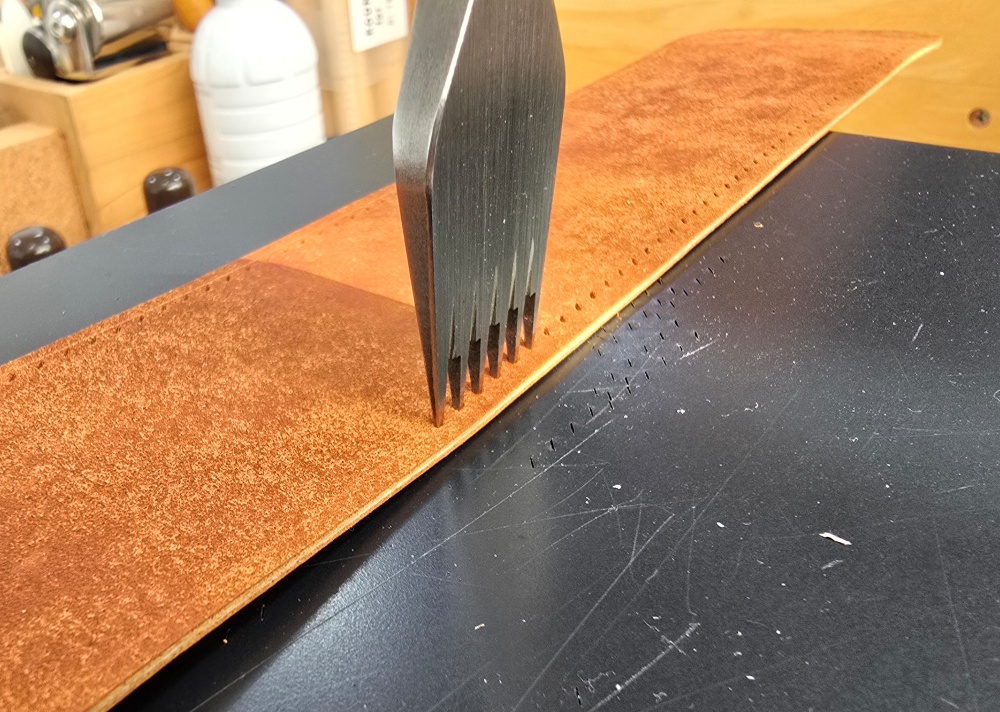
    On relatively long straight sections, a seven-tooth pricking iron creates several evenly spaced holes at once.

    When punching, hold the pricking iron at 90 degrees and align it with the left side of the divider line before striking. After punching and moving to the next position, maintain the same angle and alignment standard.

    Even on a long straight section, do not rush through the punching. Check that the pricking iron remains vertical each time. If your hand or body position becomes uncomfortable, do not continue with the tool tilted. Reposition the workpiece and restore the 90-degree angle before continuing.

    Follow Curves with a Two-Tooth Pricking Iron and Rotate the Workpiece

    2날 치즐과 작업물의 회전으로 곡선을 타공하는 과정

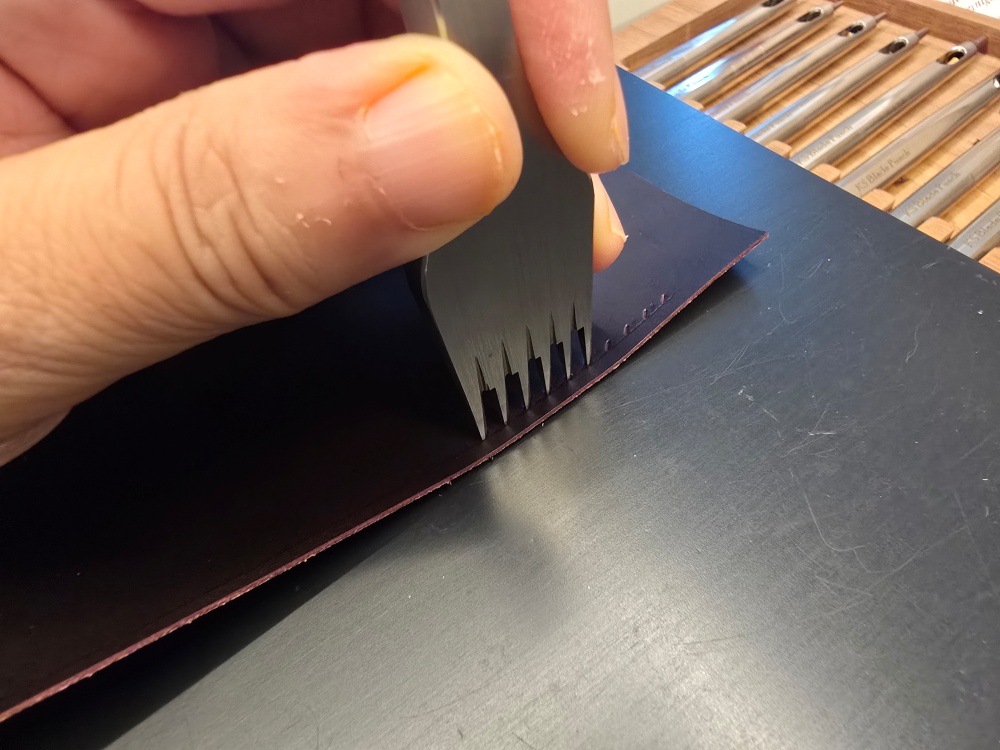
    For a curve, punch once at a time with a two-tooth pricking iron and rotate the workpiece gradually to follow the direction of the divider line.

    Do not tilt the pricking iron sideways or twist your wrist to follow the curve. Keep the tool at 90 degrees and rotate the workpiece to maintain the correct relationship between the teeth and the divider line.

    The tighter the curve, the less you should try to change direction in a single movement. Punch once with the two-tooth iron, rotate the workpiece slightly, and then punch again.

    The teeth must remain aligned with the left side of the divider line throughout this process. Even as the workpiece rotates, the vertical angle and alignment position must remain consistent so that the holes follow the curve naturally.

    Overly Sharp Teeth Can Tear the Ends of the Holes

    정상적인 타공 구멍과 양 끝이 찢어진 구멍 비교

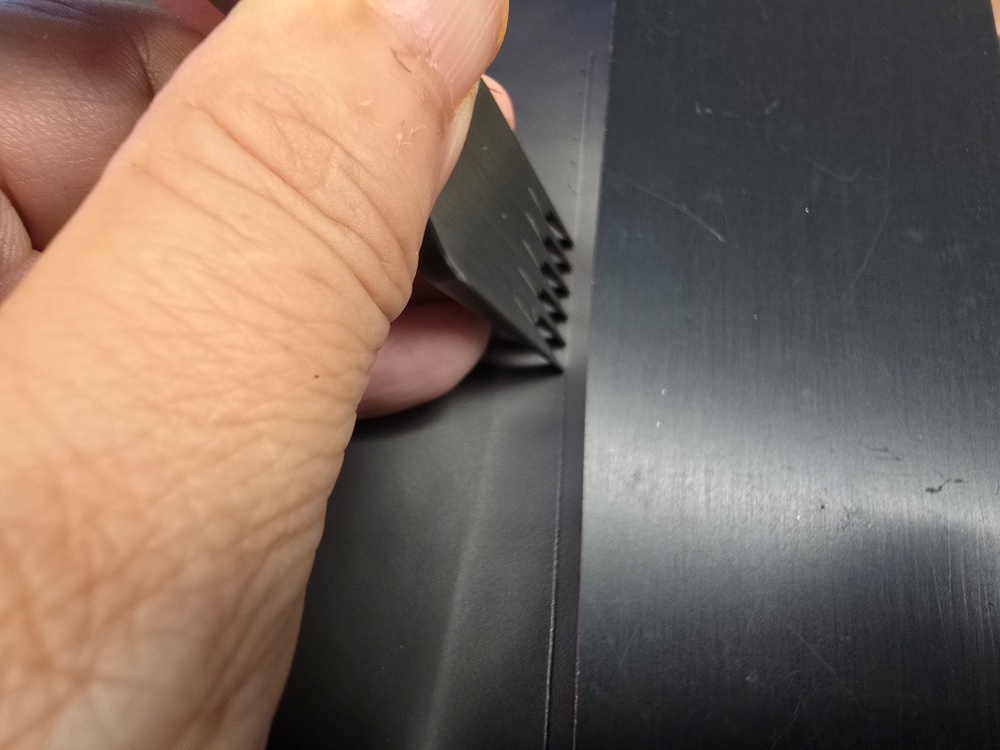
    A pricking iron should pass cleanly through the leather, but excessively sharp teeth are not always better.

    If the teeth are too sharp, the beginning and end of each punched hole can split and tear sharply. If the hole extends farther than necessary or develops small tears at both ends, the marks may remain clearly visible even after hand stitching.

    Thin or soft leather can be especially vulnerable to overly sharp teeth. Before using a new or recently sharpened pricking iron on a finished piece, test it on a scrap of the same leather.

    During the test, check whether the pricking iron passes through the leather without excessive force, whether the beginning and end of each hole remain clean, and whether the holes spread more than necessary when the thread is tightened.

    The teeth should not simply be sharpened as much as possible. They should be maintained so that they pass cleanly through the leather without tearing either end of the holes.

    What to Check When Choosing a European-Style Pricking Iron

    When choosing a European-style pricking iron, check the actual tooth spacing rather than relying only on the tool number. The tools used in our workshop have 3.8 mm spacing for No. 7 and 3.0 mm spacing for No. 9, but products from other manufacturers may use different spacing for the same numbers.

    For punching both straight lines and curves, it is best to prepare matching two-tooth and seven-tooth pricking irons with the same spacing and tooth shape. If their spacing or tooth shapes differ, the holes may change in appearance where straight and curved sections meet.

    Check that the teeth are arranged evenly in a straight line and that each tooth has a consistent length and shape. When the handle is held upright, the teeth should also stand securely perpendicular to the leather surface.

    Dull teeth require greater force and may compress or deform the leather. On the other hand, overly sharp teeth may tear the beginning and end of the holes. Judge the condition of the tool by testing it on scrap leather.

    Common Mistakes Made by Beginners

    치즐을 기울려 맞추는 잘못된 모습
    기울어진 치즐을 세울 때 타공 위치가 이동하는 모습

    The first mistake is aligning the pricking iron with the divider line while the tool is tilted. When the tilted tool is later straightened to 90 degrees, its teeth can move across the divider line.

    The second mistake is positioning the tool by looking only at its handle. The true reference is the relationship between the teeth touching the leather and the divider line.

    The third mistake is using the same number of teeth for both straight lines and curves. Curves should be punched one step at a time with a two-tooth pricking iron while the workpiece is rotated to follow the line steadily.

    The fourth mistake is tilting the pricking iron sideways to follow a curve. Keep the tool at 90 degrees and rotate the workpiece instead.

    The fifth mistake is using a new pricking iron directly on the finished piece without testing it. Because excessively sharp teeth can tear the beginning and end of the holes, test the tool first on a scrap of the same leather.

    How to Maintain and Store Pricking Irons

    청소 후 안전하게 보관한 유럽형 치즐

    After use, remove leather dust and debris from between the teeth. Leather fragments trapped between the teeth can affect the shape and depth of the next set of holes.

    Store pricking irons in a dry place to prevent rust. When they are not in use, protect the teeth with a cover so they do not strike other tools.

    Dropping a pricking iron can bend the tips or damage individual teeth. Misaligned teeth are difficult to position accurately against a divider line, so check that all the teeth remain evenly aligned before use.

    Do not sharpen the teeth excessively simply because the tool does not cut easily. After any maintenance, test the pricking iron on scrap leather and confirm that the beginning and end of the holes do not tear.

    Accurate Punching Requires Both Correct Position and Angle

    Using a European-style pricking iron accurately requires more than selecting the tooth spacing and number of teeth. Hold the tool at 90 degrees from the beginning, then align its teeth with the left side of the divider line while maintaining that angle.

    Use a seven-tooth pricking iron to maintain consistent spacing along straight sections. For curves, punch one step at a time with a two-tooth iron while rotating the workpiece to follow the line. Keep the pricking iron vertical instead of tilting it along the curve.

    The condition of the teeth must also be checked. Teeth that are too dull can compress and deform the leather, while teeth that are too sharp can tear the beginning and end of the punched holes.

    An accurate hand-stitching line is not created only after hand stitching begins. It is already determined when the pricking iron is aligned precisely with the divider line and used at a 90-degree angle.